Today we are going to test the Mini 3d scanner from Revopoint.
Unboxing
In the first box, with the Pop Mini, there is a phone holder, an extendable tripod, a calibration card, a USB-A to USB-C adapter, a cable to connect the scanner via USB-A, a cable to connect the scanner to a USB-C phone with a USB-A for the external power supply, pads to help with the scan, the test bust and finally the Pop Mini 3d scanner itself, which already seems to be very well made and resistant.
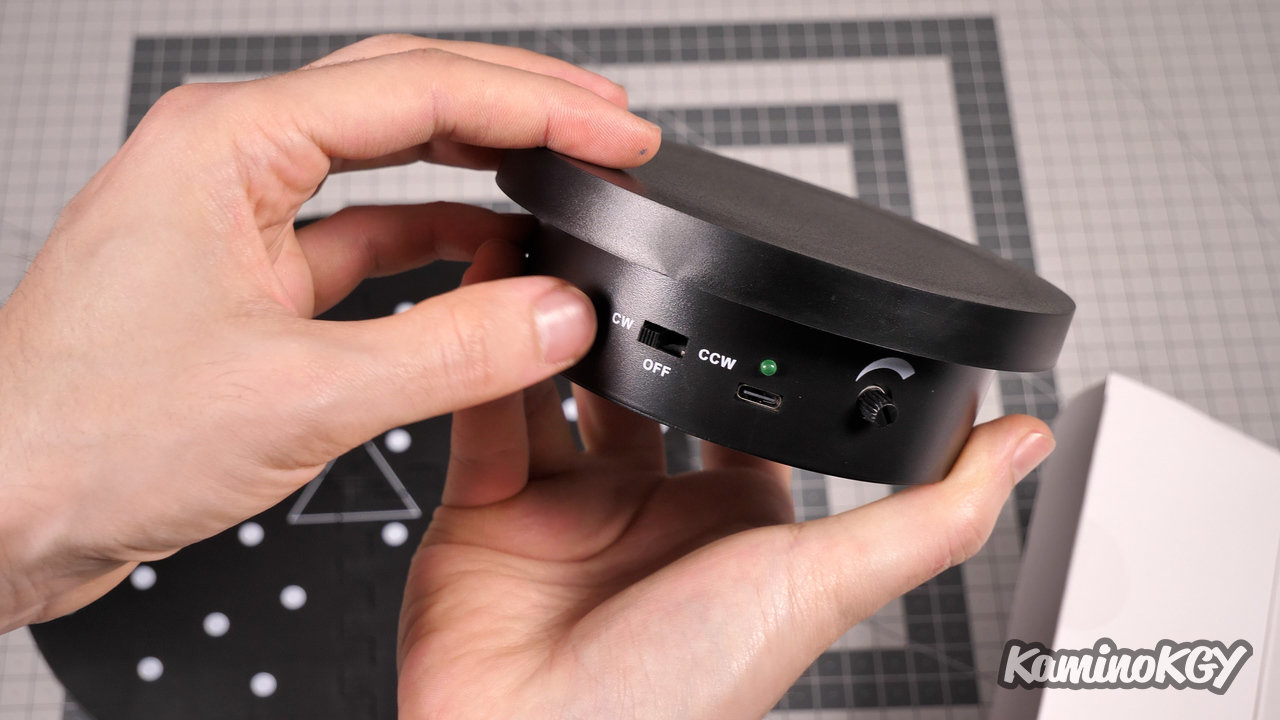
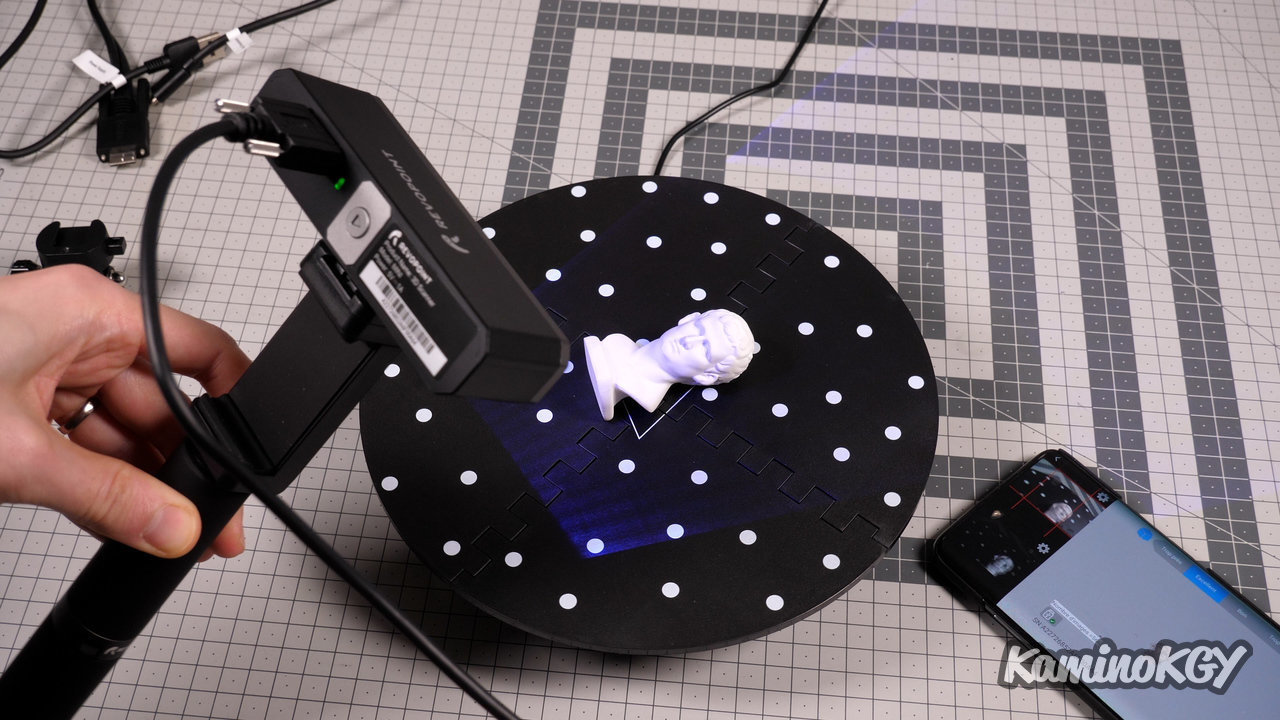
In the second box, with the “Potable” turntable, which you should be able to drink right away. We have the 4 dials of the disc to assemble by sliding the parts 2 by 2, then the whole. Then, it is the mechanism that rotates where you can choose the direction and speed of rotation. There is a flexible self-adhesive part, which sticks really well. And all powered by a USB-C port too.
Features
Regarding the characteristics, the Pop Mini is rather made for small objects between a cube of 1 cm side to a cube of 50 cm side. The resolution is 0.02 mm maximum.
Assembly
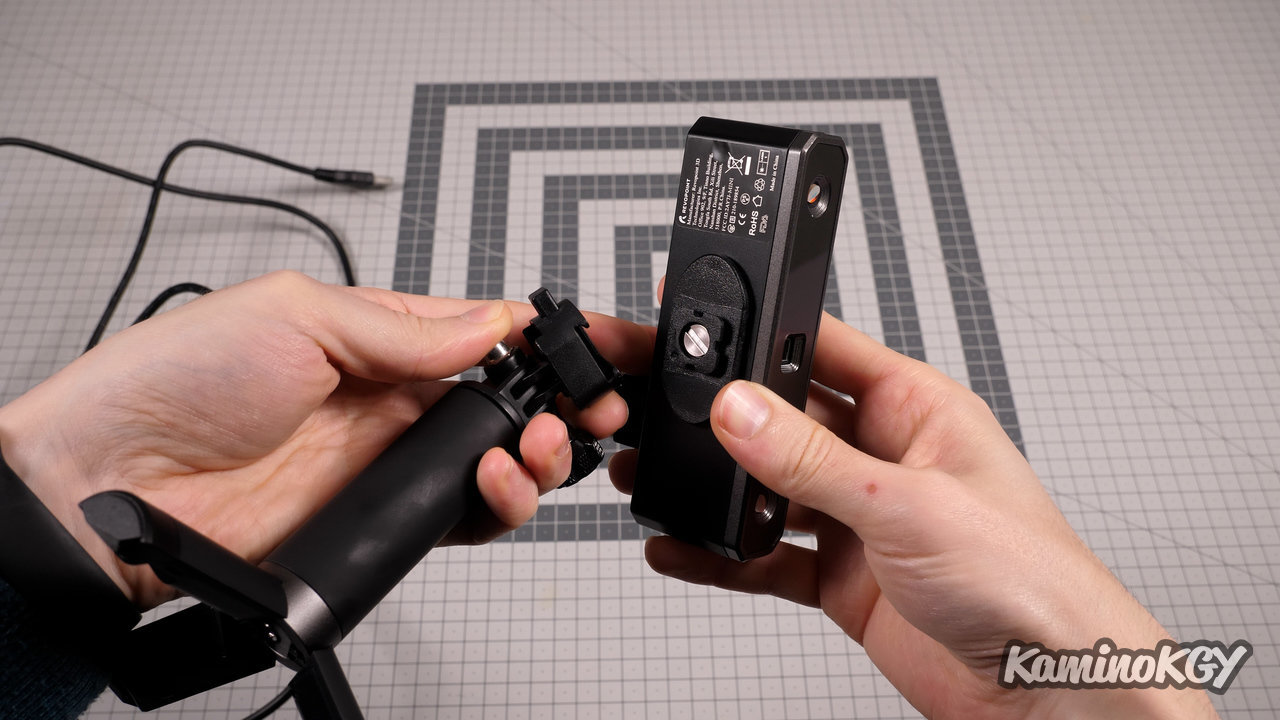
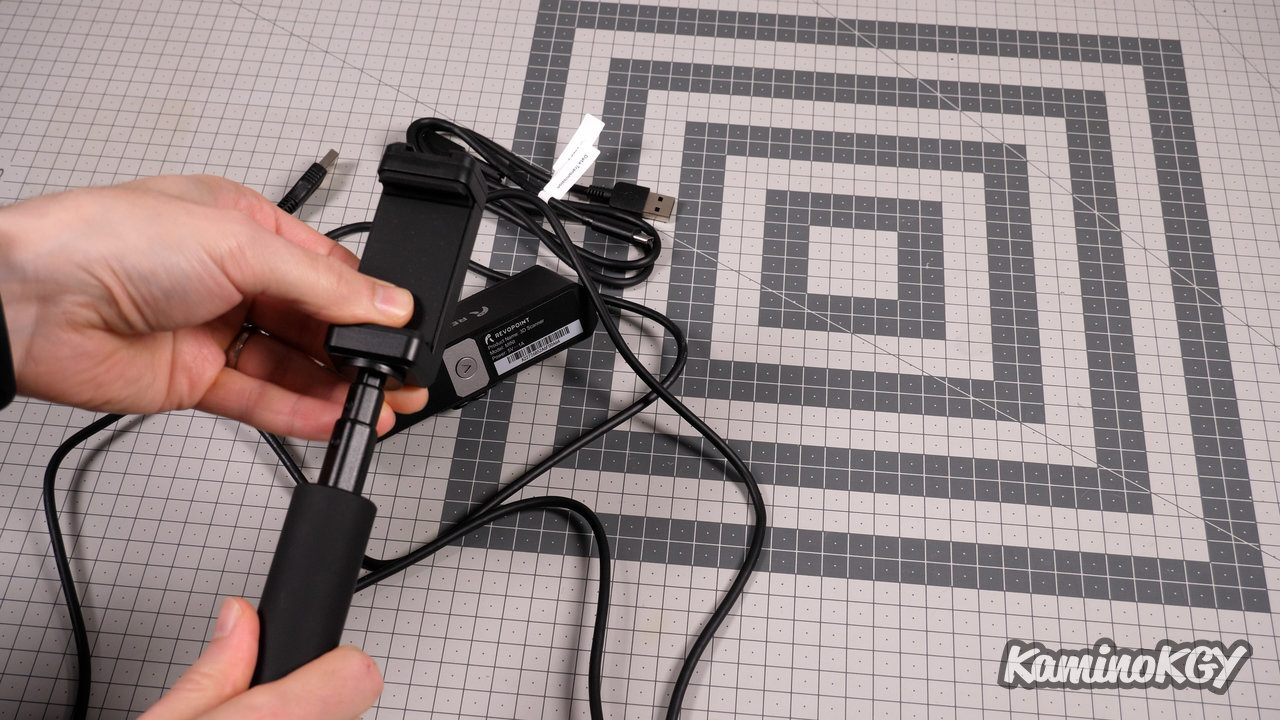
The scanner slides on the tripod which is extendable. You can deploy the feet and lengthen them by pulling on them, the head is vertically adjustable and allows good freedom of movement.
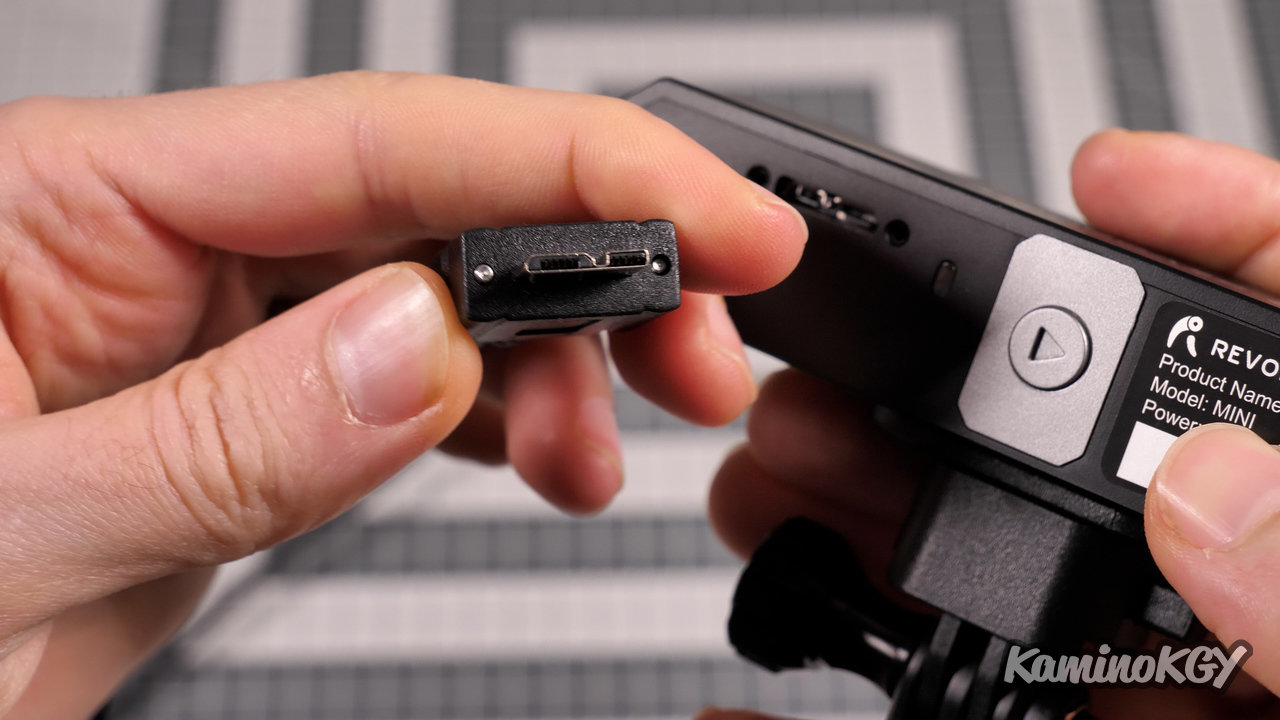
The scanner is connected via a Micro-B plug which screws to avoid false contacts and loss of connection, especially when you want to use it by moving your hand around an object, it's very practical.
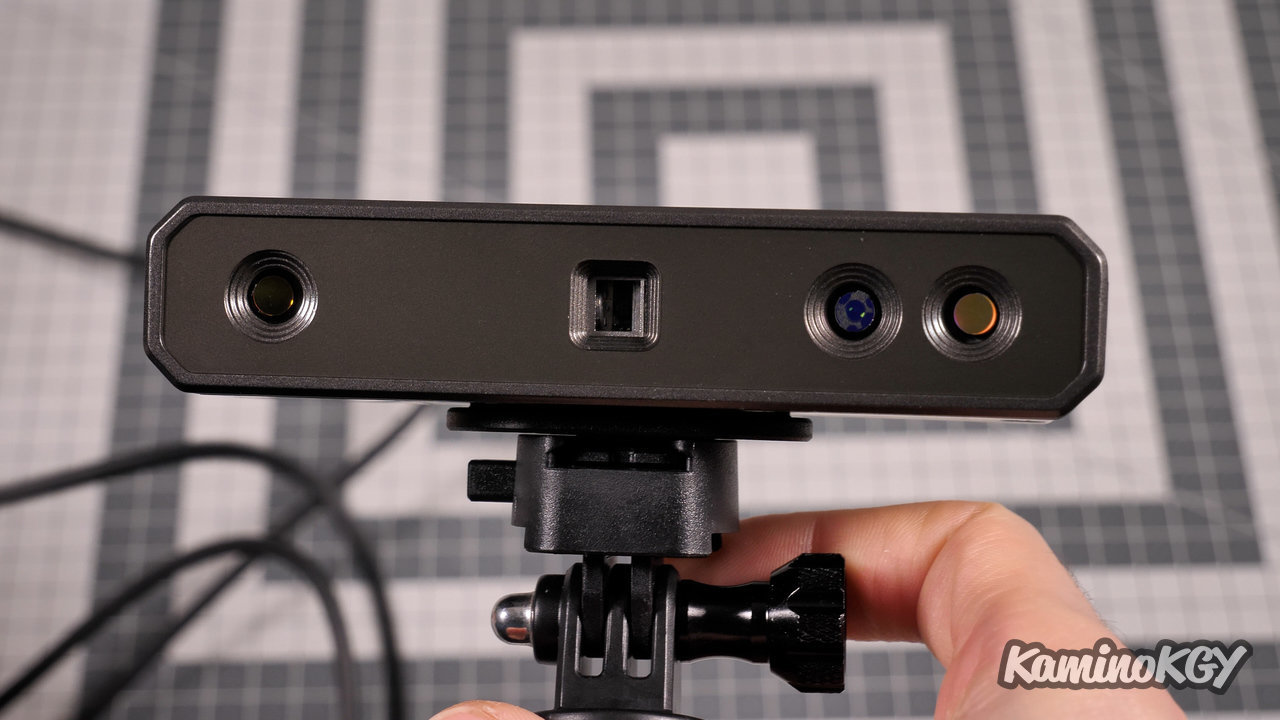
On the bottom, there is a tripod-type screw thread to be able to mount the scanner wherever you want. On the front, we find the sensors, the projector and a camera for the texture of the objects.
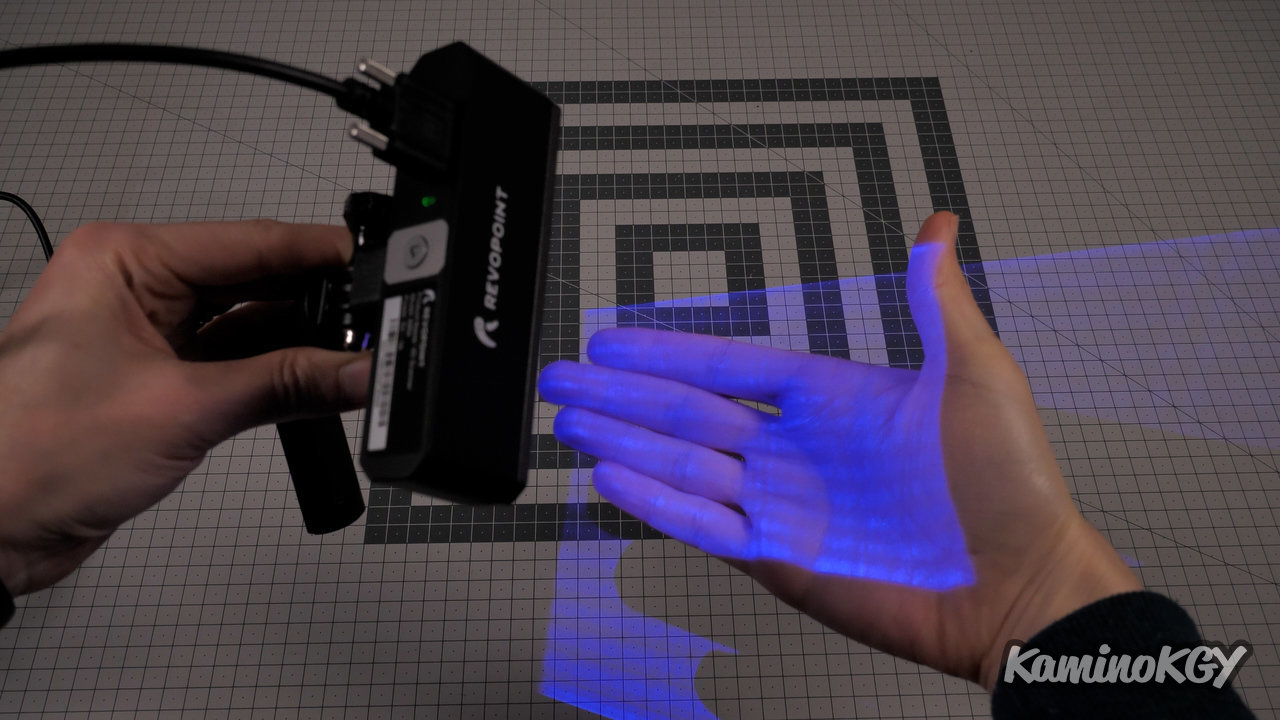
The blue beam of light projects like lines to distinguish the shapes without doubt at their deformation.
Usable via USB on Windows and Mac, via Wifi on Windows and Mac, via USB on Android, via Wifi on Android and via Wifi on iOS.
Process on PC
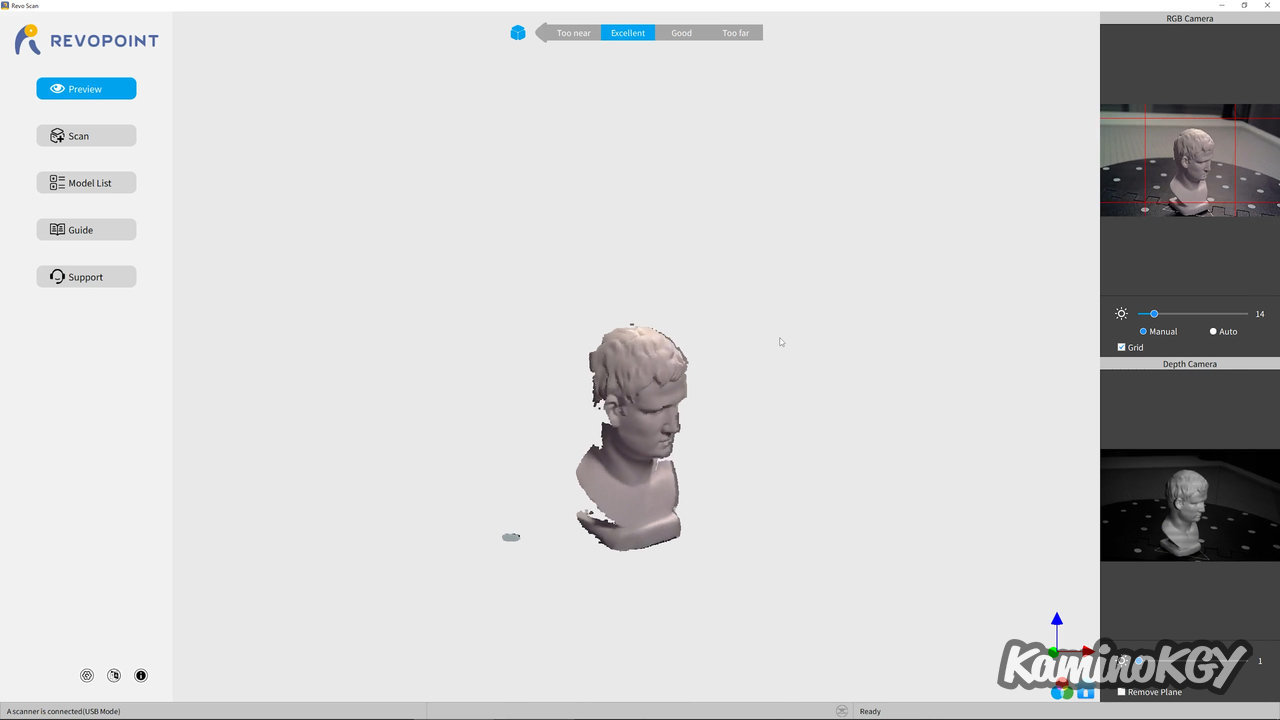
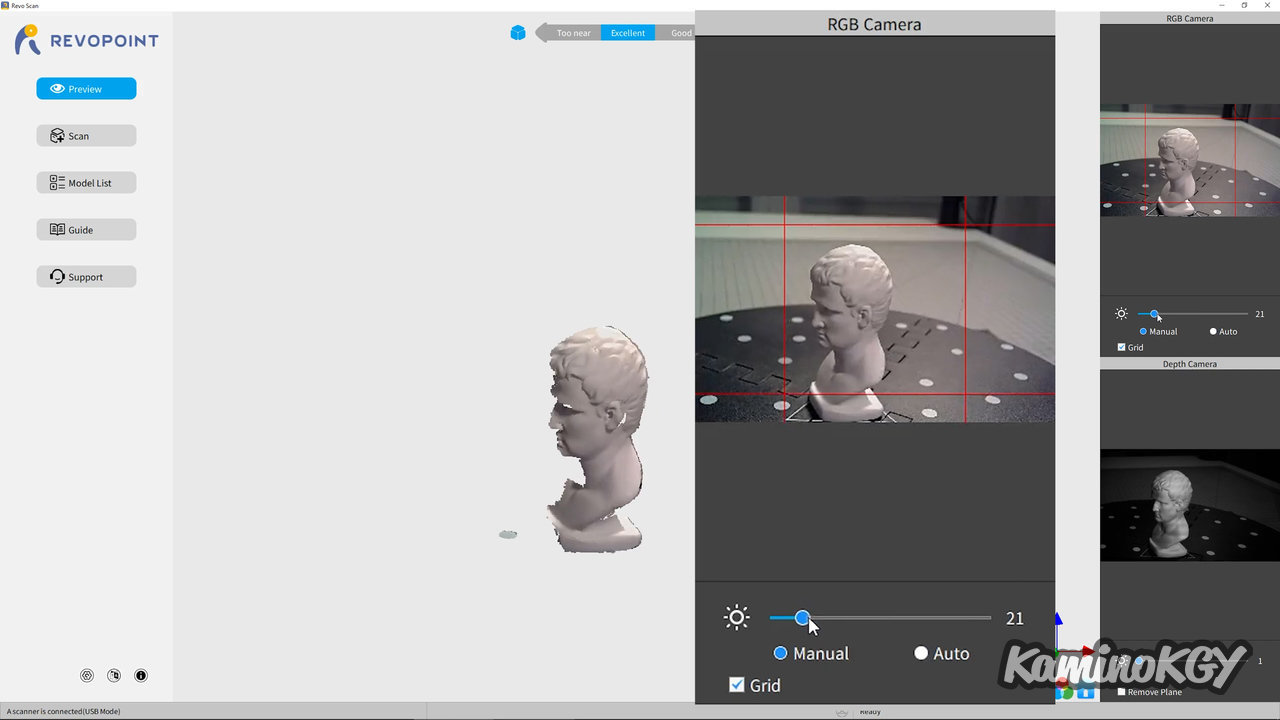
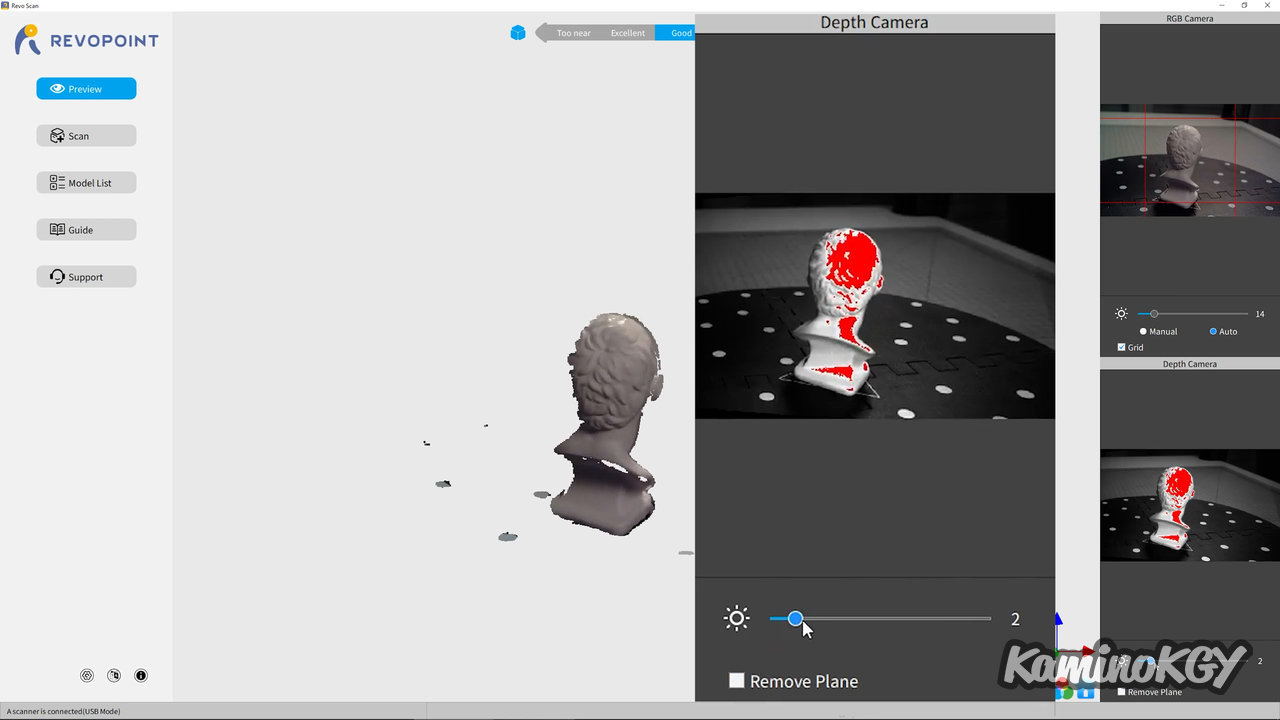
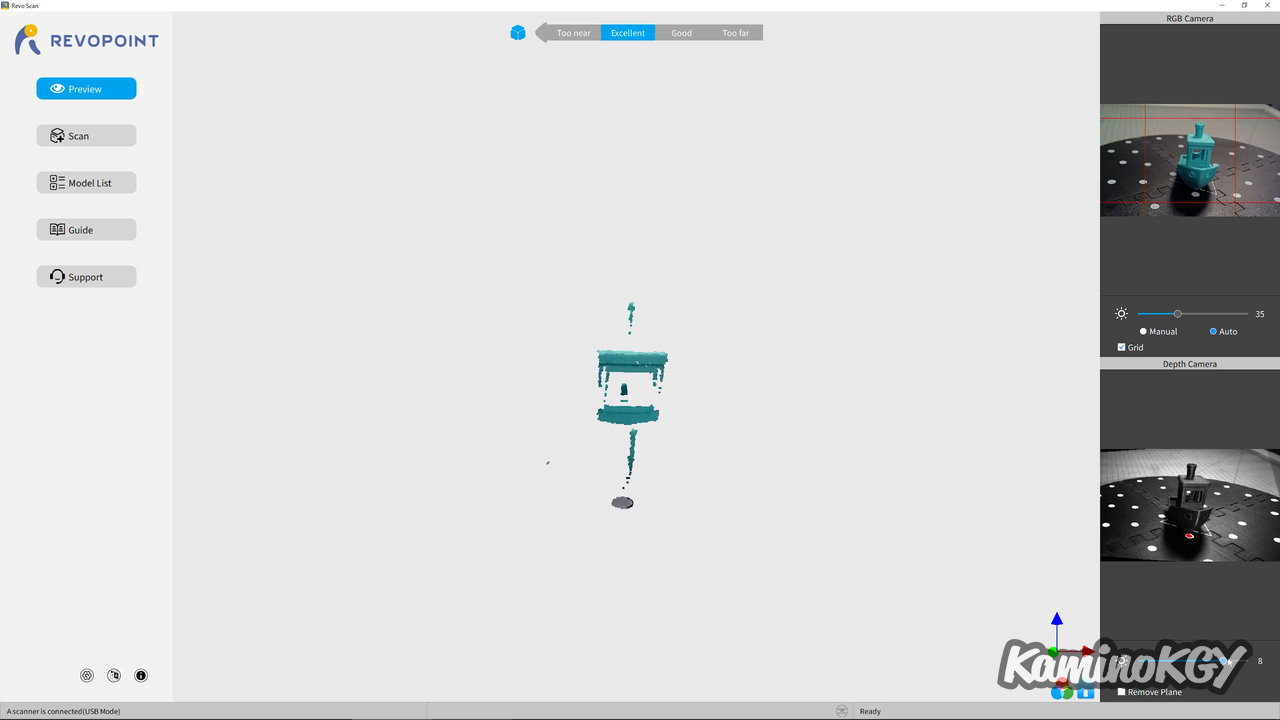
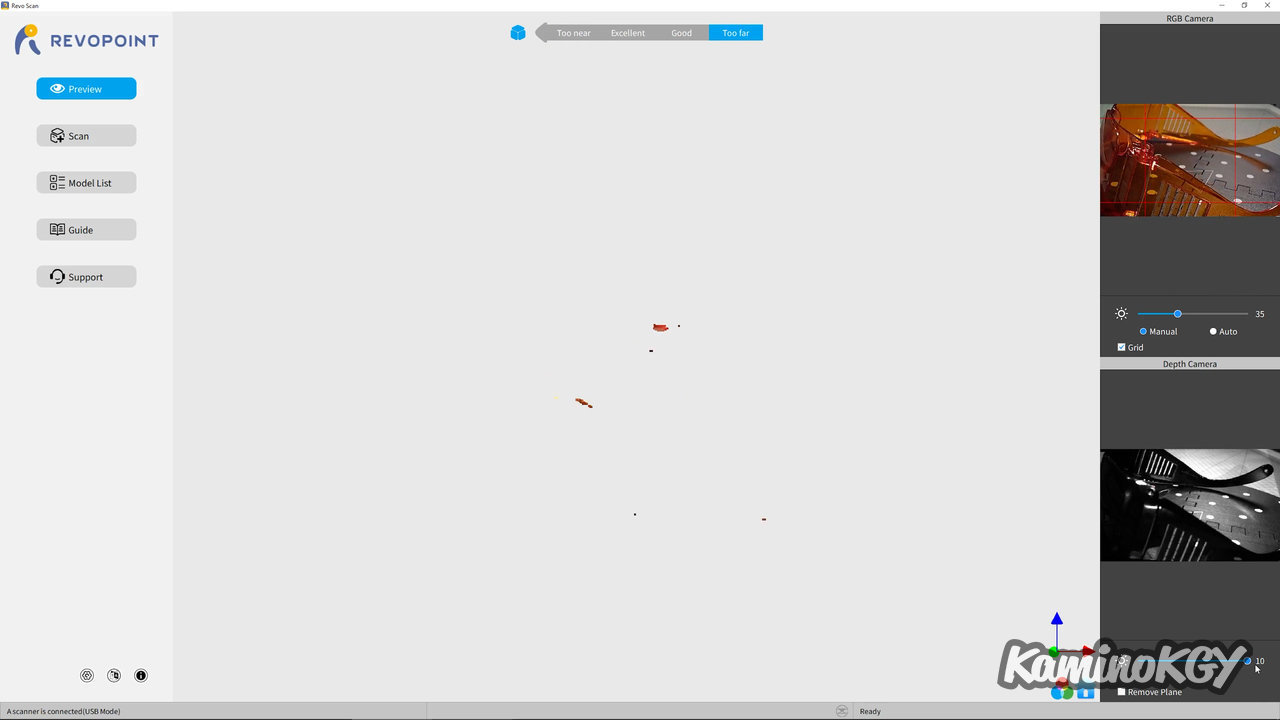
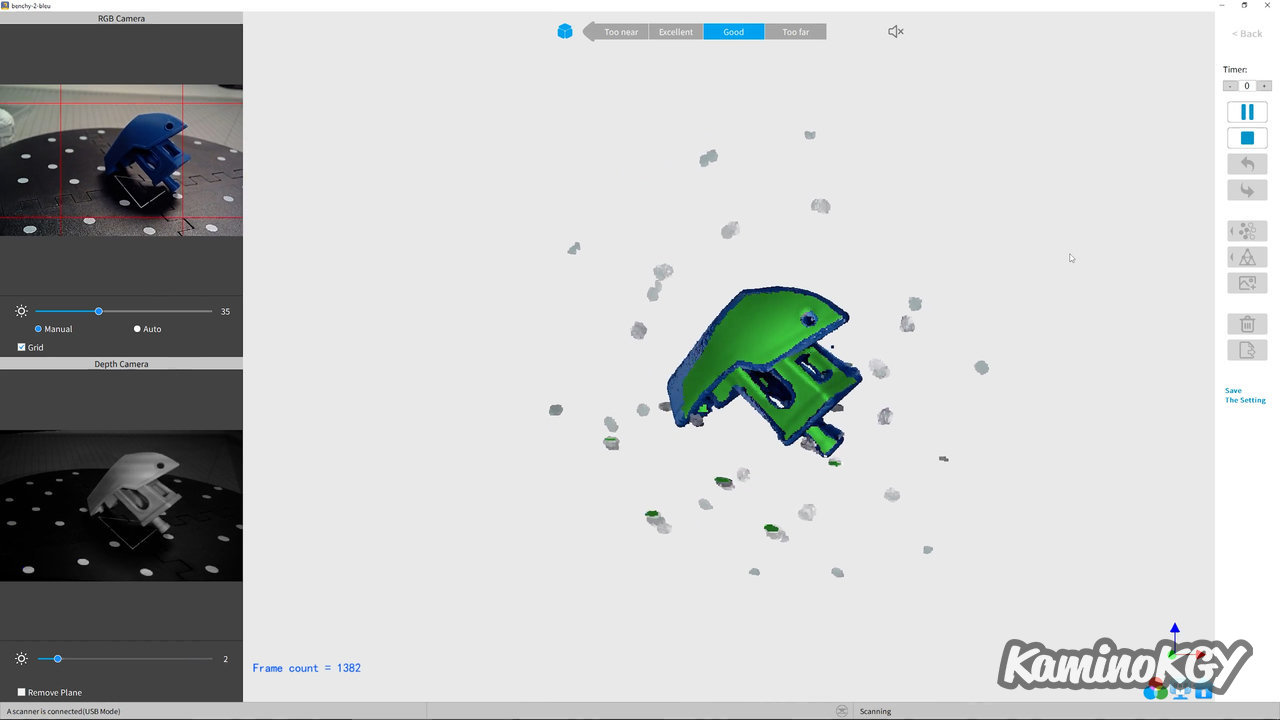
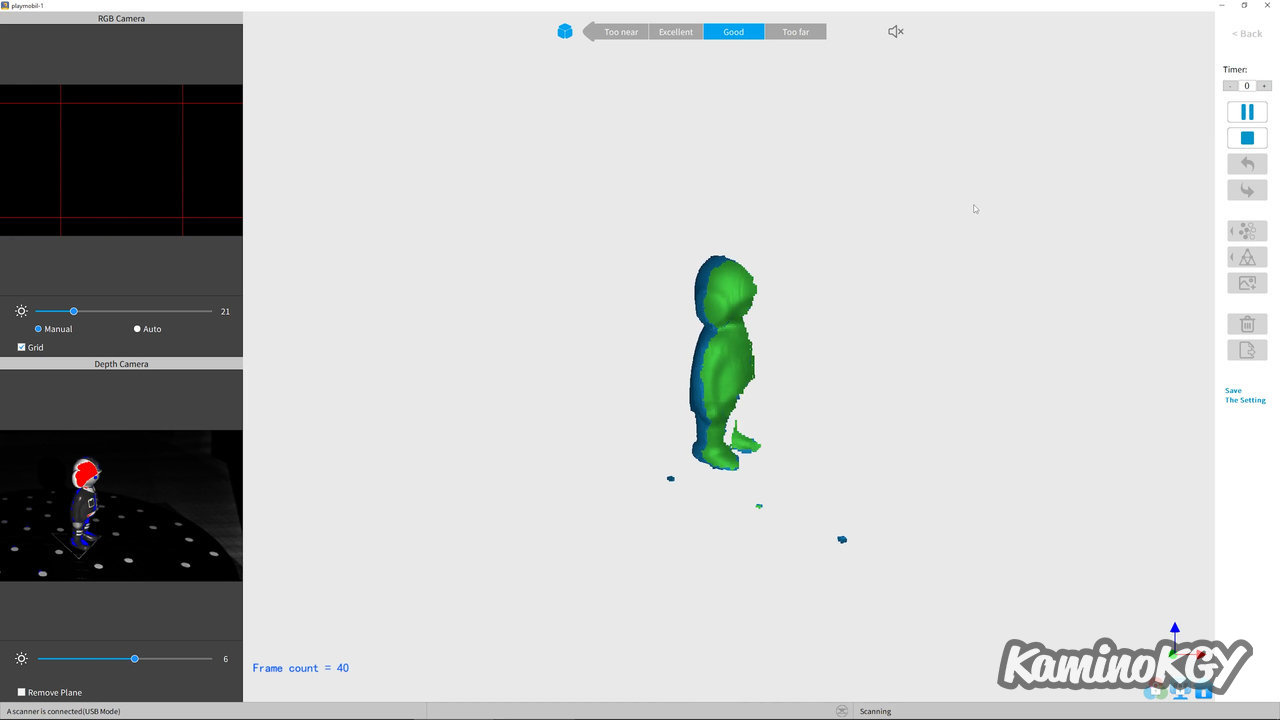
In terms of software and scanning process with the Revoscan PC application. We start with the Preview view which allows you to test the settings. We check the framing of the scanner. At the top right, you can adjust the brightness of the RGB camera which will be used for the texture in manual or auto. At the bottom right, we adjust the power of the blue projector, knowing that we must increase its power when areas are blue and reduce it when areas are red like there. In the menu, we have the view here, Preview, Scan, the list of models created, a guide and a contact.

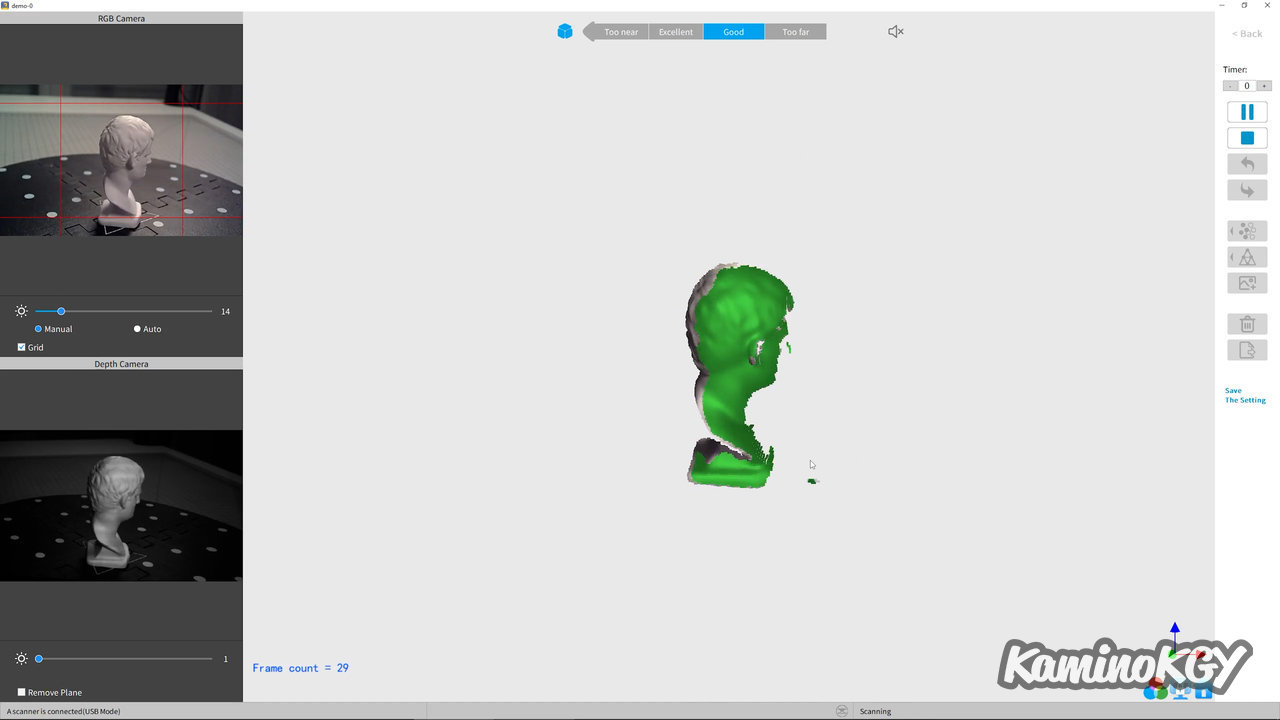
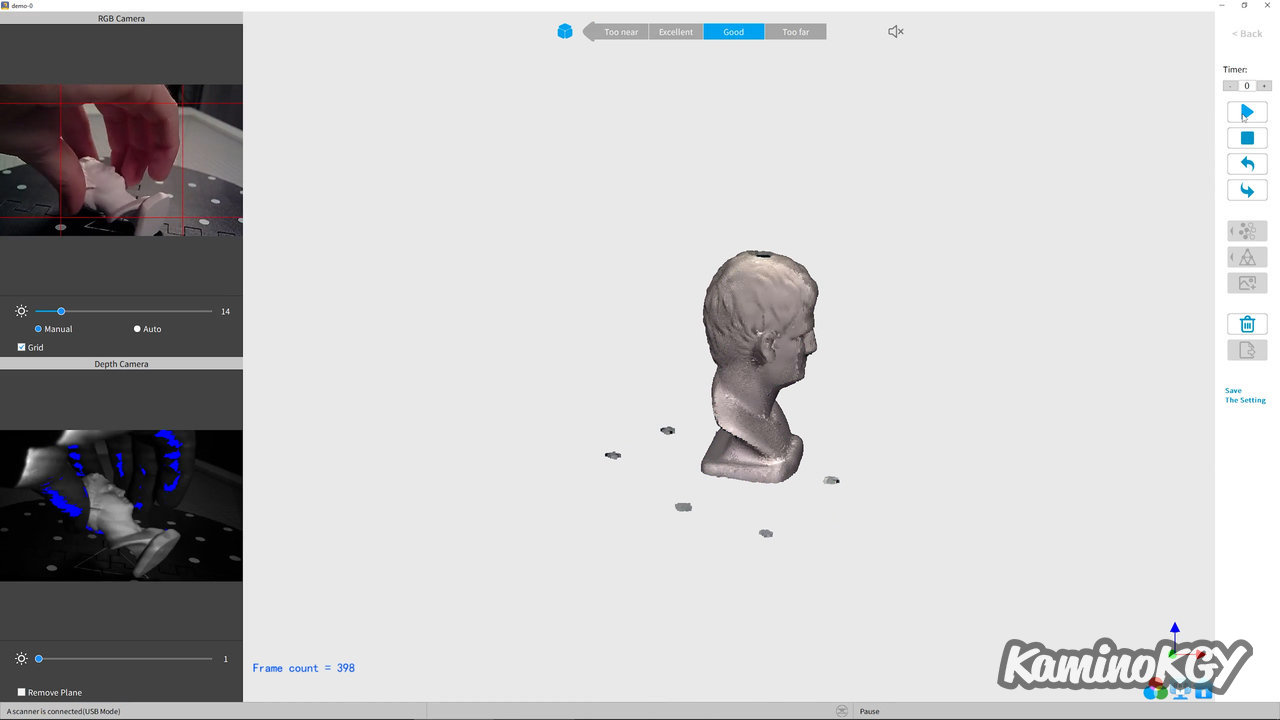
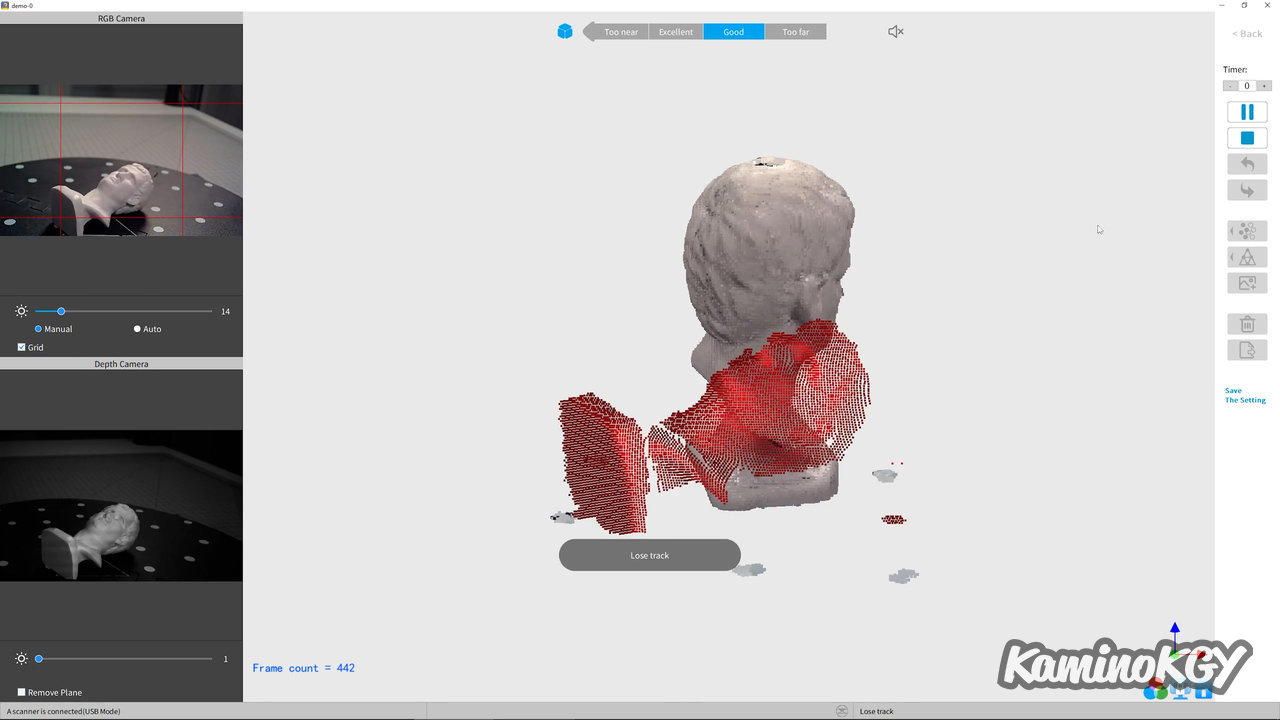
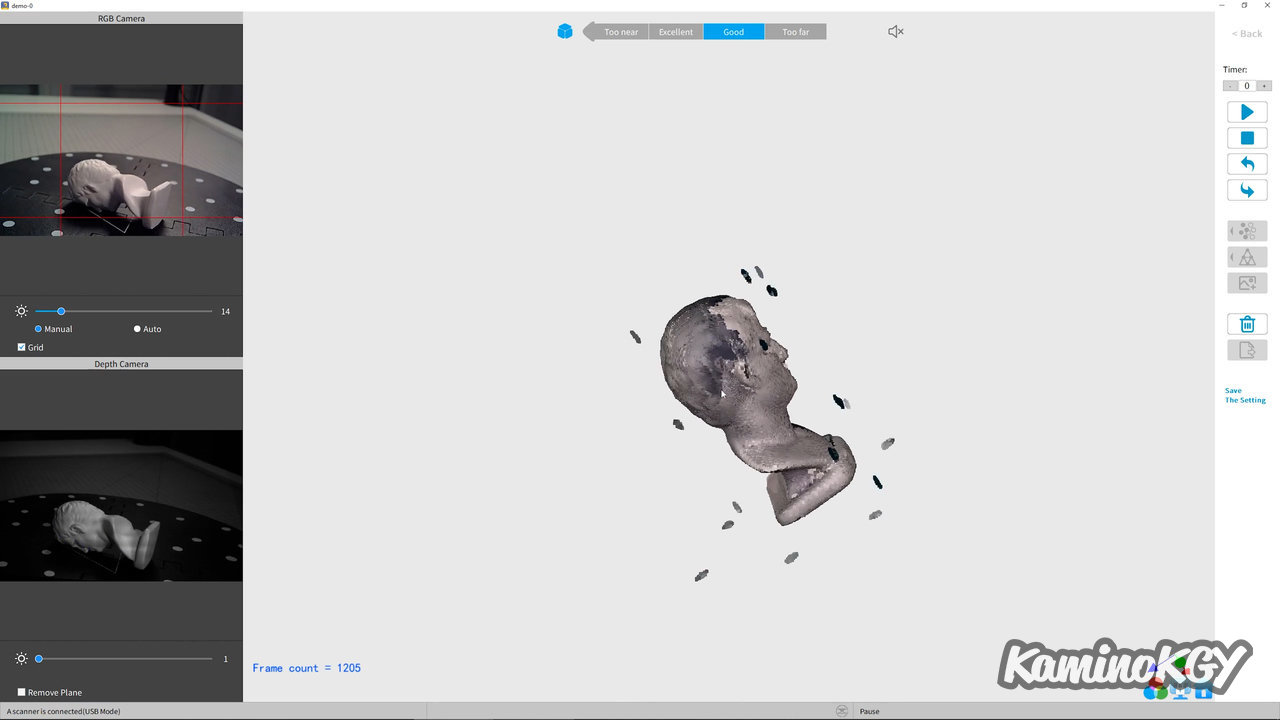
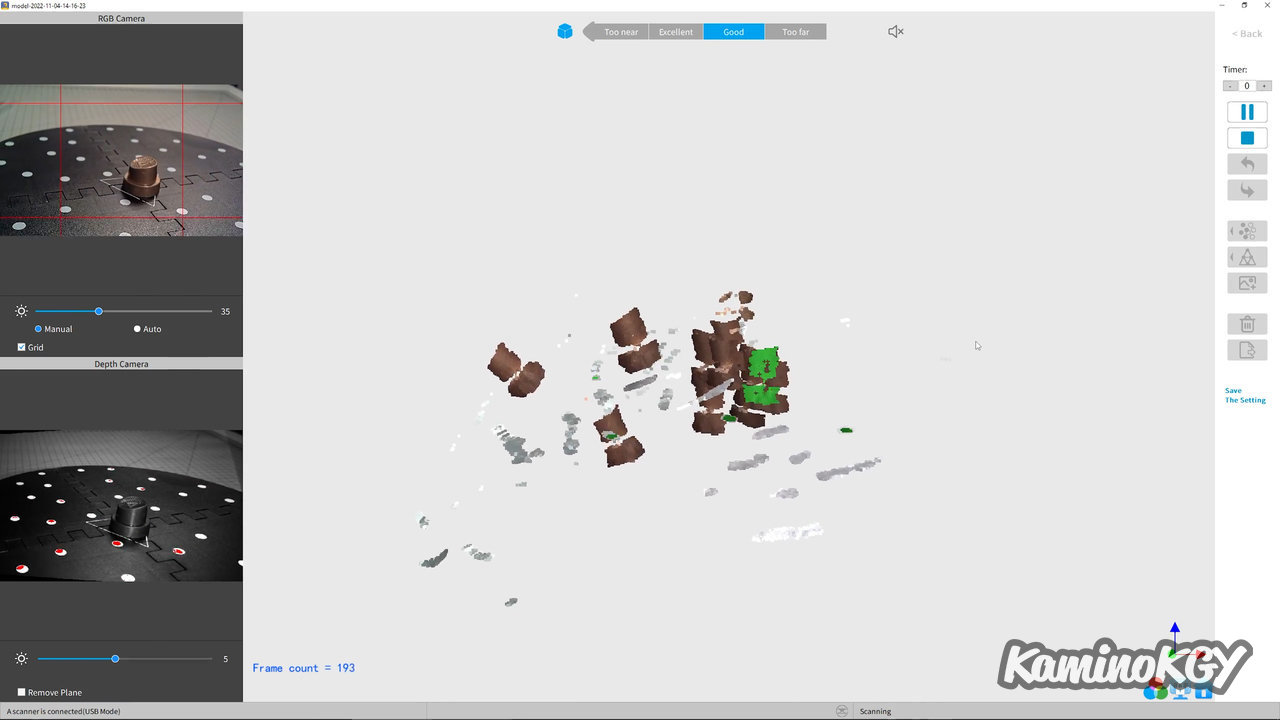
Once the framing and the distance have been validated, on the ruler at the top, you can see the points with the texture measured in Live. Then, we click on the Play button to start the scan. The green zone corresponds to what we scan, if it is red, it is probably that he no longer knows where he is. We take a break when we have done the trick. We change the orientation of the model, then we restart with the Play button. We see that he has lost tracking here, but we can Pause, and cancel the last points and redo Play so that it starts again. You can do this several times until you have covered all the surfaces of the model and avoid any holes.
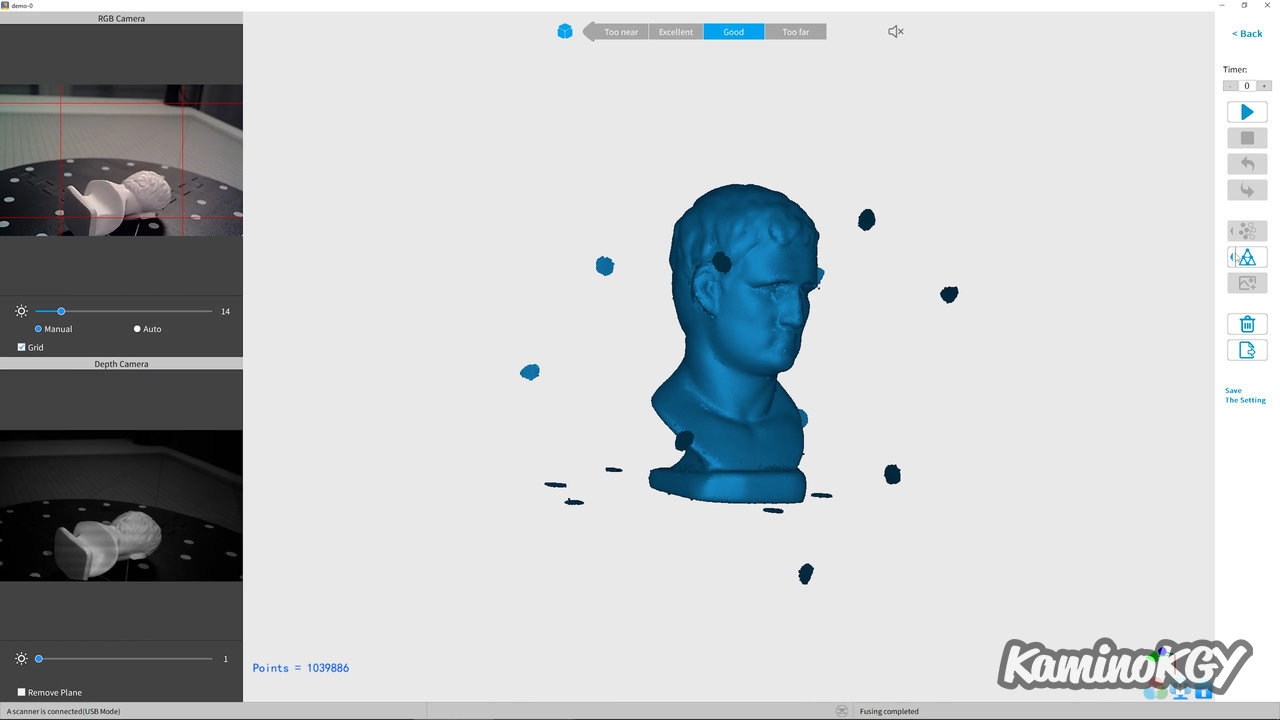
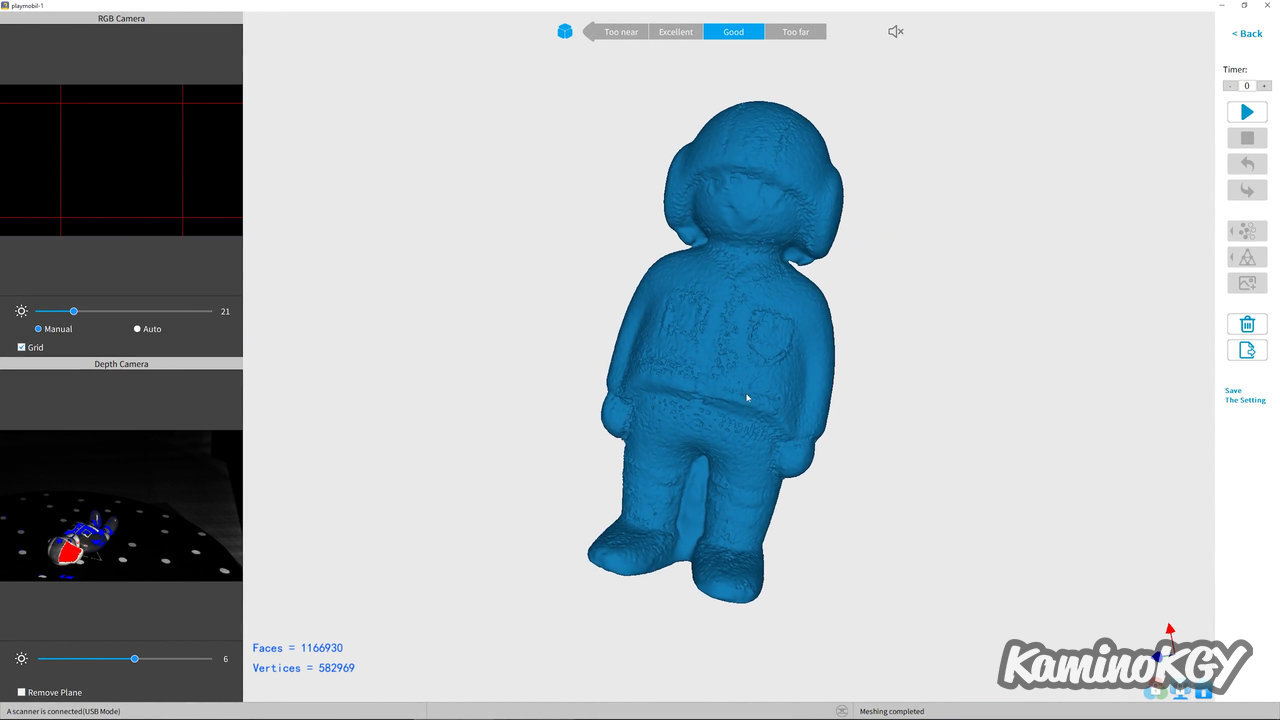
Once we have validated that we have covered the whole model, we do Stop and “Complete”. From there, we will merge and clean the cloud of points obtained. Once that's done, we generate the faces of the model.
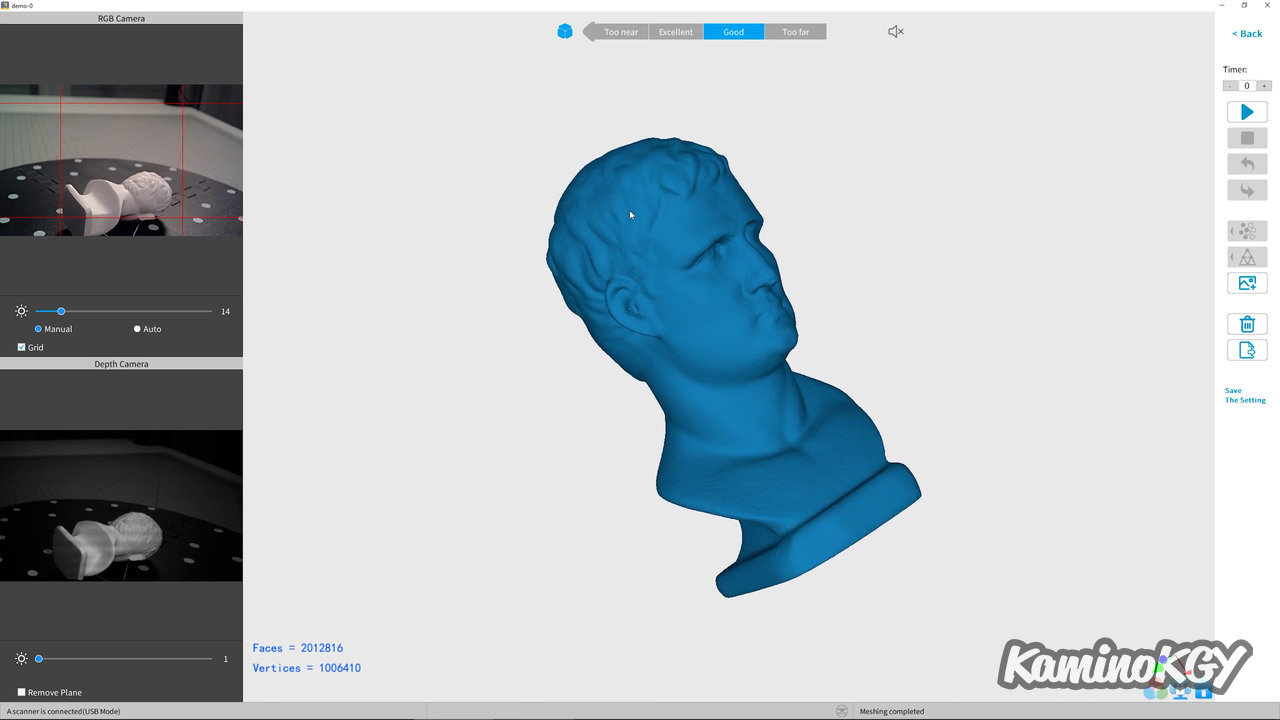

The final model obtained is really clean, with the basic texture, it looks good. From there, we can still do the mapping between the model and the texture, but as we can see, I find that the result is often less good.
Finally, we can export the model in PLY, OBJ or STL.
Process on Mobile
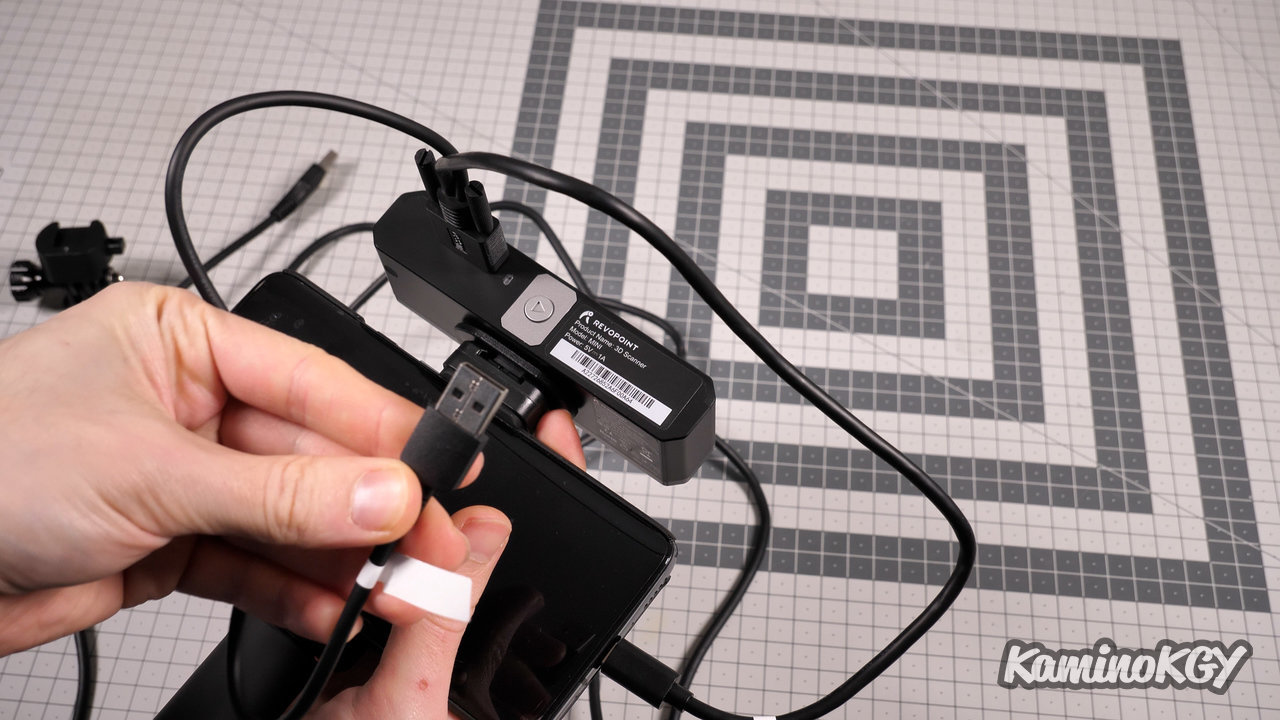
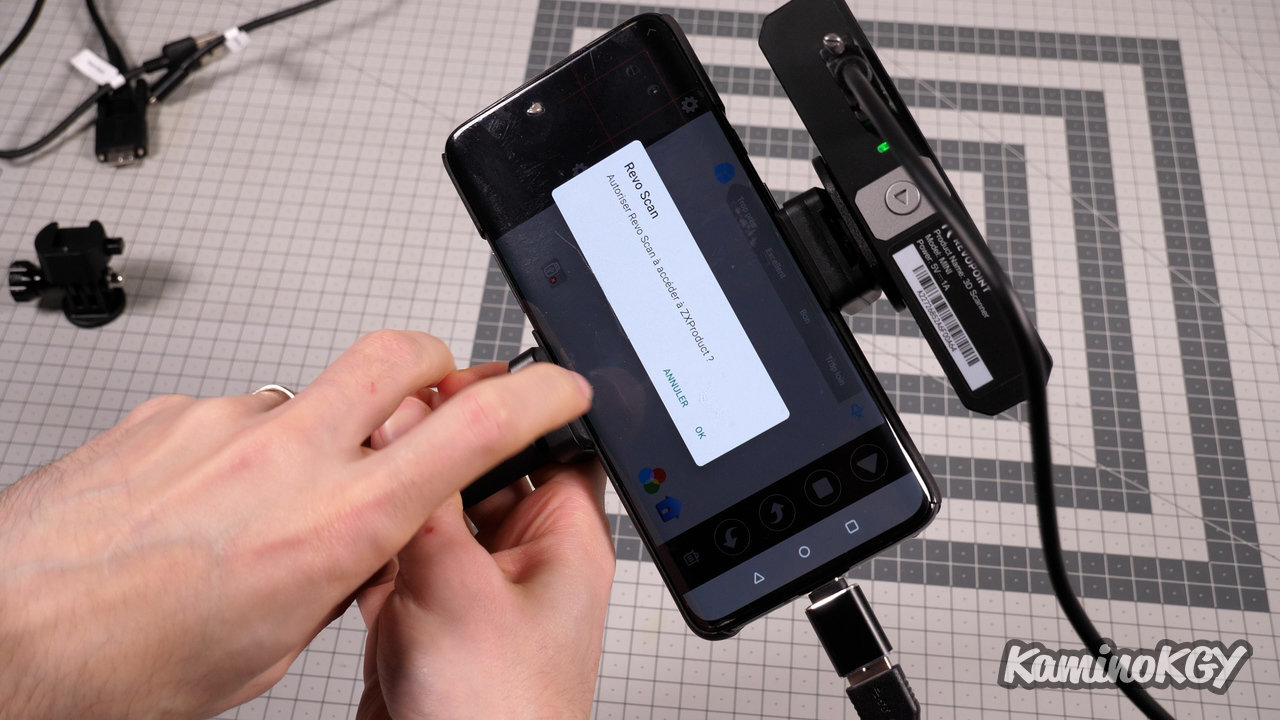
If you want to use the scanner directly on a mobile, you replace the hinge with the phone holder on the tripod, you slide the scanner and the phone that you just connect via USB-C or Wifi for an Android or Wifi only for iOS. The second USB-A port allowing the scanner to be powered externally so as not to use the phone battery.
Once the application has been launched, you authorize access to the device connected via USB and you can start testing the settings. The panda appears here right away.
Personally, I use the PC cable with the USB-A to USB-C adapter to only have one longer wire. You can then put the phone aside and scan. You can zoom in on the model and the result is really clean with the test model.
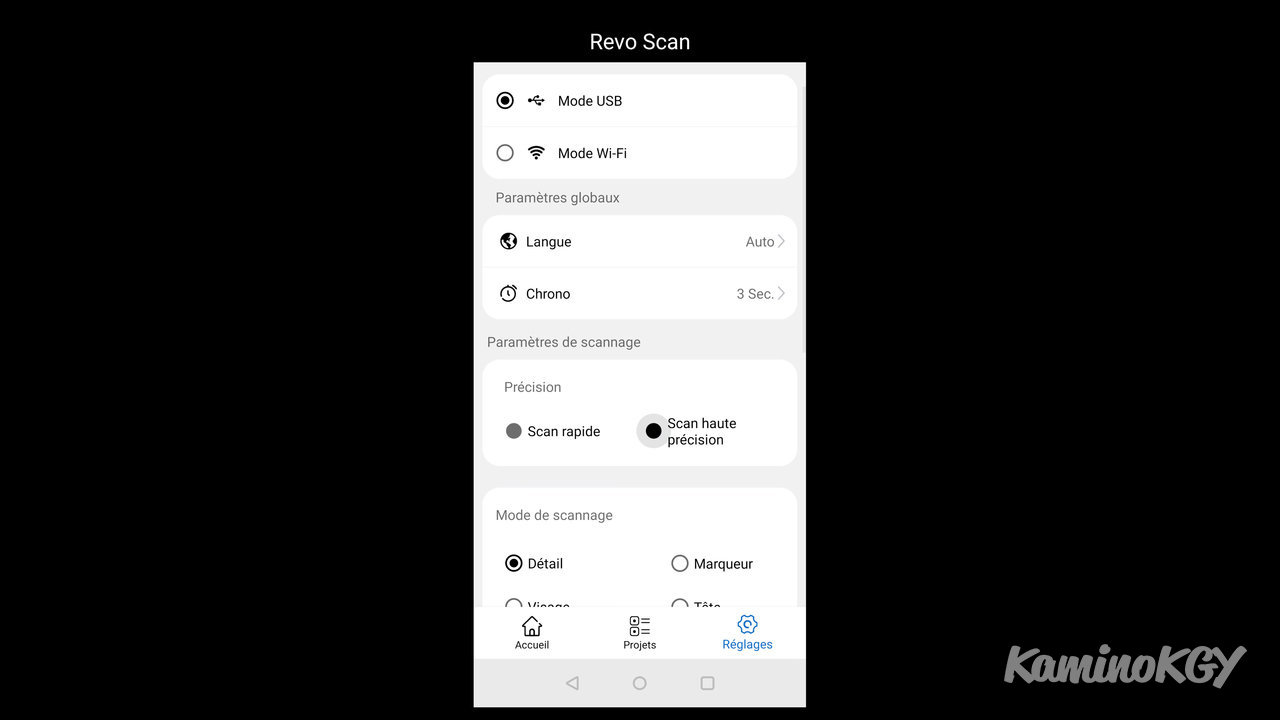
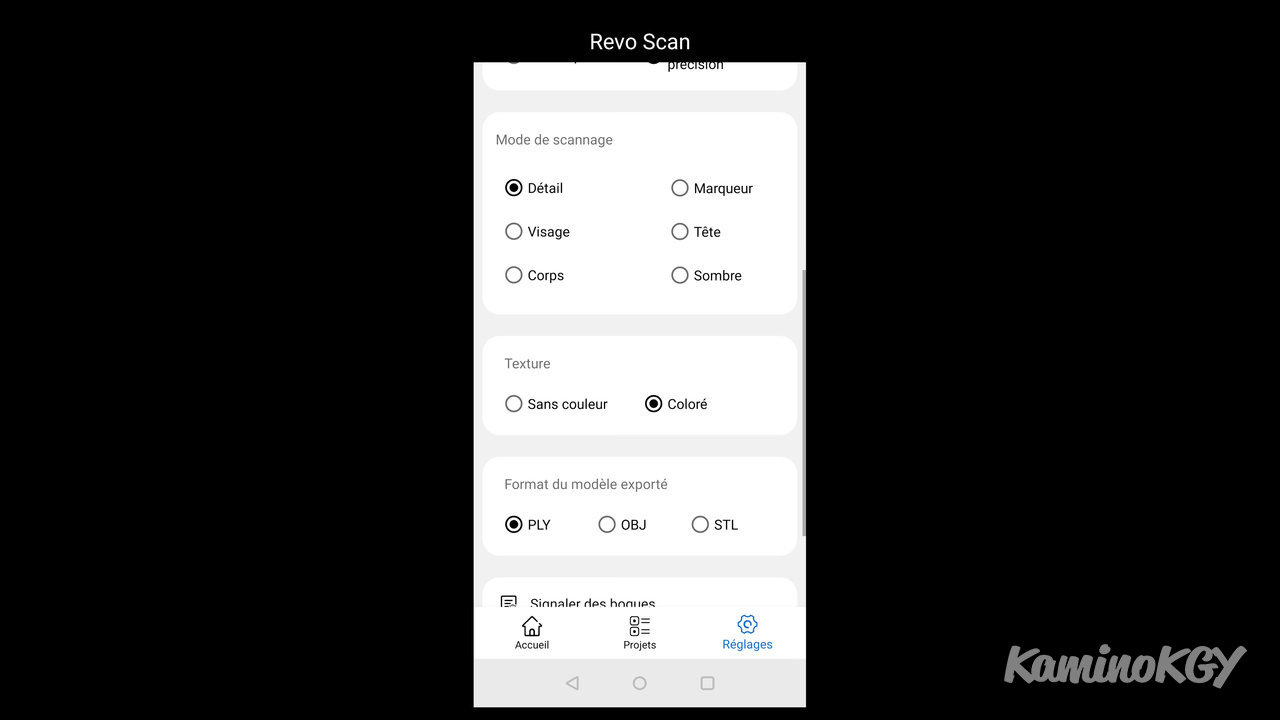
In the options, you can choose between USB mode or Wifi mode. The fast or high precision scan, the scan mode, with Detail, Marker, Face, Head, Body or Dark, but some parameters are more for Pop 1 and 2. Then we choose the texture with or without color and the format export in PLY, OBJ or STL.
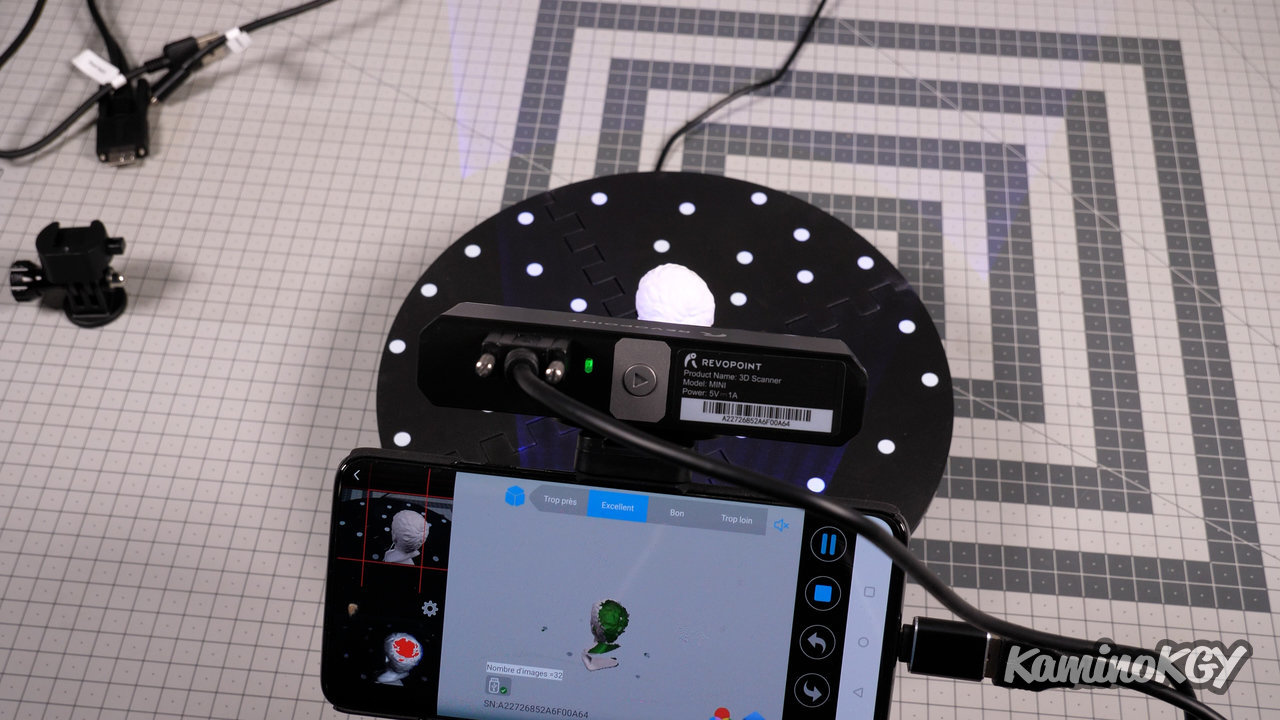
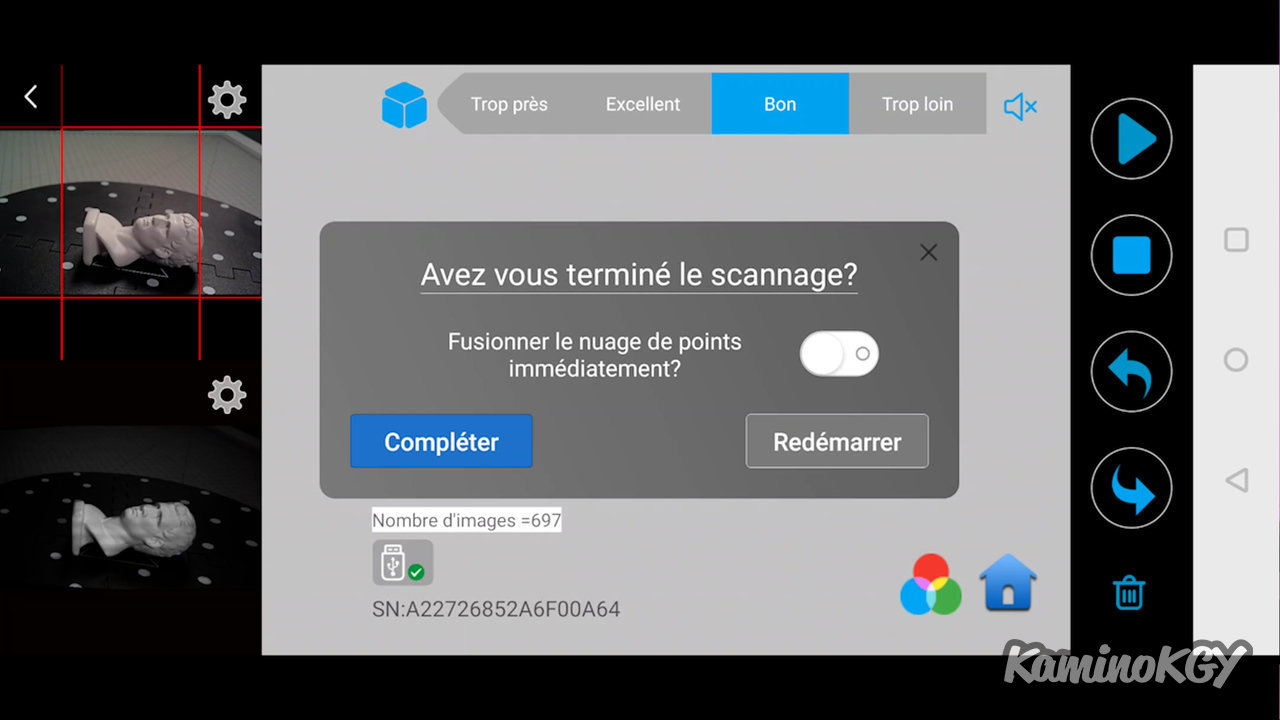
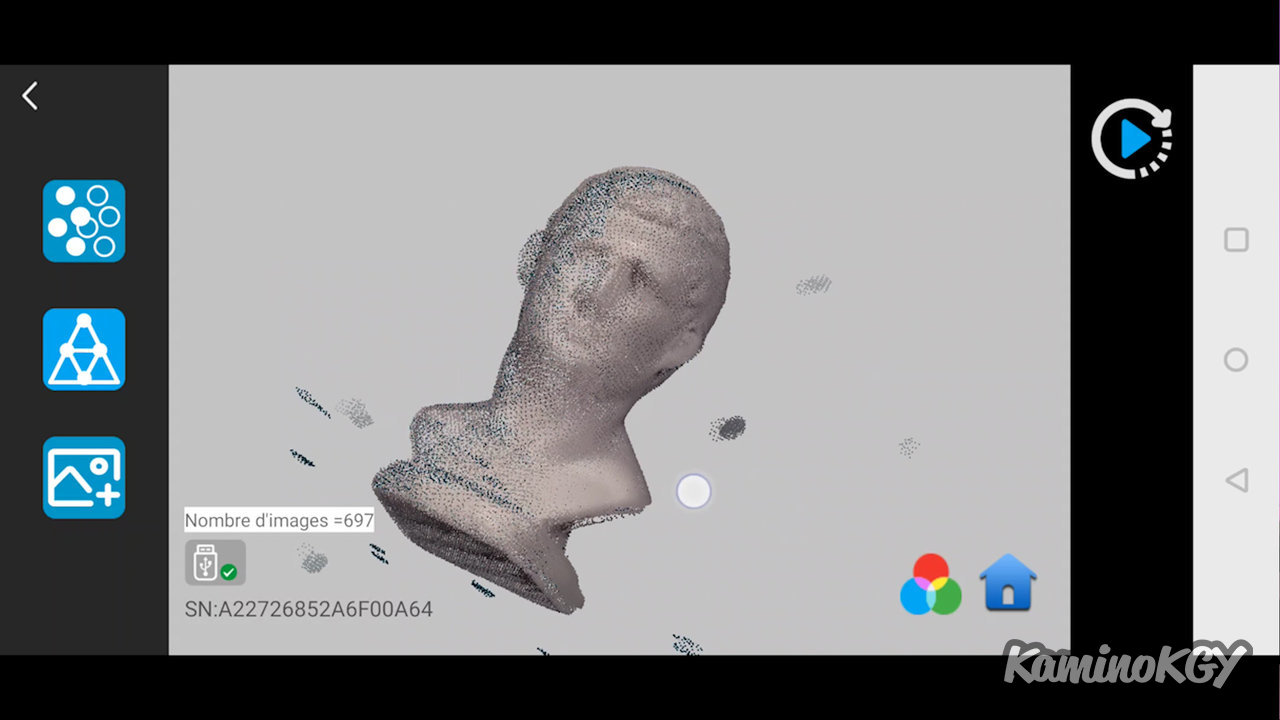
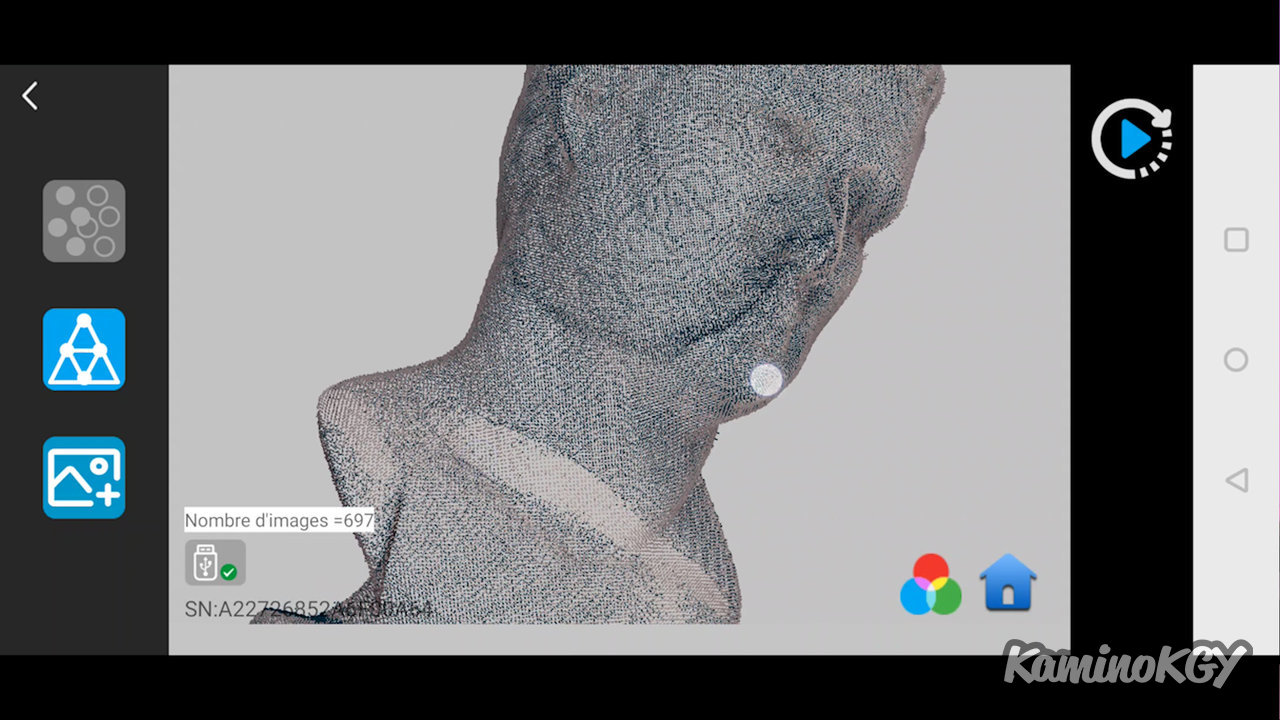
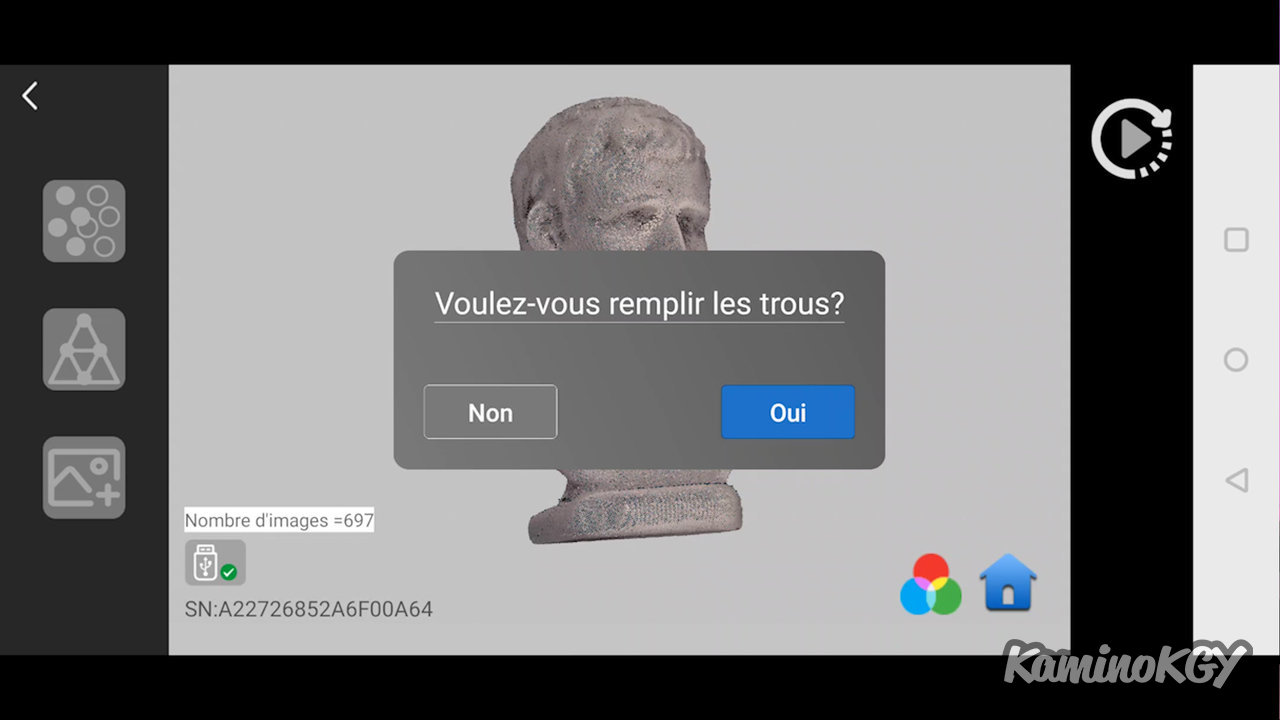
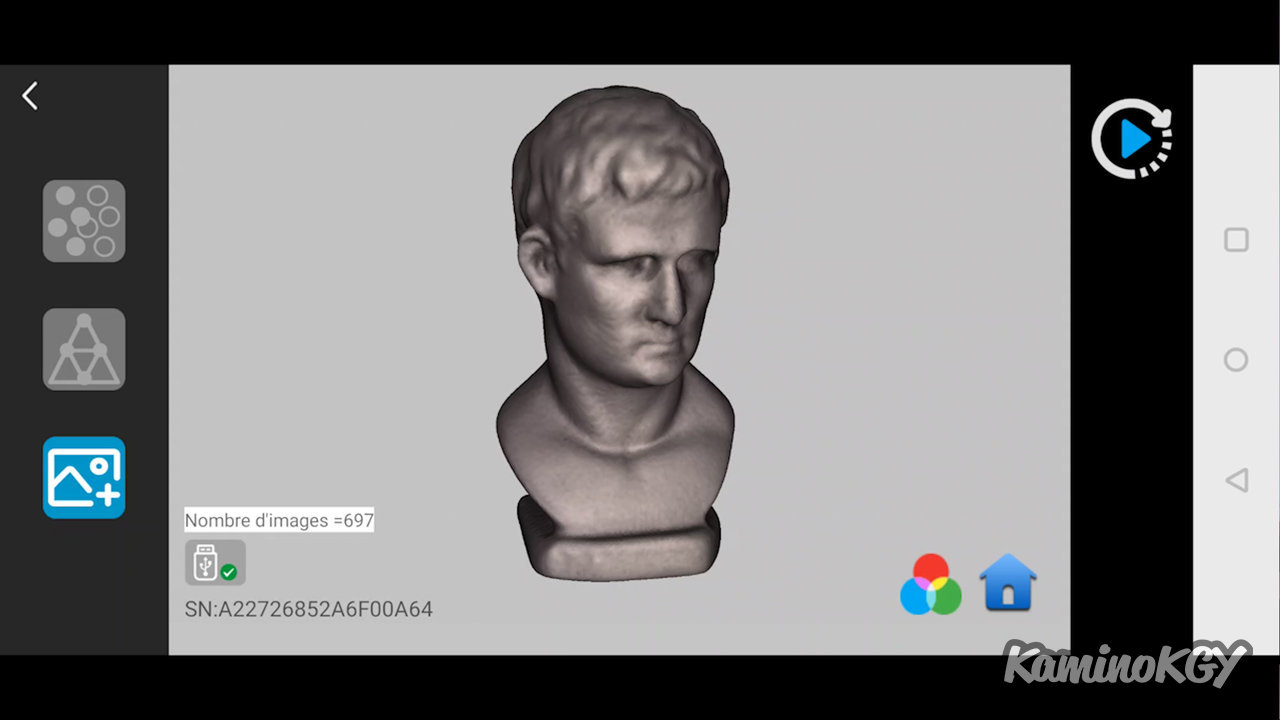
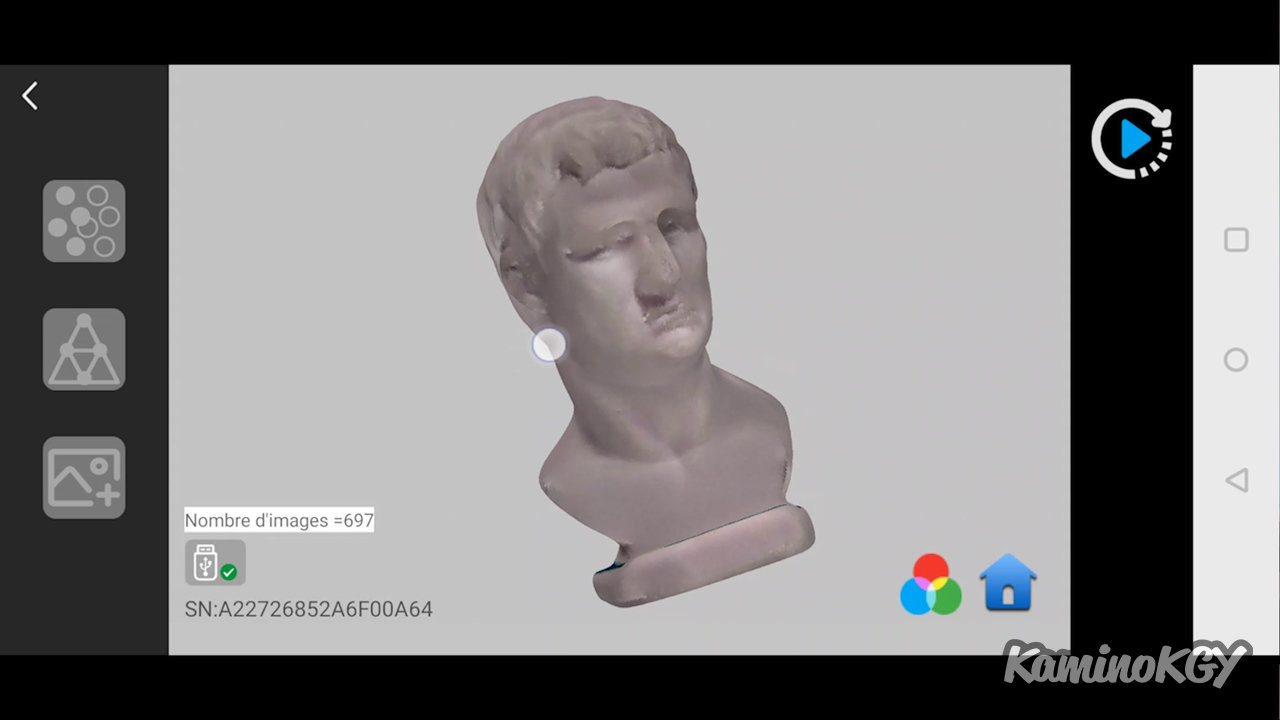
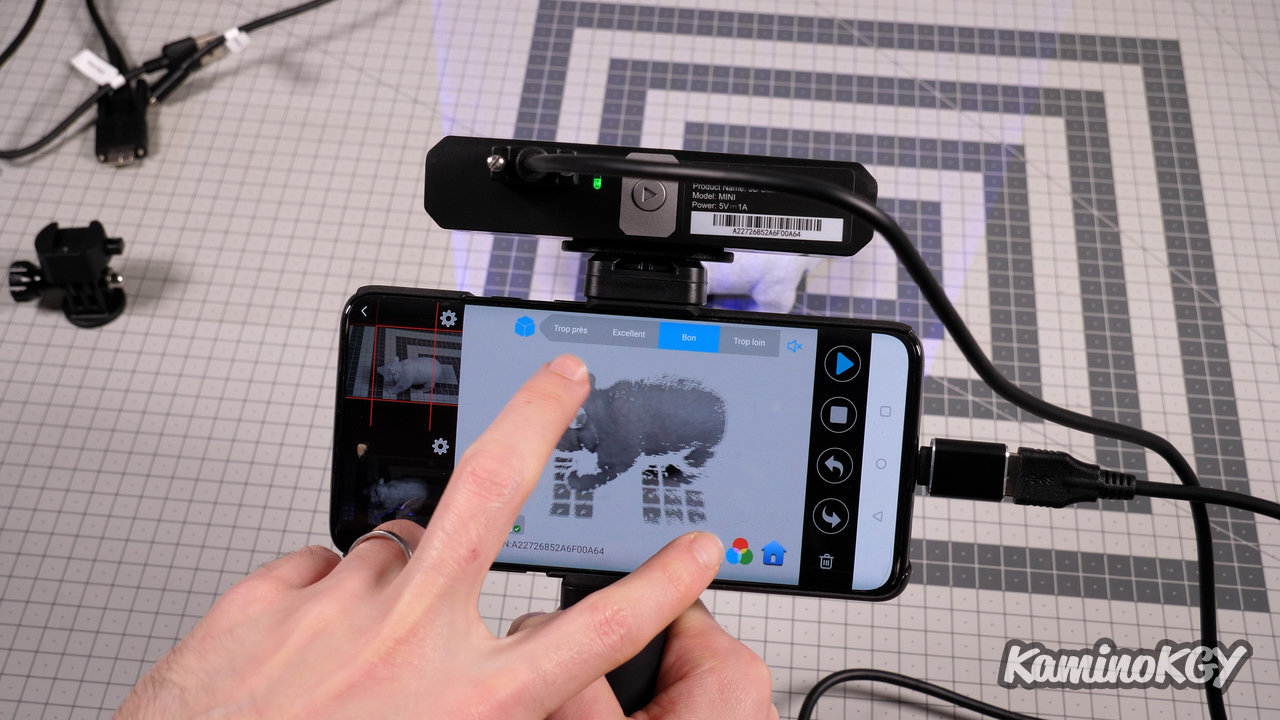
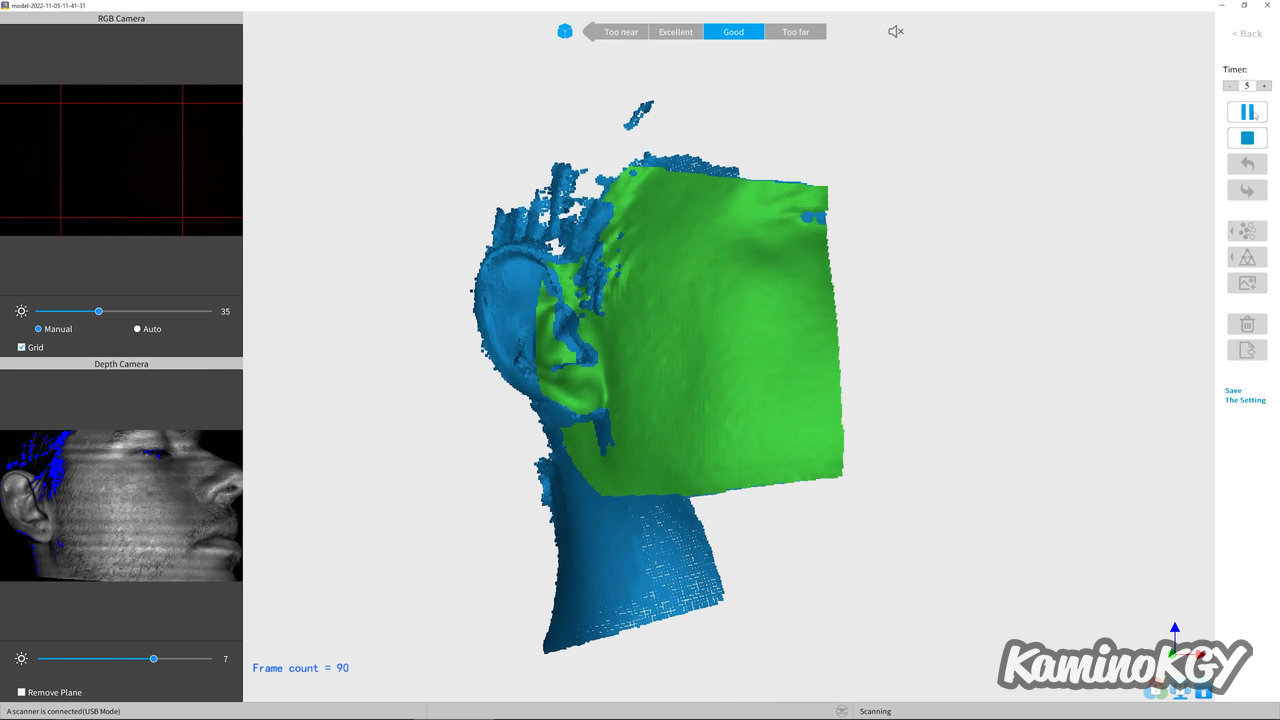
Let's start with the test bust scan. We press the Play button to start the scan, we wait to have gone around the object. We press the Pause button for the time to change its orientation and we press the Play button again. Once we have done the trick, we do Stop and Complete. We press the first button to merge the points. There, we are already starting to have a cleaner and more readable model, even if there are only points left. We press the second button to create the faces of the model. You can display or not the texture detected by the RGB camera. Then we can finish with the texture mapping, but again, this is not an operation that I do often as I no longer need files that serve as a working base to do other things. As we see here, there is regularly a shift like at the level of the nose here. but the 3D model in blue is really good.
Test scans & different materials
So for my tests, here, I didn't deal with surfaces to get better results or anything, I stayed on the basic objects so that you can better understand the basic limits.
If we do some tests with quite different objects, we can start with this green Benchy. We can already see a shift in the colors from the RGB camera, since it comes out more turquoise. In addition, it is a fairly bright filament so it is difficult to have good detection.
On this spray paint cap, the preview seems to go well, but on the scan, it obviously loses these marks quite quickly since it has no texture to attach to and it is shiny as well. Finally not to help, it is a really small object.
Then, for the glasses of the Ortur, they are transparent and therefore here invisible for the scanner.
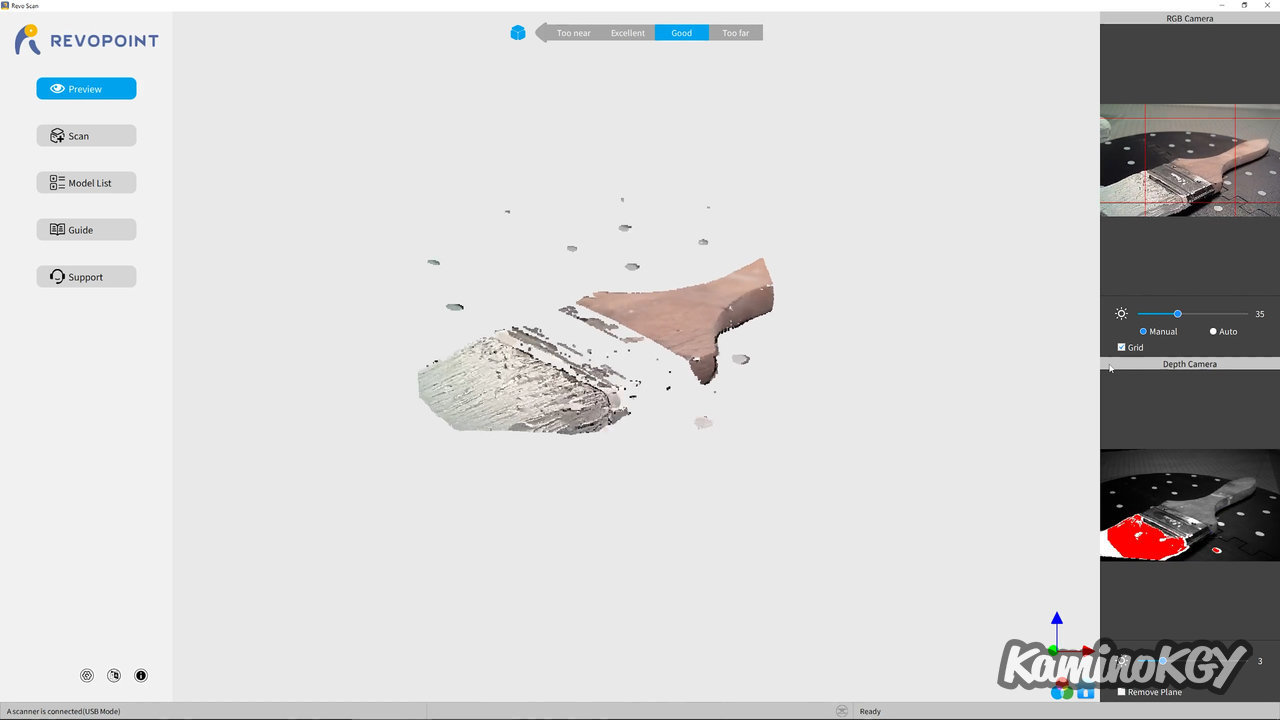
On this brush, we can clearly see that the bristles with the dry paint and the handle stand out well because they are matte, but the metallic shine is not picked up by the scanner.
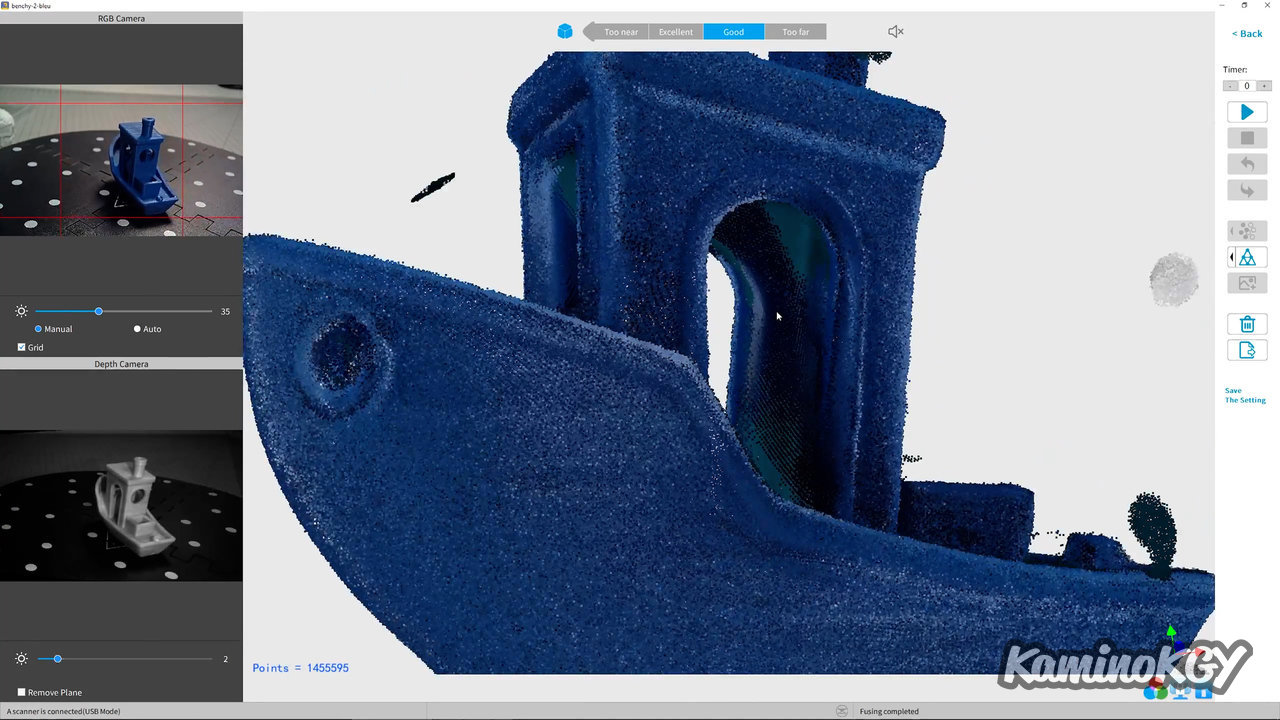
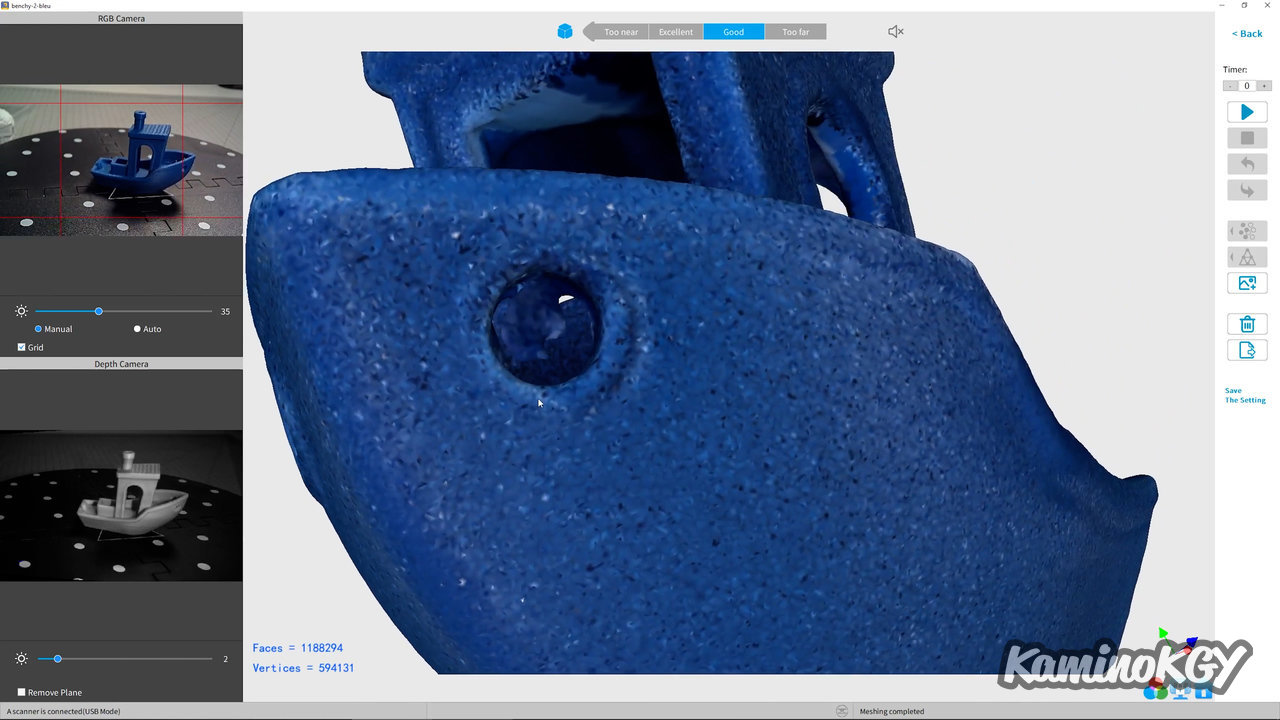
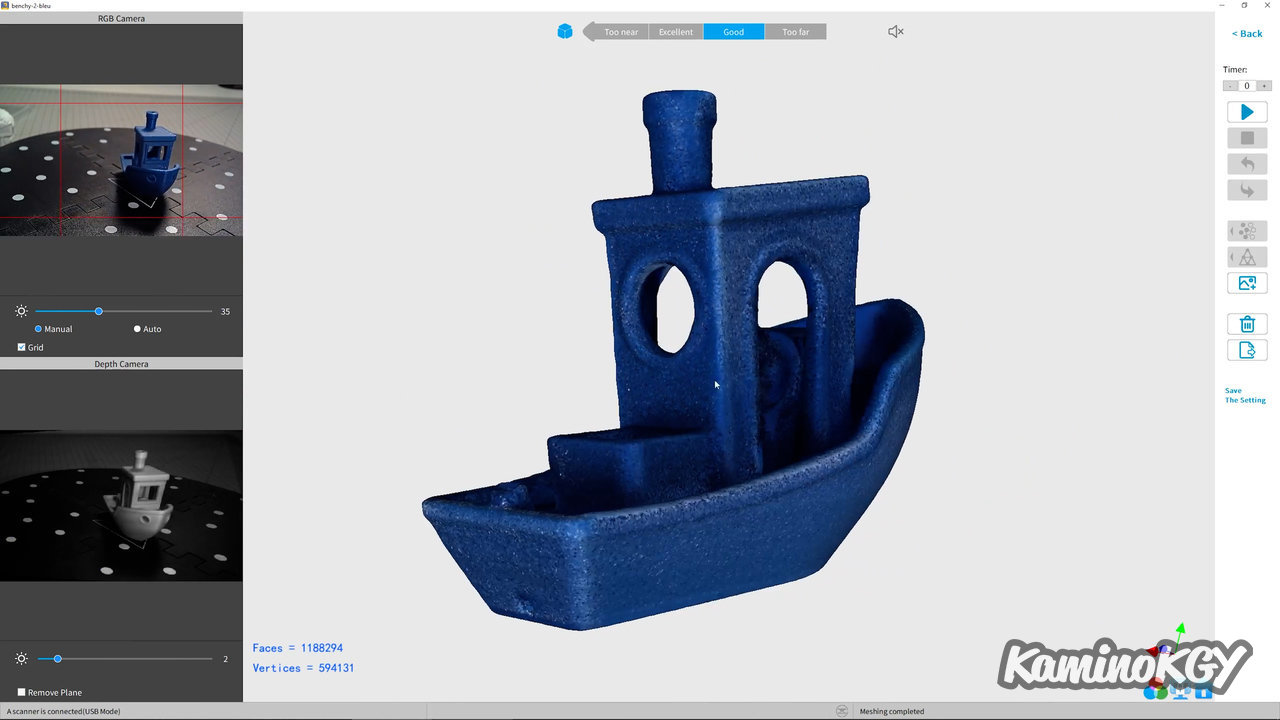
On this Benchy printed with the dark blue test filament, is quite matte and is therefore well picked up by the 3D scanner. The tracking was often lost at the beginning, but by testing several orientations, we end up getting by and having a complete model. The point cloud obtained is clean, at this stage, we can still see the pads on the board. Once the cloud has been merged and the faces generated, we have a model close to reality. The result is really satisfying.

The panda scan is more complicated as it is because we have white and black at the same time. The black band will be difficult to obtain.
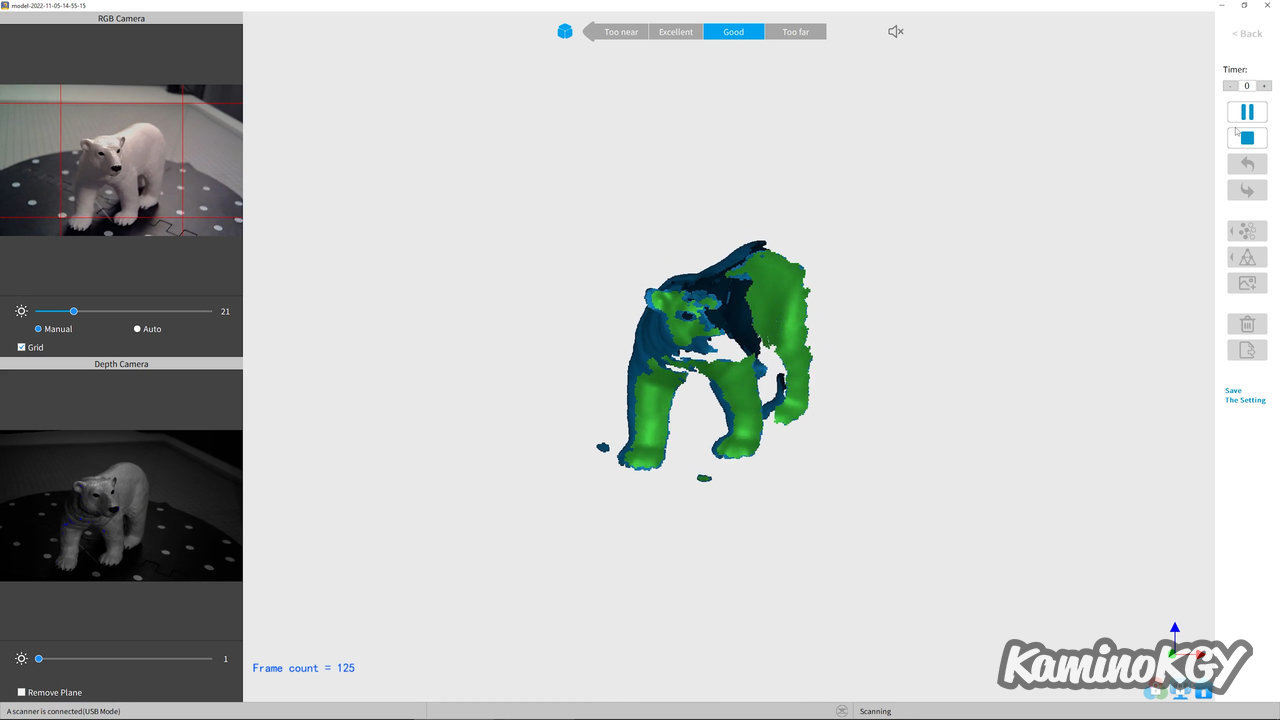
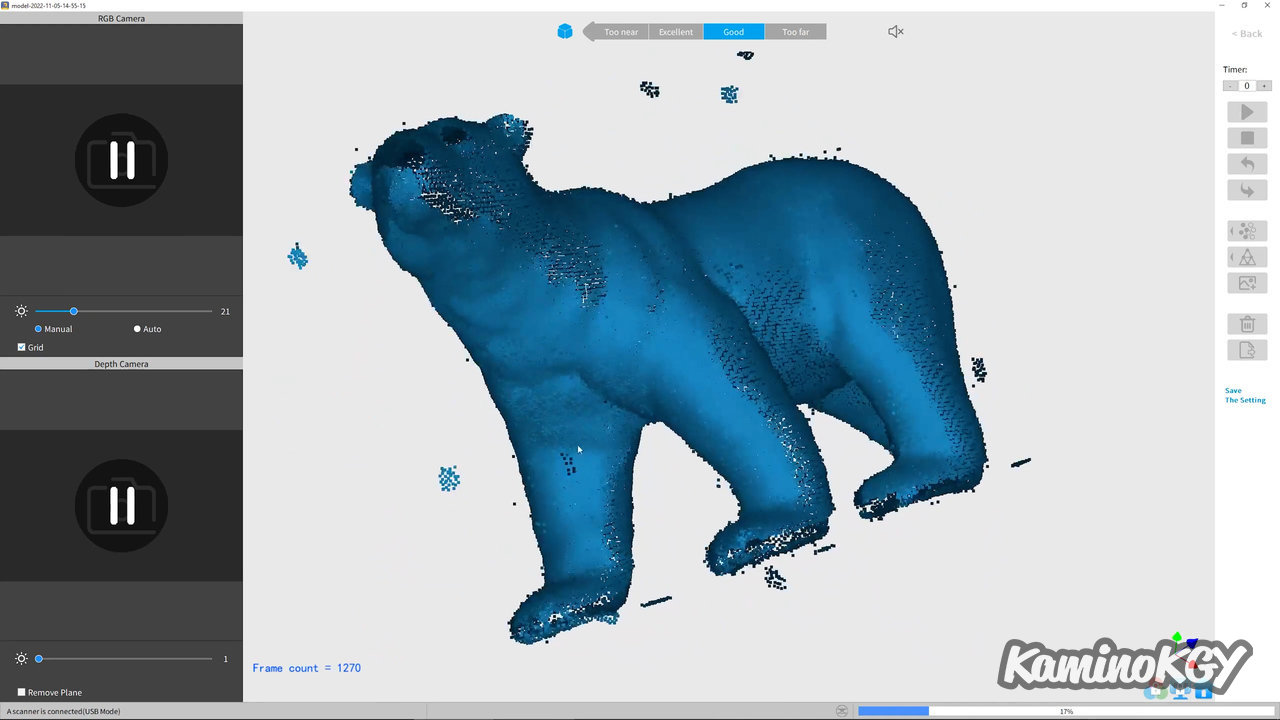
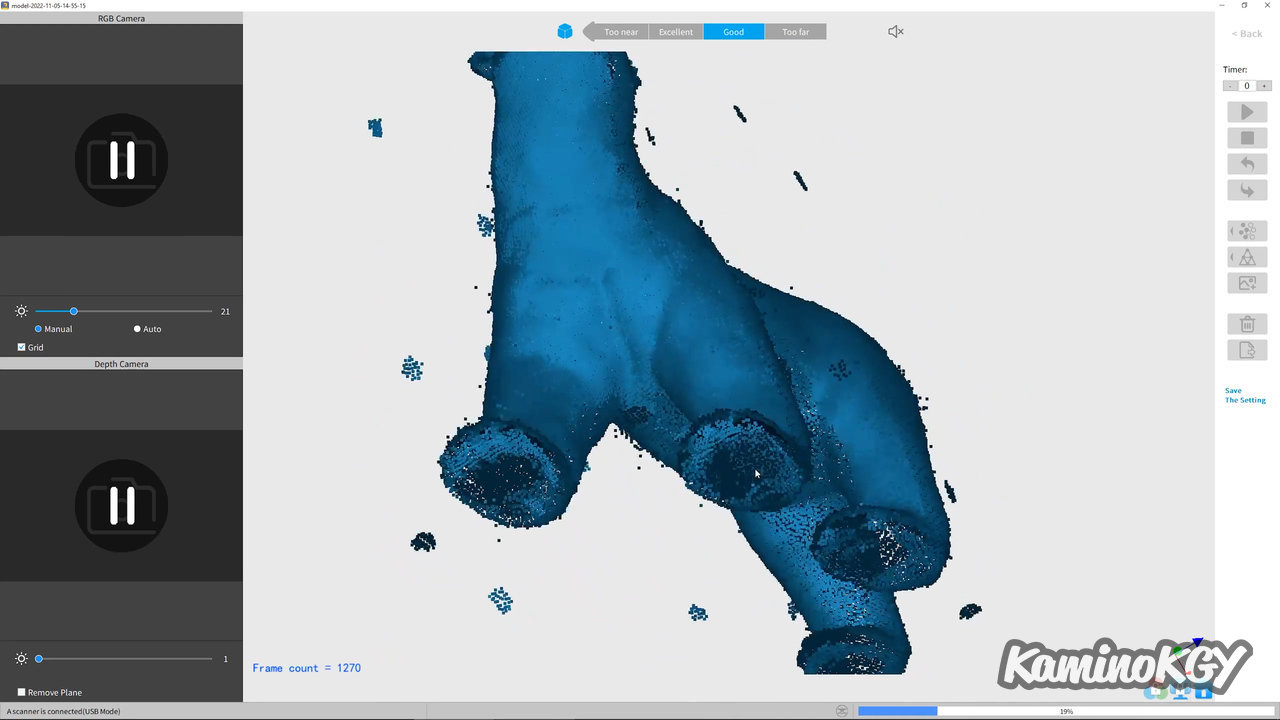
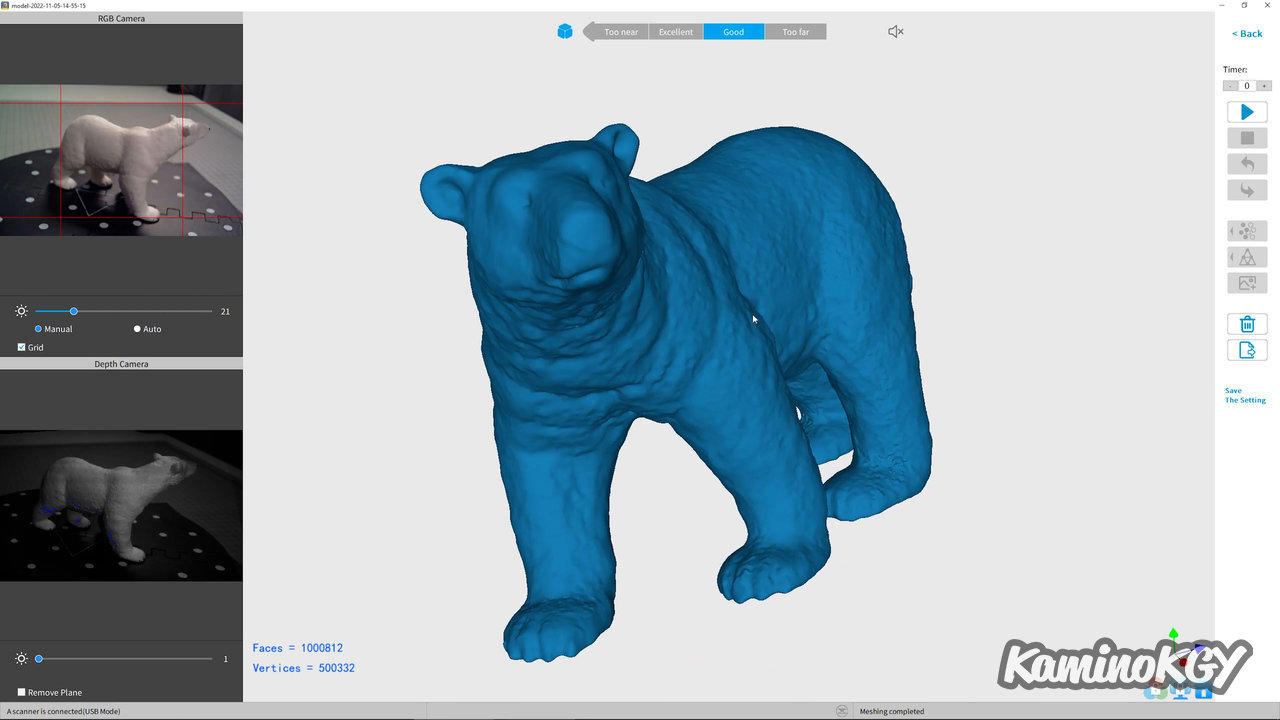
On the polar bear, on the other hand, we will have less trouble, because we have few black areas with the eyes and the underside of the paws. They can be easily closed when the faces are generated because they are also quite flat. The result obtained is close to reality.
On this character who is very bright, I managed to scan him, but by turning off the lights and keeping only the light coming from the projector at medium power, because there we have dark colored clothes and a rather clear helmet and face. The model obtained is quite noisy, but it can serve as a good basis for smoothing it out and redoing some details.

I then wanted to scan my face, but that's quite complicated on its own. Because as the blue light is quite violent, you have to close your eyes, except that from there, you can't see where you're going, what can be missing, manage the orientation of the scanner and its distance. Where I've had good results is by turning off the light and trying to do a sweep, avoiding going over the same place several times. Because in general it seems to add detail with texture, but I think it's more noise than anything.
Review
It's really nice to use, even if there is a little learning curve to know what can or cannot be scanned directly, and if there is no need for a processing of upstream surface. As we have seen with transparent or reflective surfaces, or even very dark colors or with both light and dark colors, it is often more difficult. But when you have good conditions for the scan, or well prepared your model, the result is really clean. And you should not hesitate to play with the power parameters of the projector, the precision of the fusion of the points and the generation of the faces. In addition, the scanner is really compact and easy to use on the go.
Bye bye!