Today we are going to test the Ortur Laser Master 3 and frankly hang in there because it takes your breath away.
Unboxing
In the box, there is documentation, a reusable box with screws and tools, the pre-assembled rear profile, the front profile with its integrated motherboard. Below, we have the cable to connect the laser, the power supply, the USB cable, really stylish protective glasses entirely in transparent orange, the pipe to use the laser with an optional air assist, the really stylish laser module too , the side profiles, a pouch with, among other things, some test items and the X-axis preassembled with the carriage.
Assembly
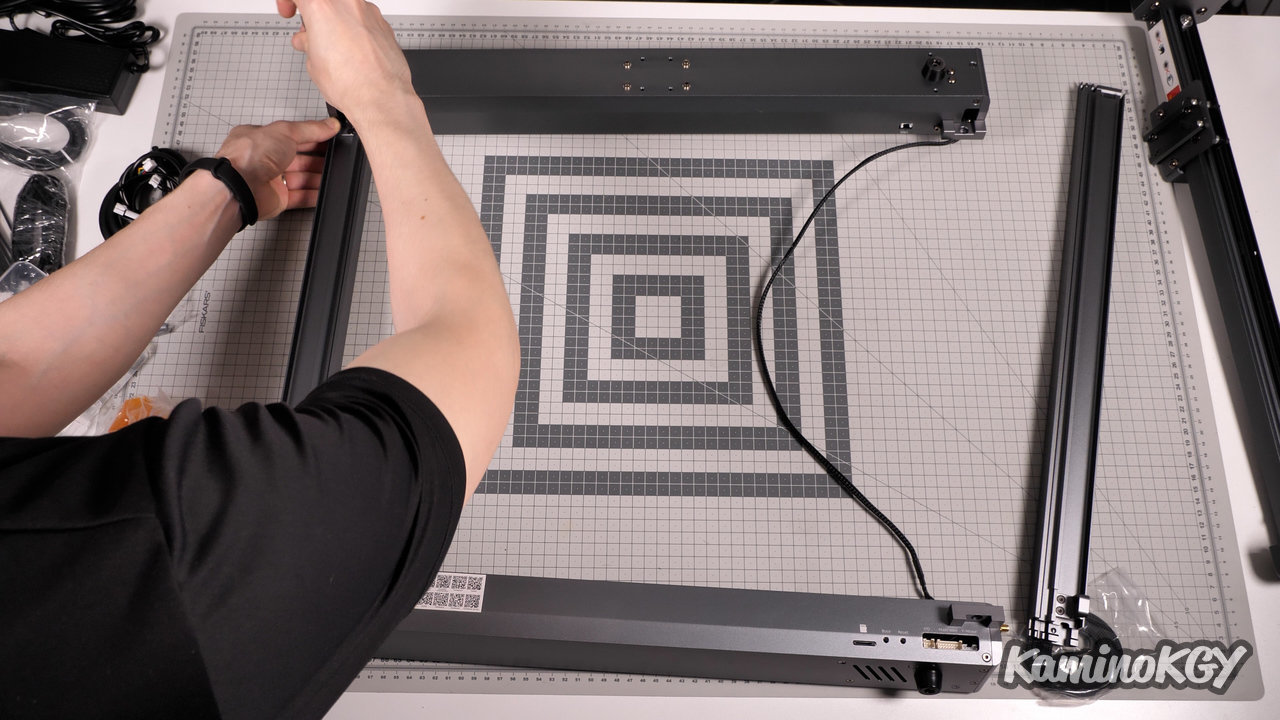
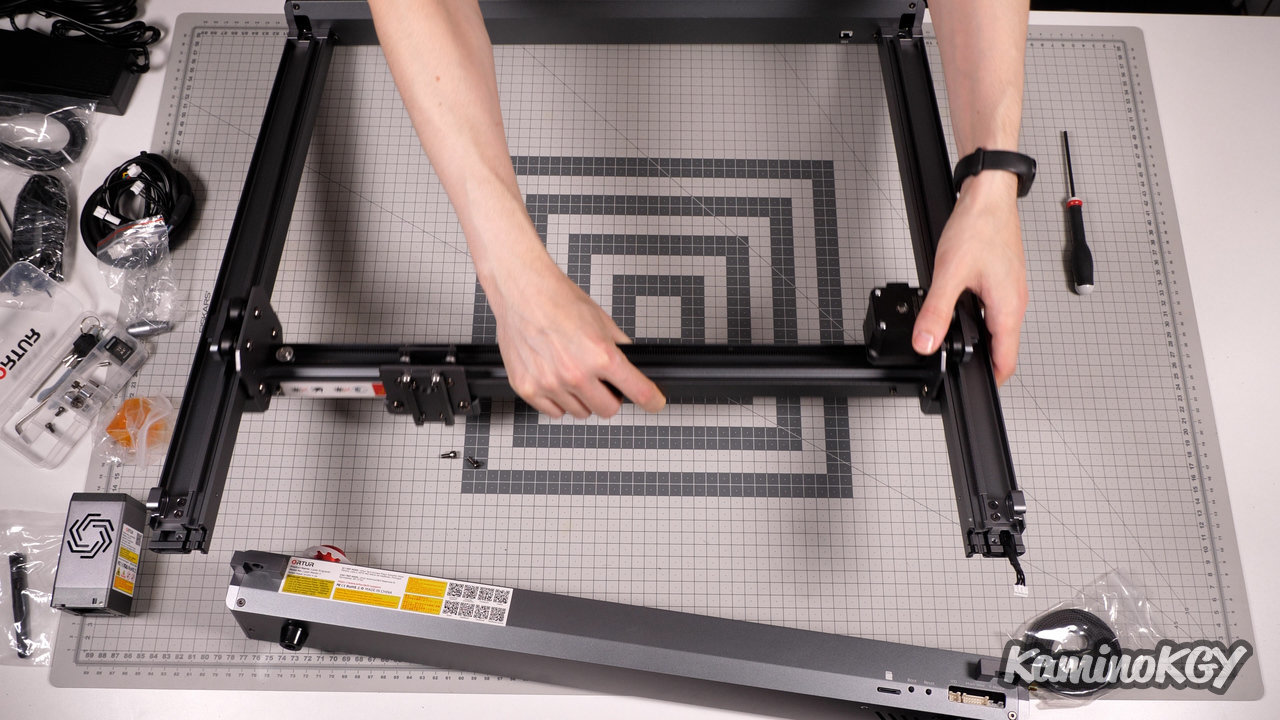
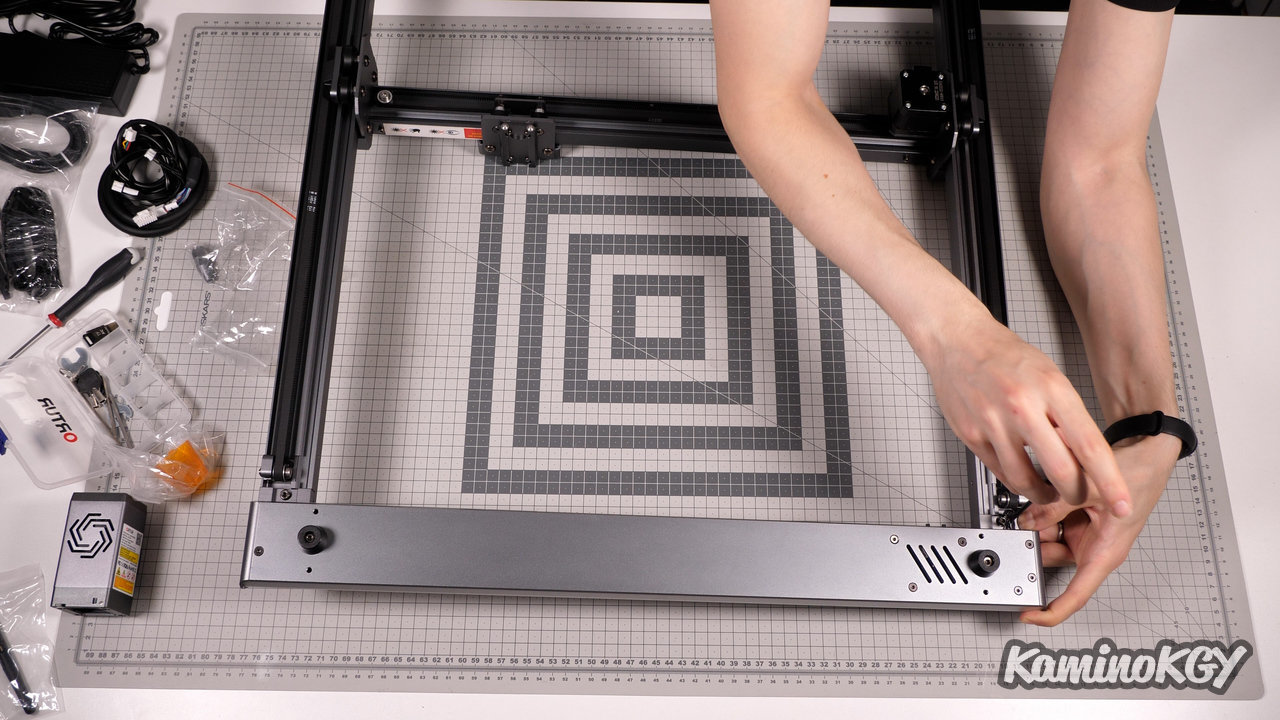

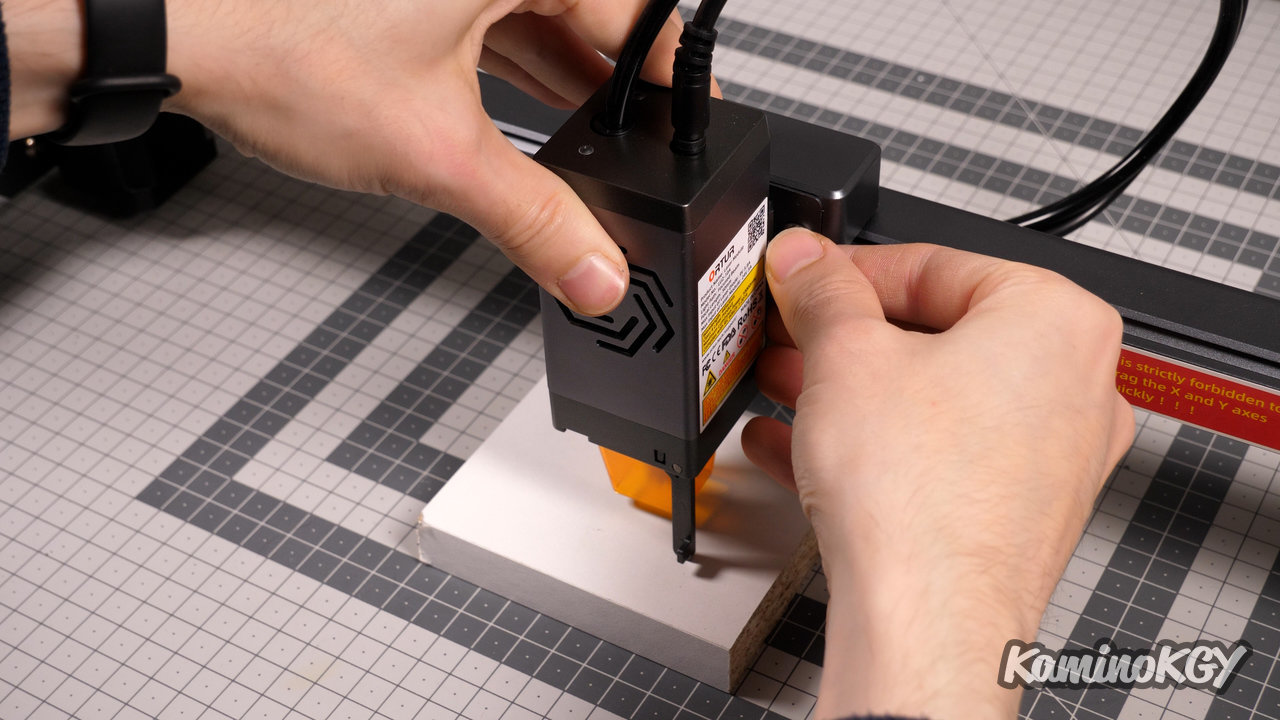
Regarding the assembly, the cable is slid into the side profiles which are screwed onto the rear profile. We slide the X axis, we install the belts that we maintain with the tensioning systems that are on the front of the machine. We connect the motherboard, we screw the front profile and we just have to install the laser module and the cable.
Features
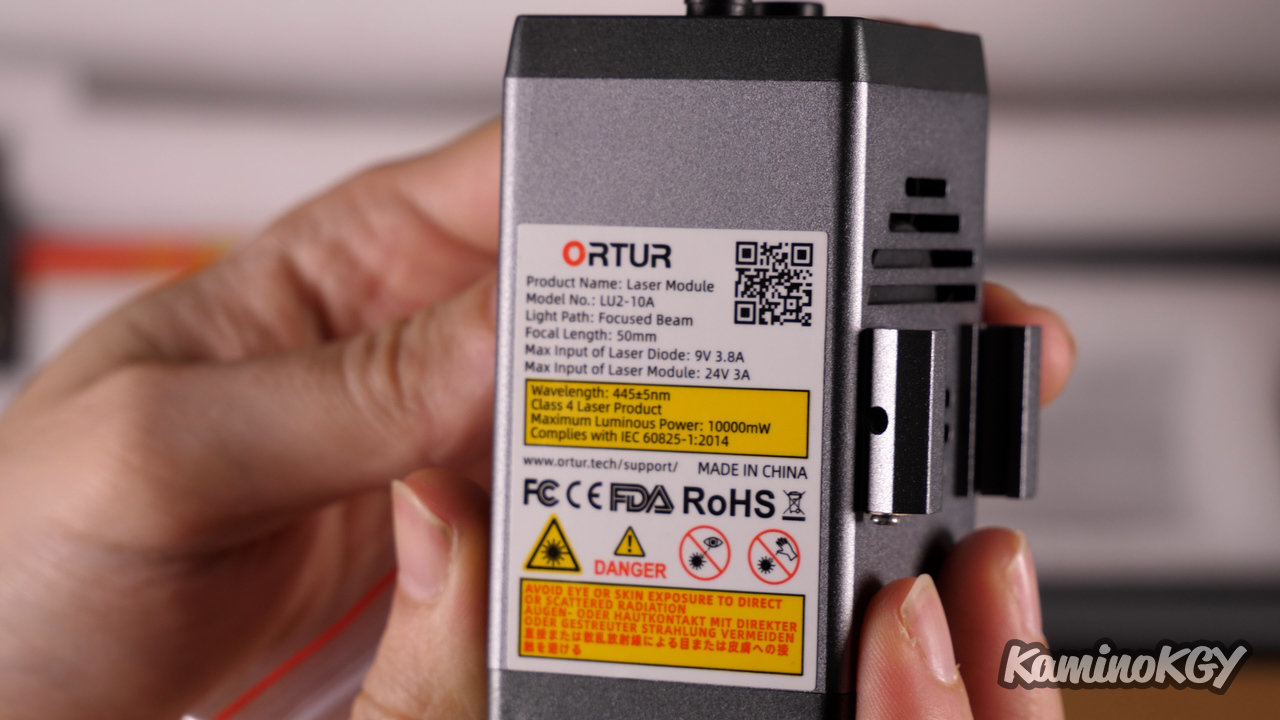
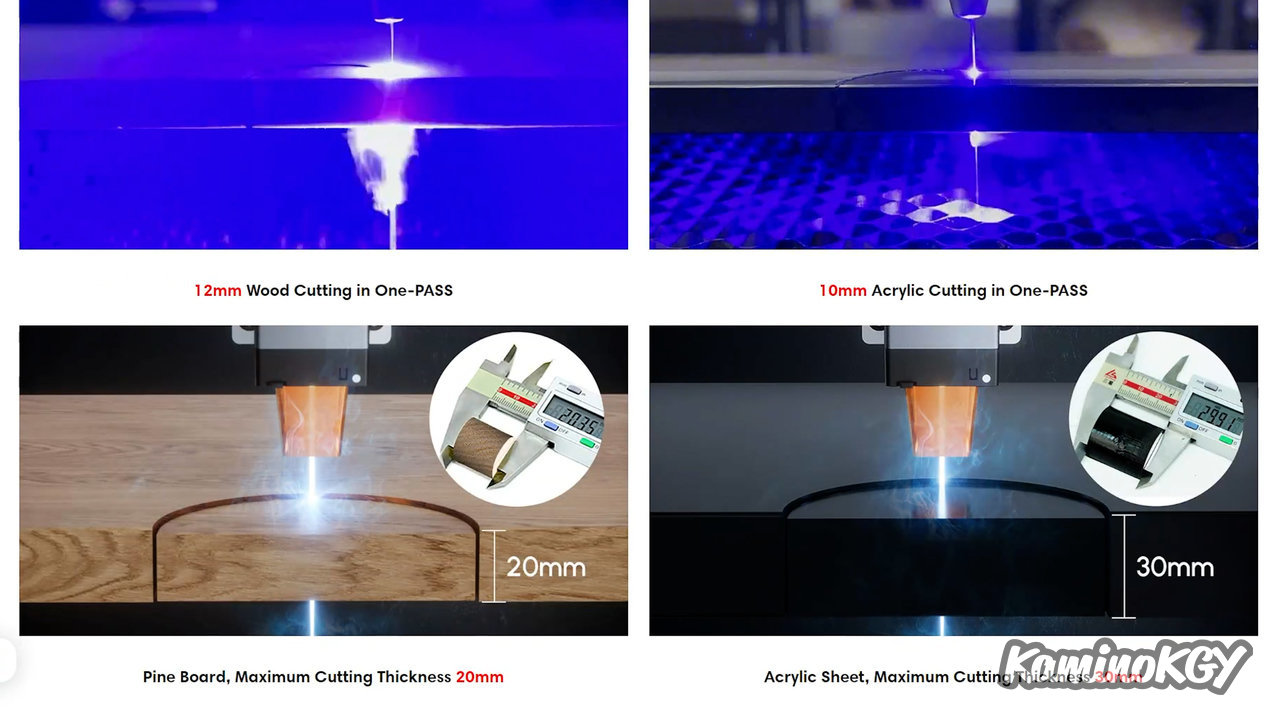
Regarding the features, the machine has a working area of 400 by 400 mm, expandable with an optional kit. The max engraving speed is 20000mm/min which is really good. With a cutting thickness of up to 30 mm, the laser has an optical power of 10W. It can be used connected to a PC, but also wirelessly. It uses TMC2209 silent drivers to make an autohome without limit switches, but just at the resistance of the motors at the end of the stroke.
To focus the laser, it's simple, there is a small arm that you take out of the laser, you adjust the height and you're done. What is practical is that there is no risk of losing the wedge placed just anywhere between the engravings as can regularly happen to me with other machines.
I must tell you right away that my machine was always in error, but usable connected to a PC via USB. It was when I wanted to configure the Wifi that it blocked me. So I searched for a solution without success. So I updated the firmware, but there, no way to find a page on the site on how to get it and install it. Eventually I went to a Facebook group on this machine, where I came across a post that quoted another official post, with a somewhat questionable translation. So there, I went to the official group, I found the profile of the person who had posted. By chance on his profile I saw that he was talking about firmware update on a reply he left on another member's post with the link to download it. Which I did, but no info on how to update it. So I searched on Google where I came across the official Ortur Youtube video that shows the procedure. Honestly, I would never have guessed the manipulation where you have to press the button to turn on the machine, at the same time on the boot button briefly, stay on the button to turn on until you have the right colors, boot on the card. The machine turns off automatically, you have to turn it on again, but with the on off button switched off, restart the machine by hand and there it is updated. So, I put the link of the firmware download page and the update video below.
So we have different ways of using the machine, via USB on the PC with LaserGRBL or Lightburn, but also via the Web or a mobile application via WiFi. And to configure the wifi, you have to find the right explanatory video.
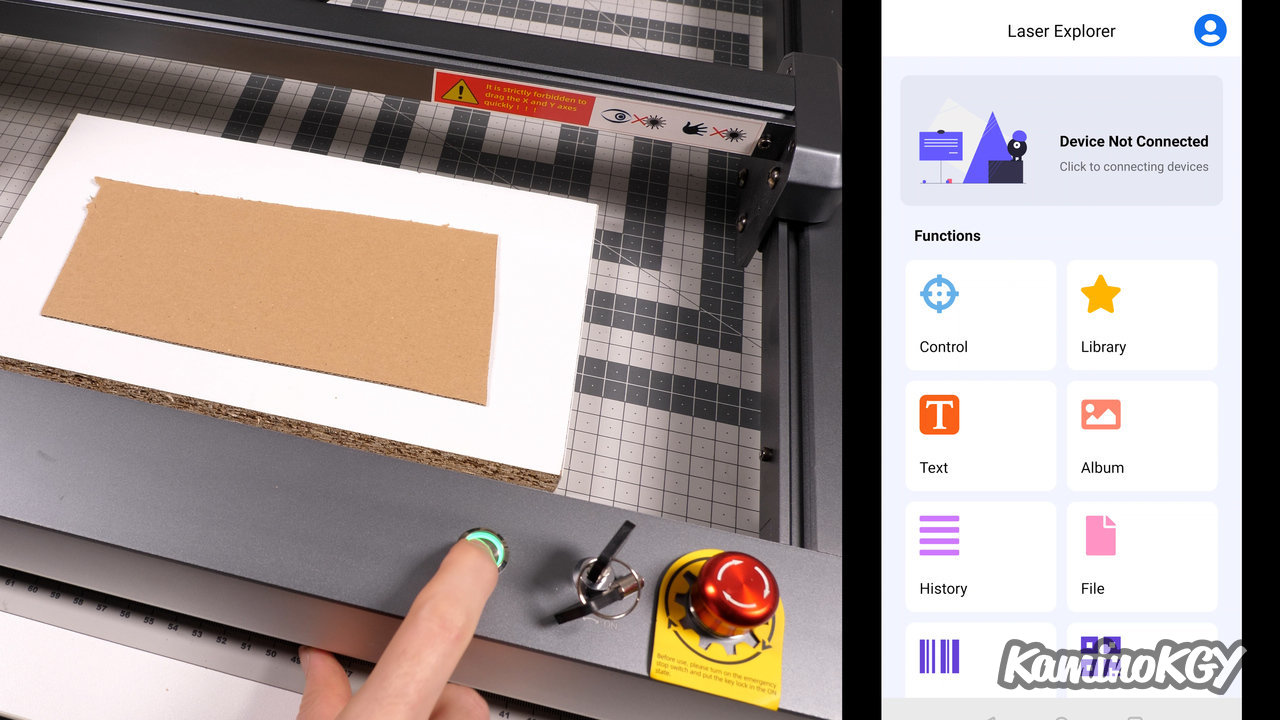
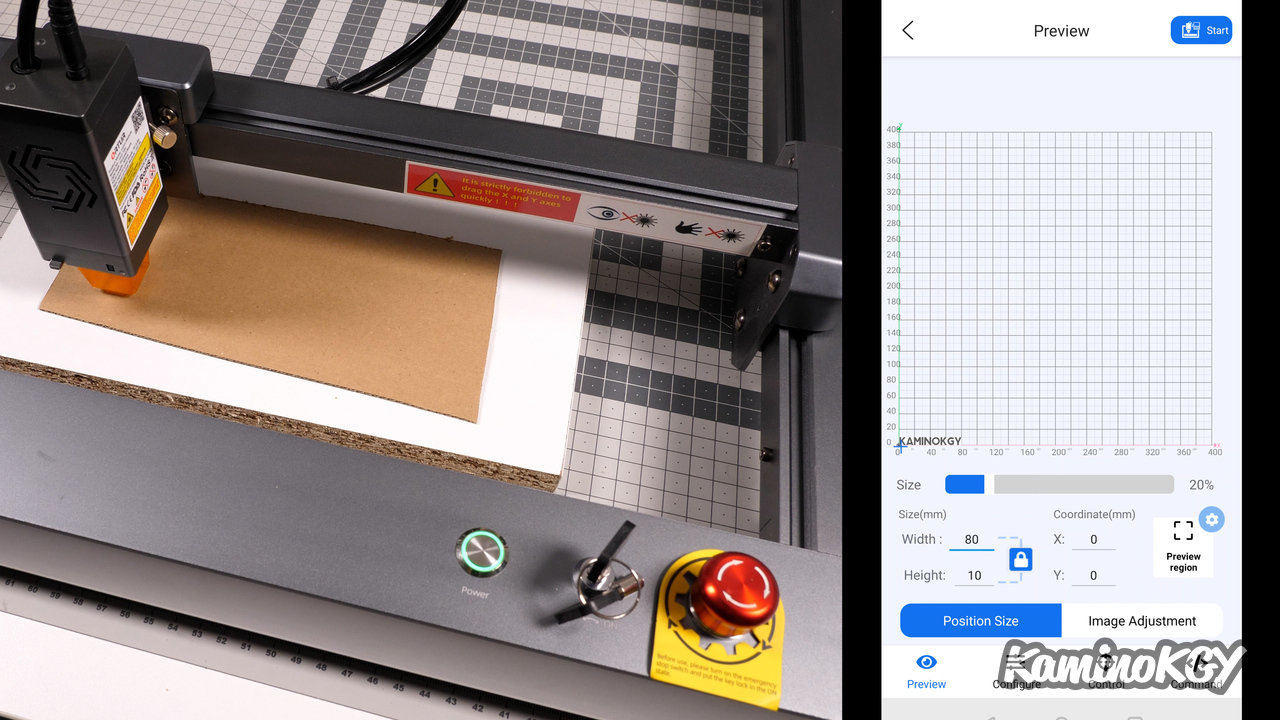
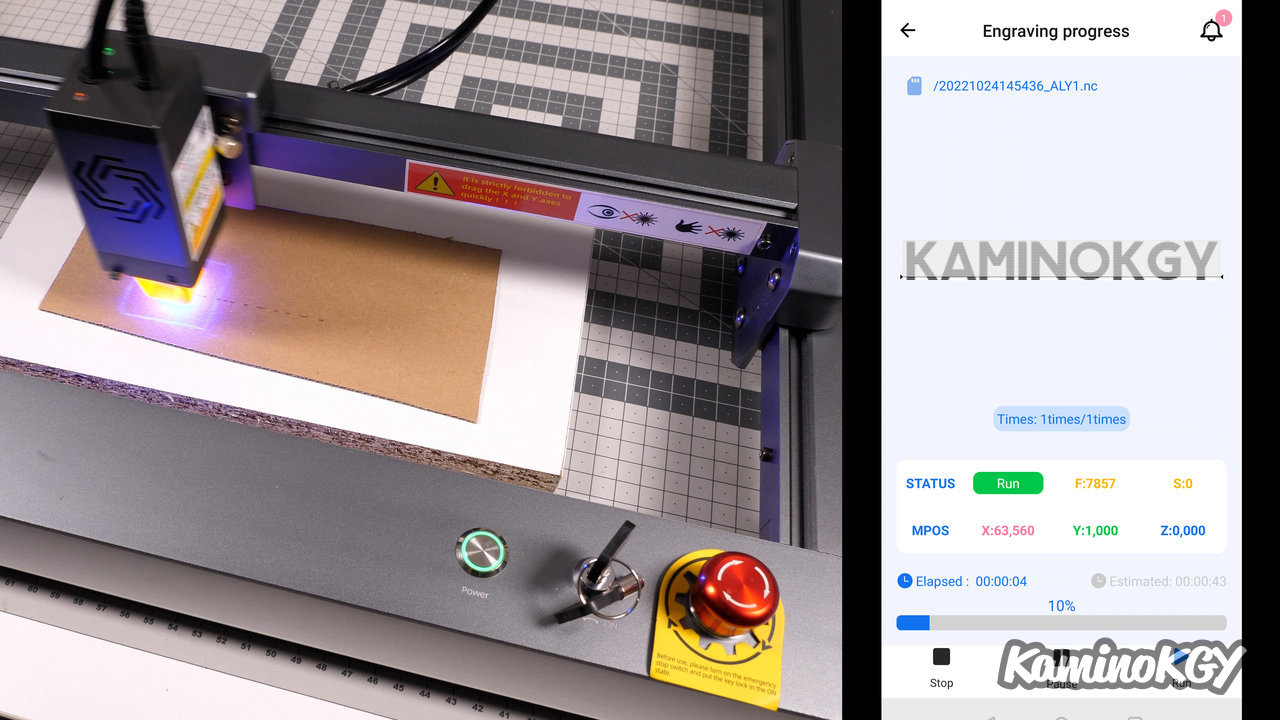
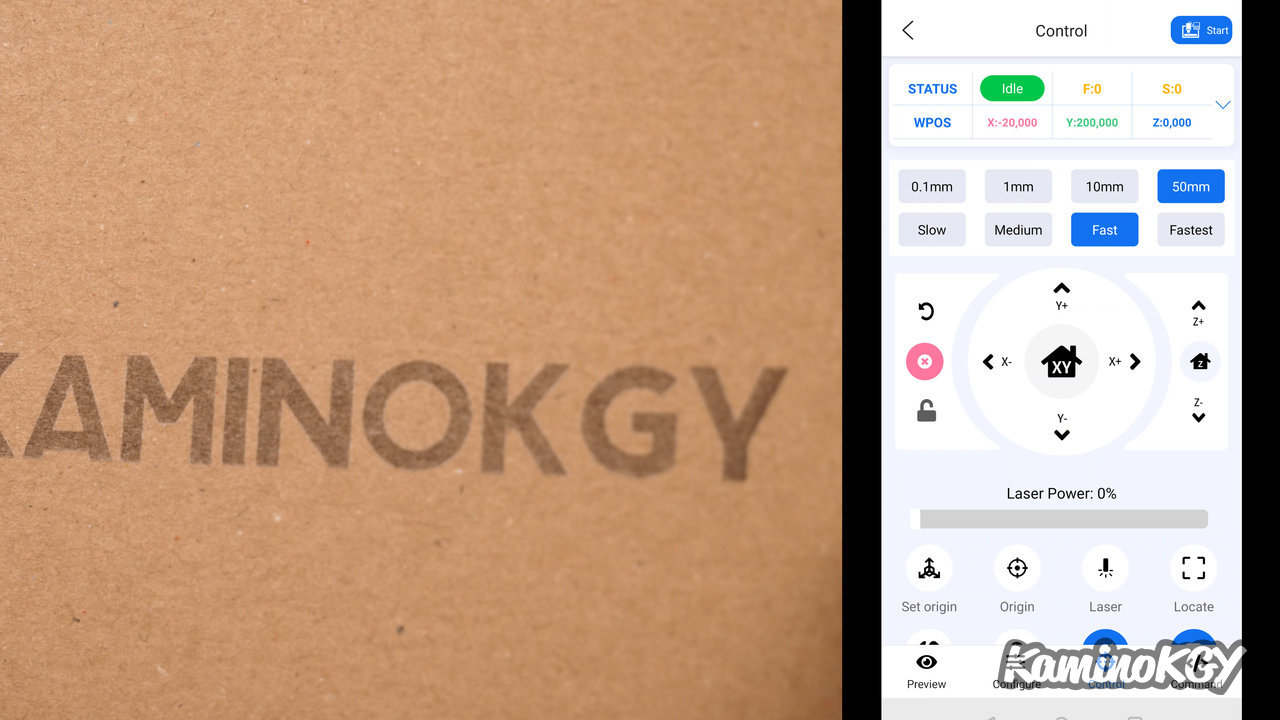
To configure access to the Ortur Laser Master 3 in Wifi, you must press the power button 5 times quickly, you hear a beep and the button changes color several times. There we go to the mobile application, we add the machine by indicating your wifi. We can control these movements, burn a file on the mobile. I left on the engraving of a small KaminoKGY entered in text with a font that is nice. You can then change the size of the engraving and move the head by hand or via the control menu. We start the engraving where the head is. You can see the progress of the engraving as it goes. Once finished, the result is there and rather quickly obtained with the parameters for cardboard at 15000 mm/min and the laser at maximum.
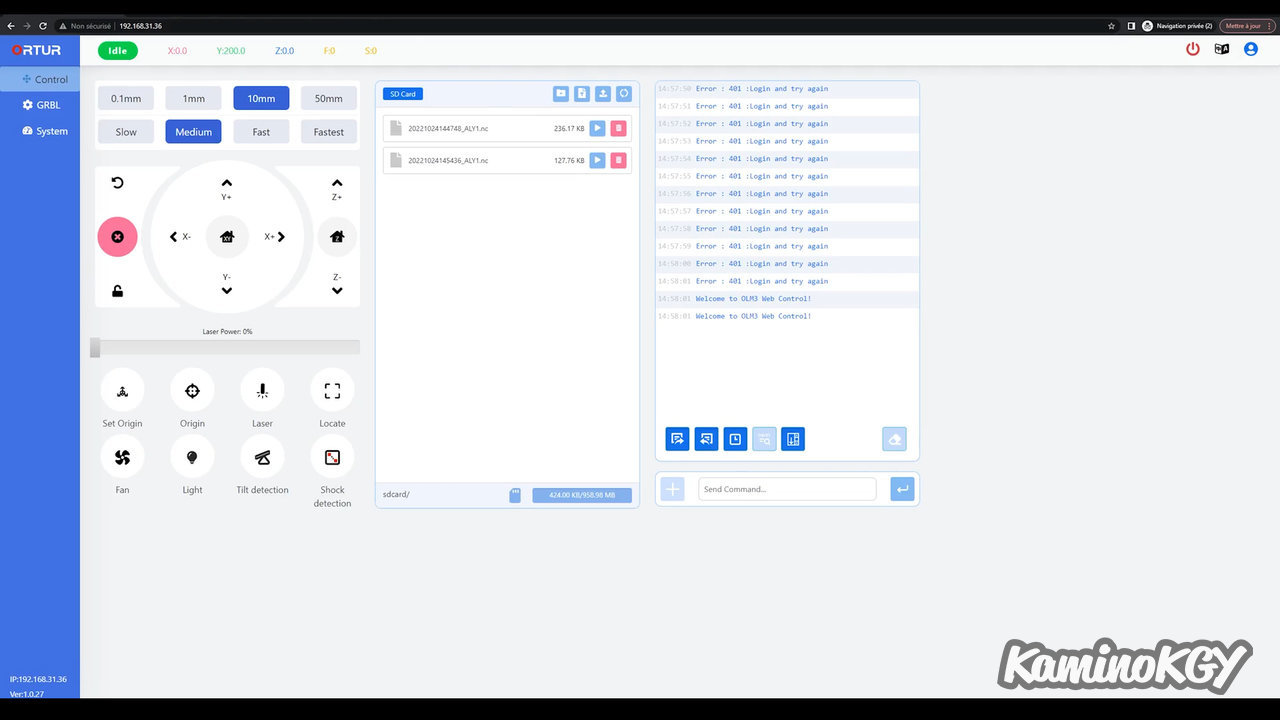
To access the machine via the web interface, simply go to a browser and enter the IP address visible on the app. We put the secure identifiers admin and admin and we access the engraving management interface, we have all the parameters of LaserGRBL. You can move around and manage files. It is very readable and convenient to use.
We have an interface to connect the module to engrave cylinders on the back of the machine with a switch to choose the mode. It is easily accessible and practical if you change the configuration regularly. This is a very good point.
On the other side, we have the wifi antenna, the power port and the classic USB port. A little hidden on the back, we have the slot for the microSD card, the boot button and the reset button.
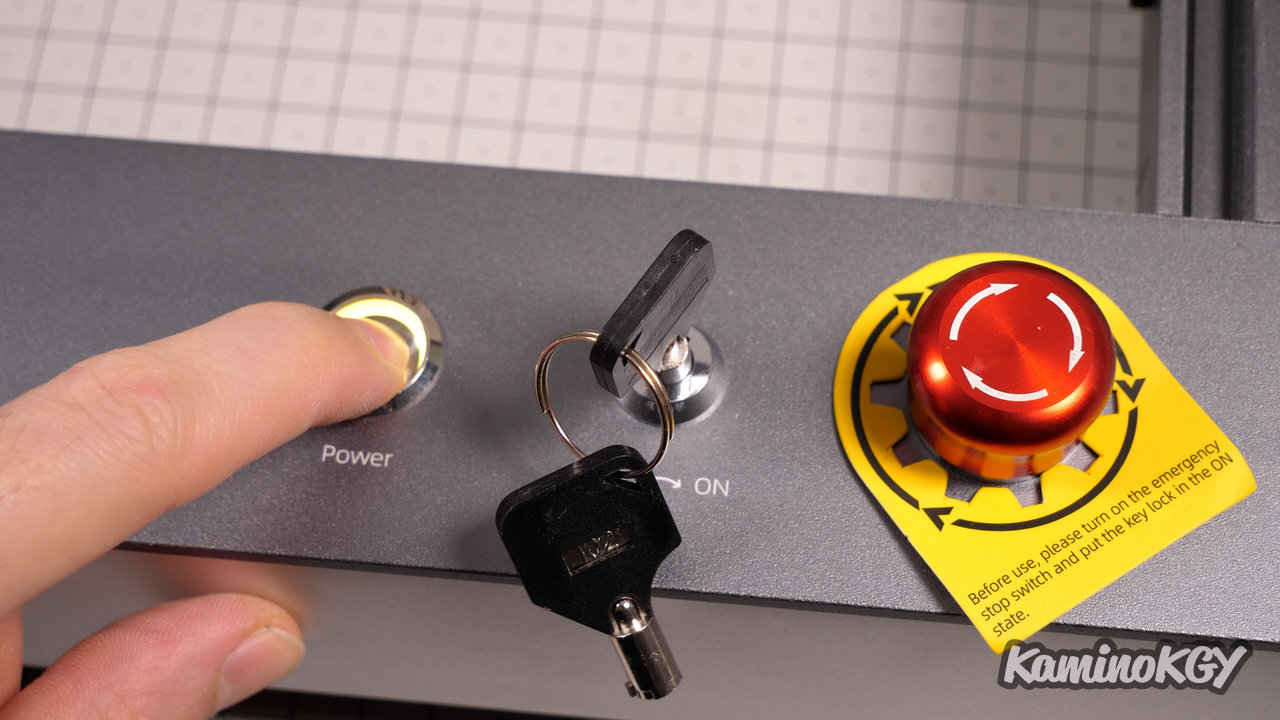
We have an On/Off switch that we activate using a key, then we press the Power button to start the machine and on the right we have a clearly visible emergency stop button and accessible. We can see that Ortur thinks a lot about user security with this.
From a design point of view, it's really very clean, you can hardly see anything except the cable to power the laser and the hose for the Air Assist.
Then for the engraving parameters, on the microSD card, we have a file which for once really gives the values of all the LaserGRBL parameters with screenshots of the interface, so there is really no doubt. Especially since the settings work well too, so don't miss it.
You can't say that the machine is silent. The fans tend to get a bit riled up when burning at high speeds, but that bothers me less than the Neje's noise which seemed to come straight from the laser.
Engraving prints
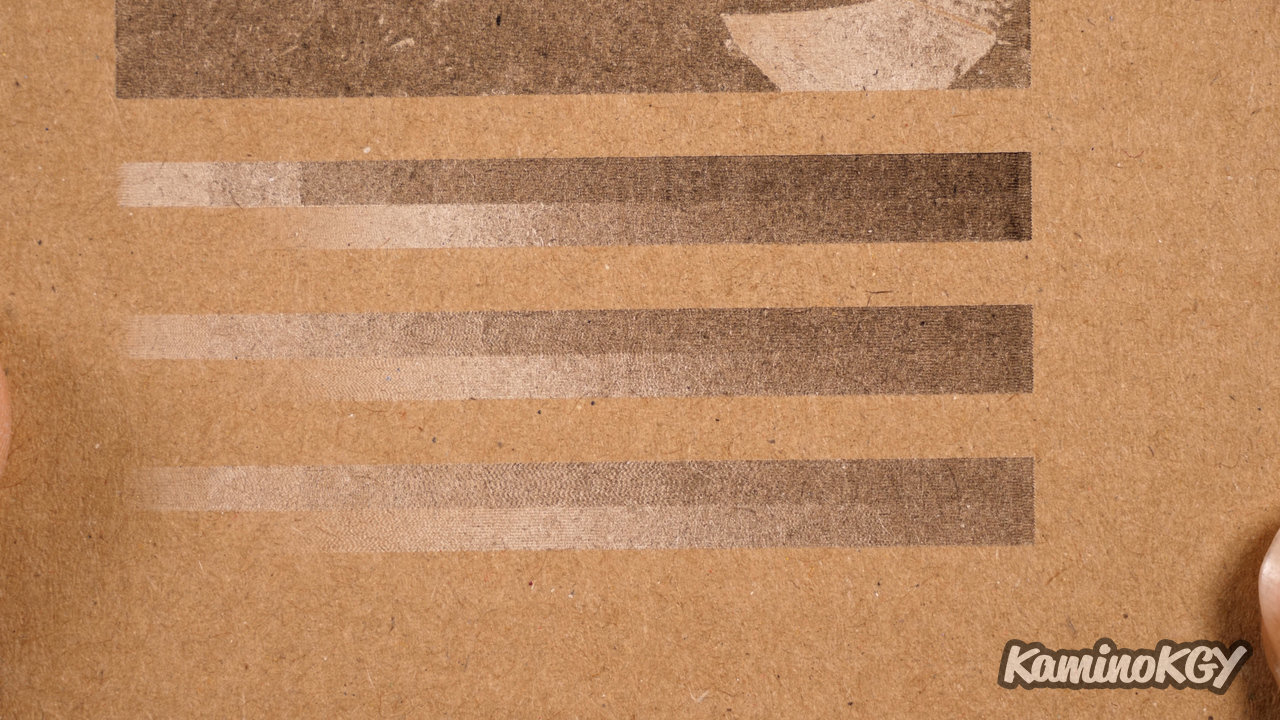
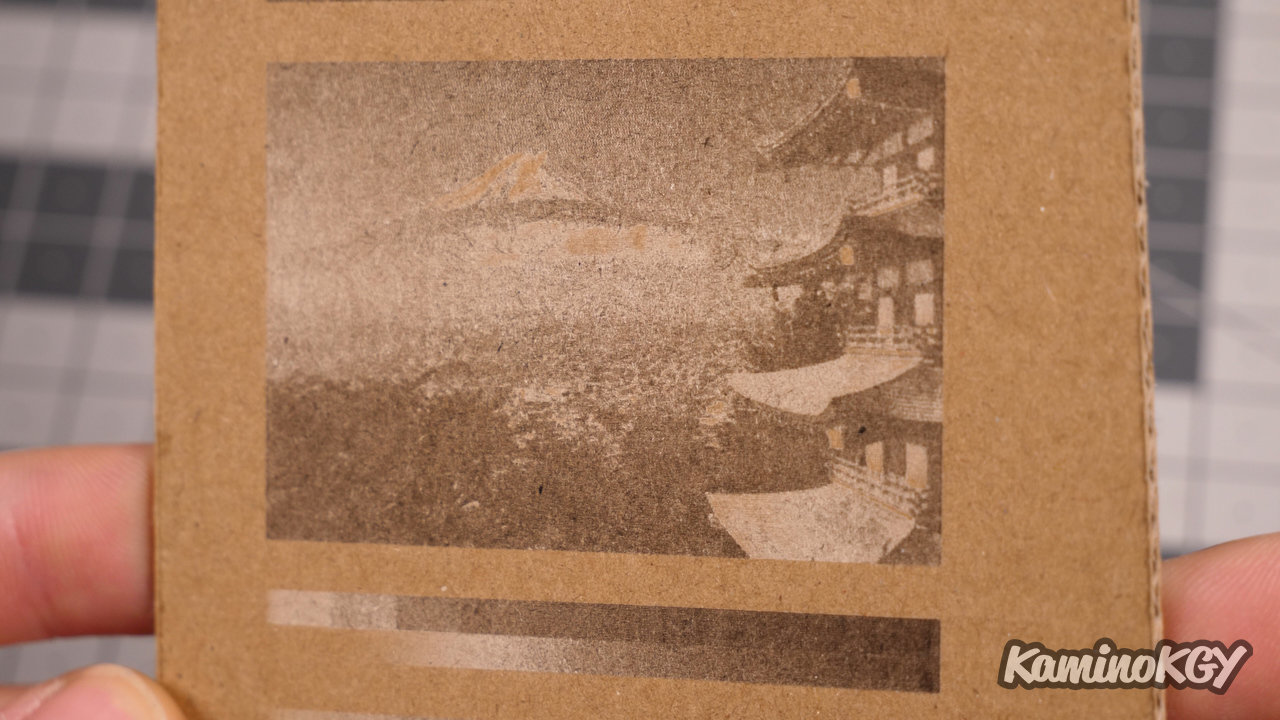
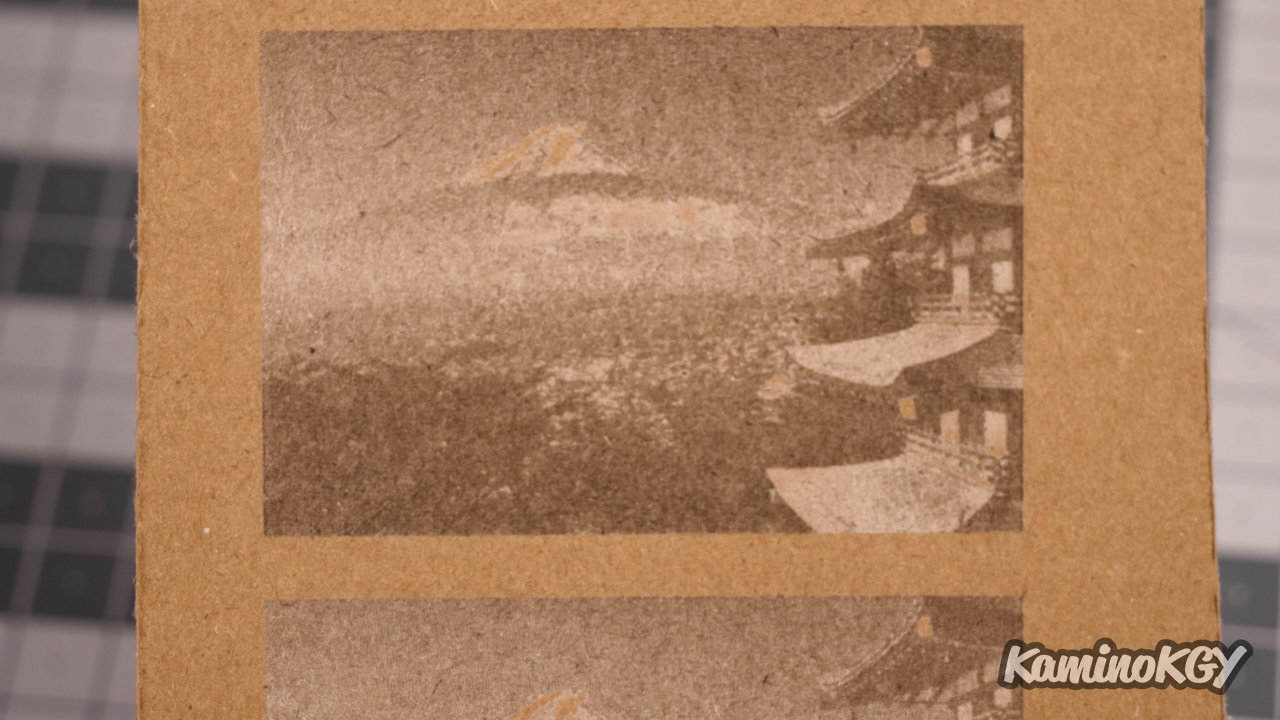
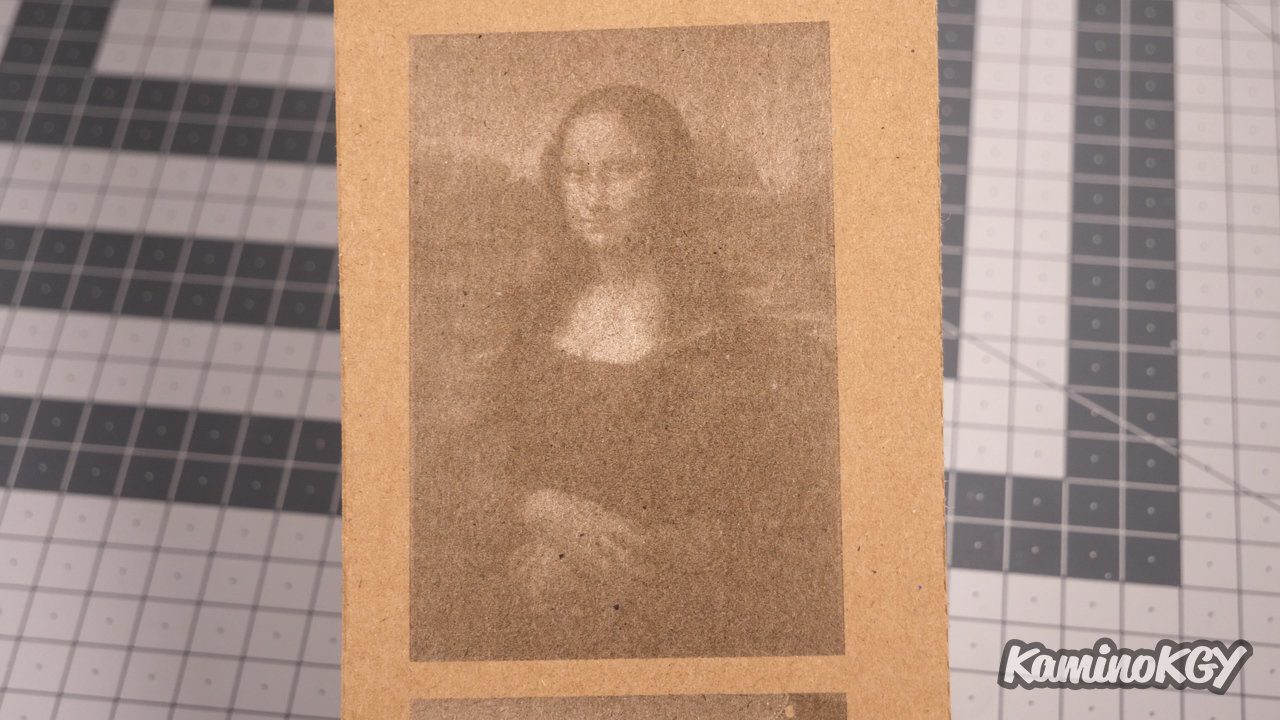
On test engravings, starting with cardboard, I started with the laser at max and a speed of 20,000 mm/min and the machine largely kept pace. After to have darker colors, I reduced to 15000 then 10000 on the gradients. I went up to 15000 then 12500 on the 2 Mt Fuji which stand out really well. This is also the case with the Mona Lisa as well. We could have a little more contrast by playing on the contrast and the brightness, but the initial result is already very satisfactory.
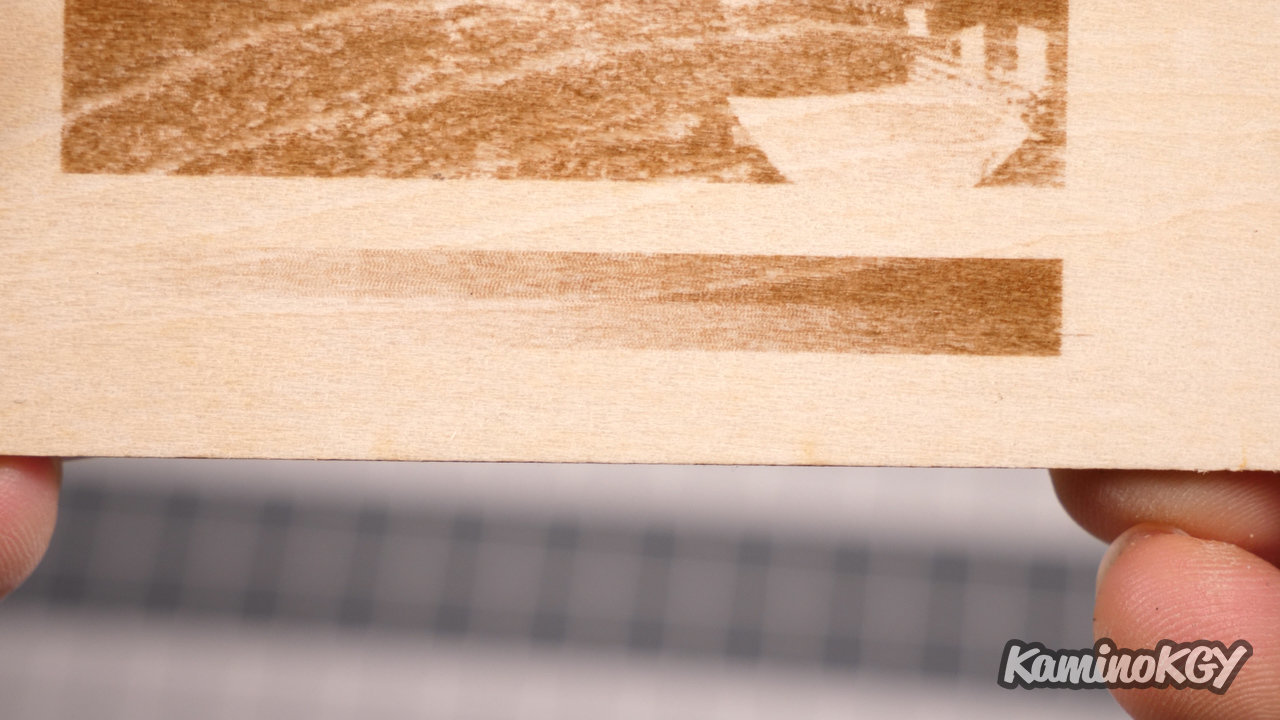
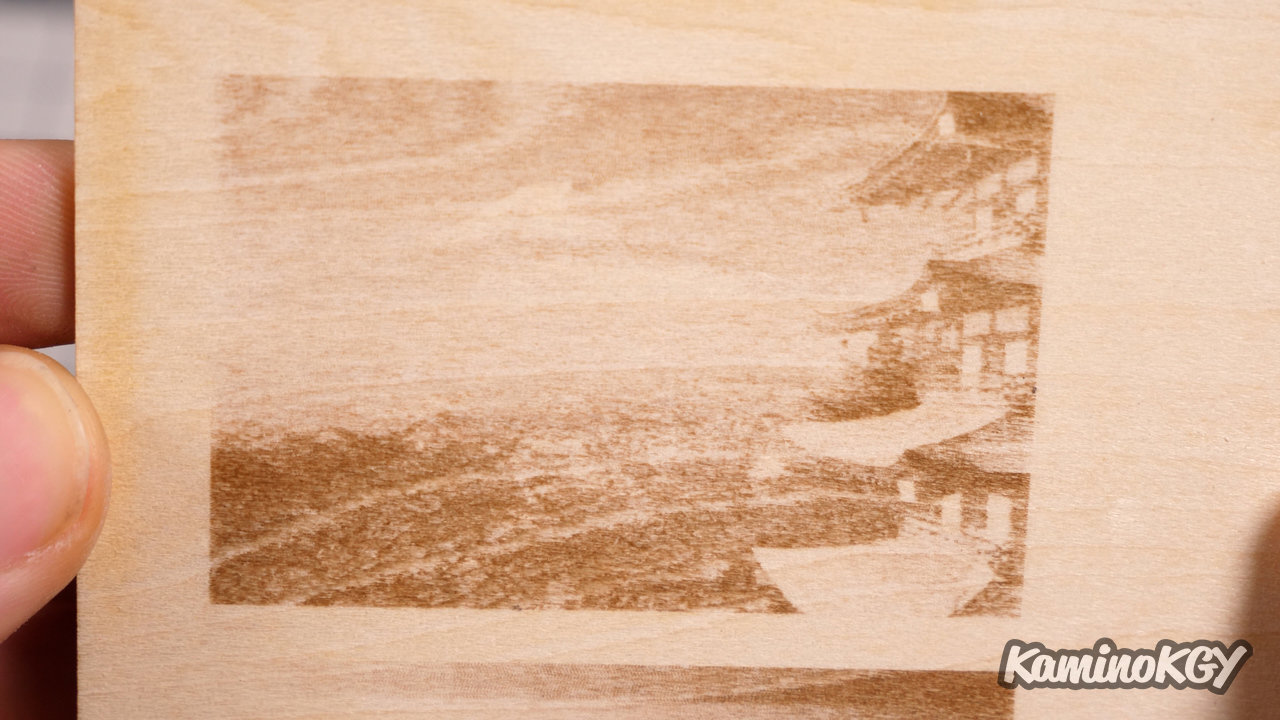
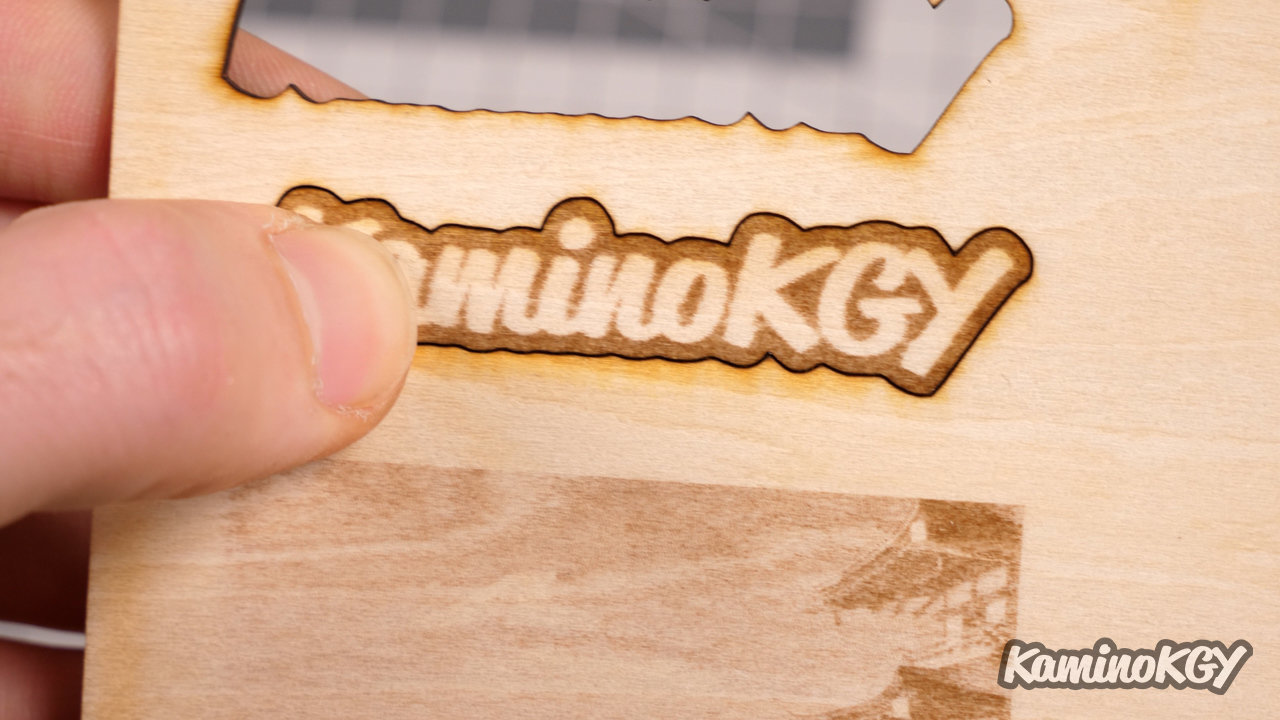
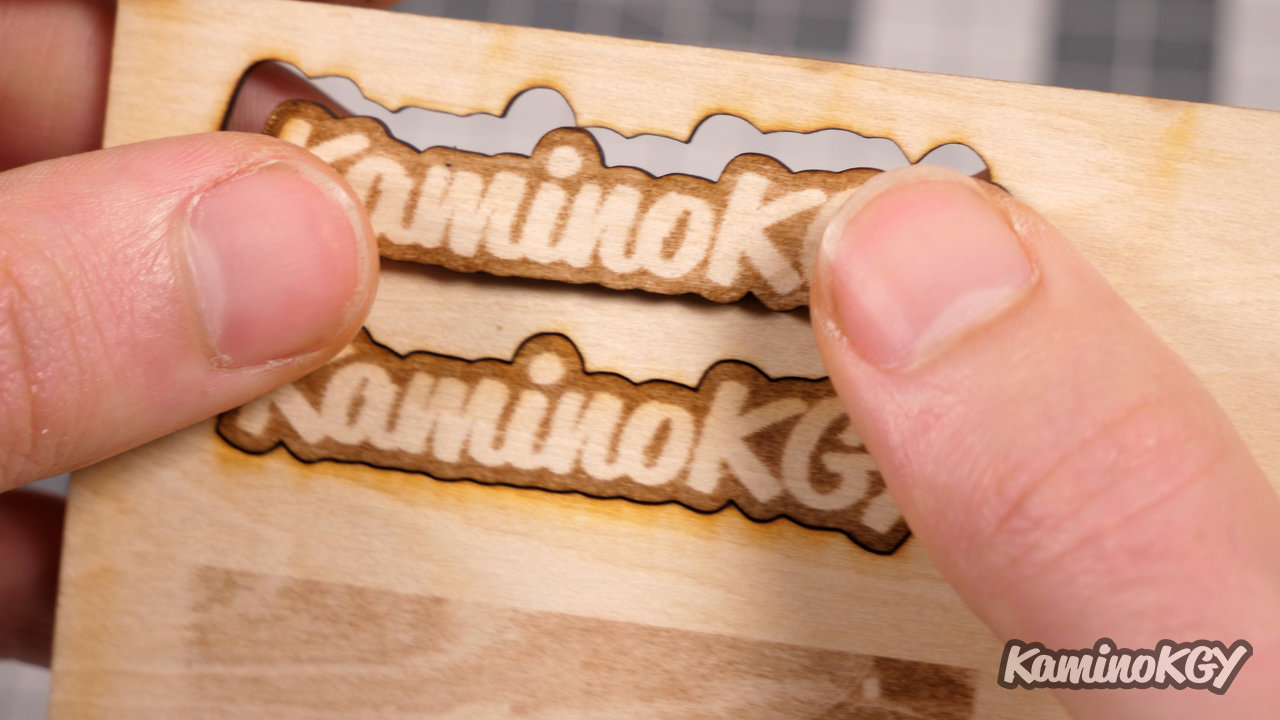
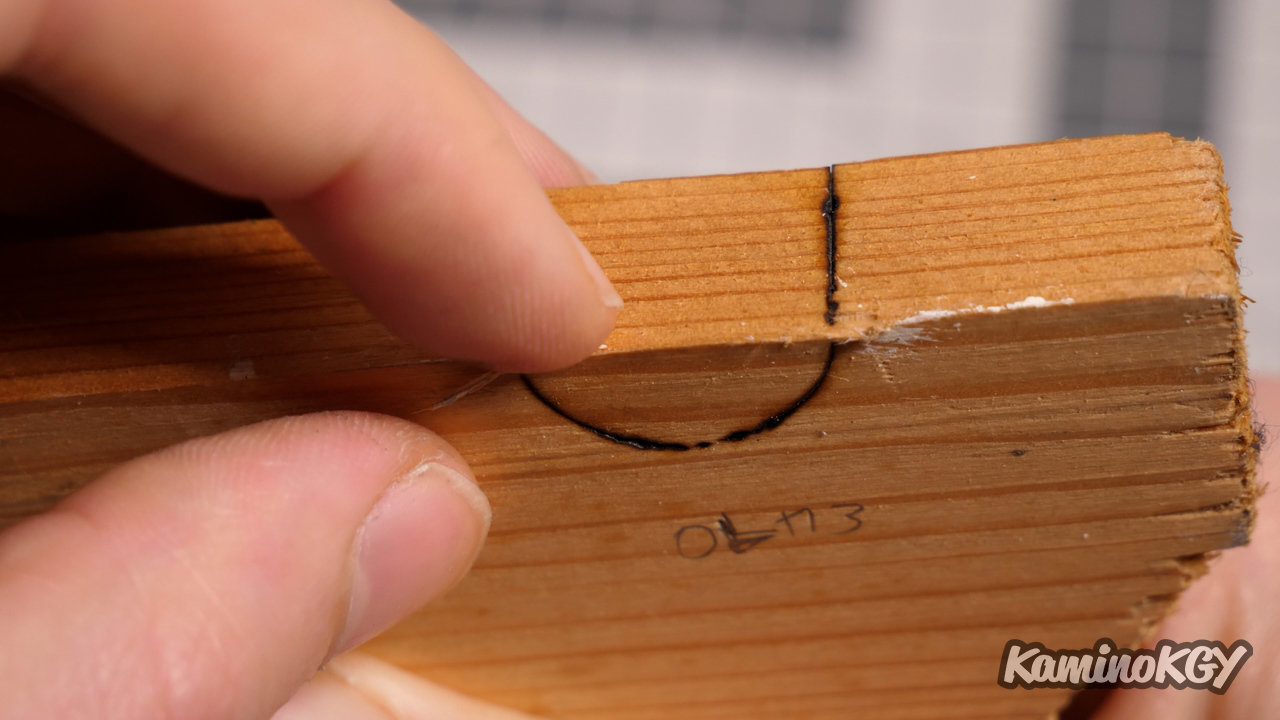
On 2mm plywood, I have a very clean little gradient. The darker colors of Mt Fuji stand out quite well, but you can see that the fairly heavy texture of the wood plays a lot with the white lines of the wood. Then, I did a first KaminoKGY at 500mm/min and a pass, I thought I saw the laser pass through, but in fact not. So I restarted the same engraving and cutting in 300 mm/min this time. And we see that the coin fell by itself
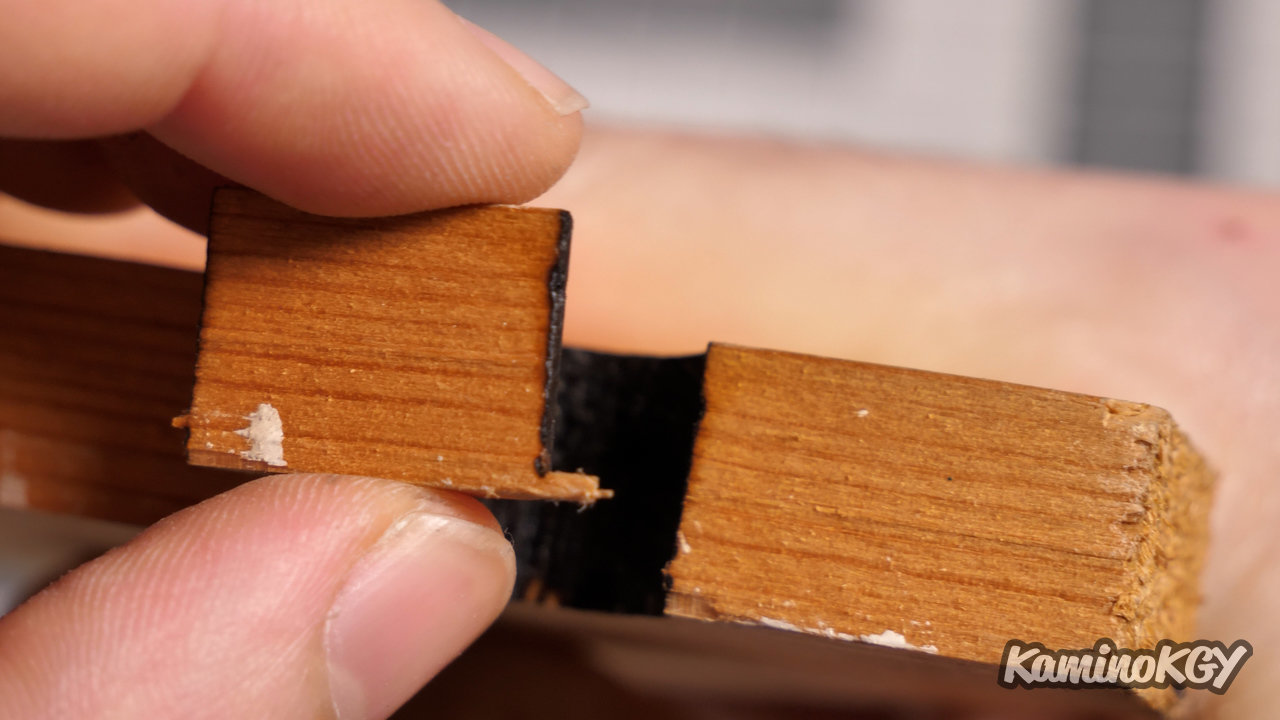
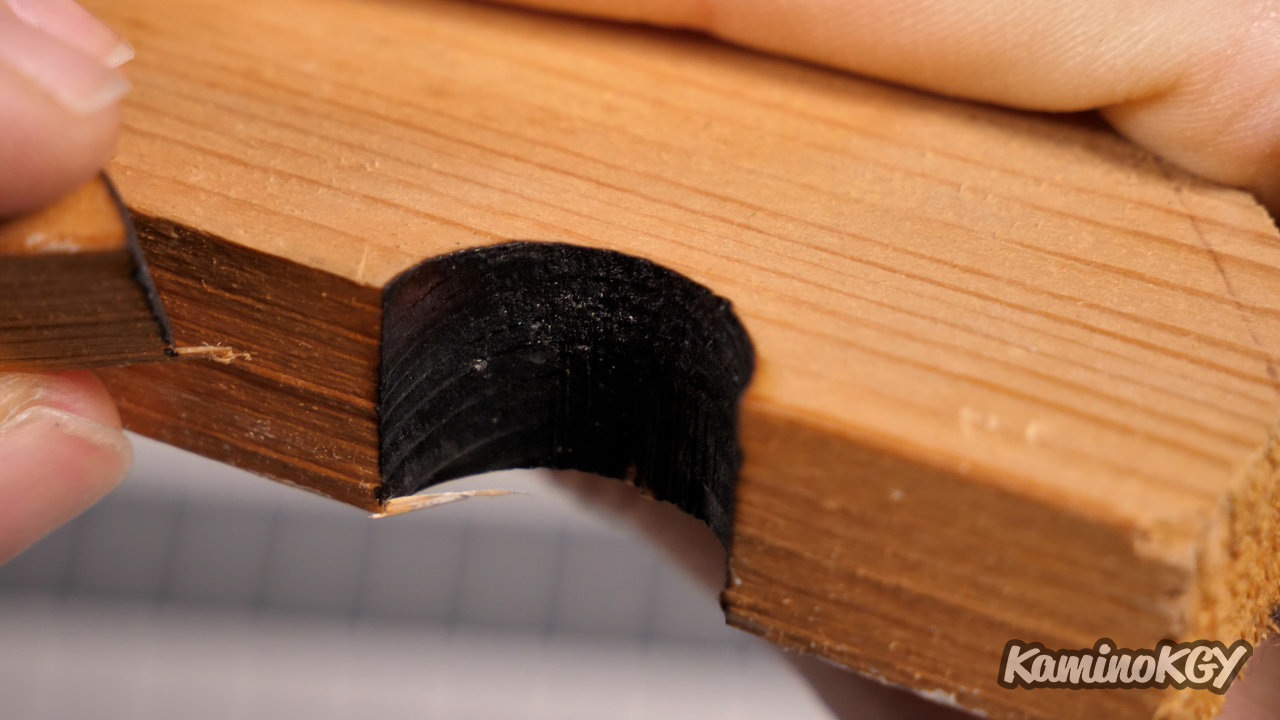
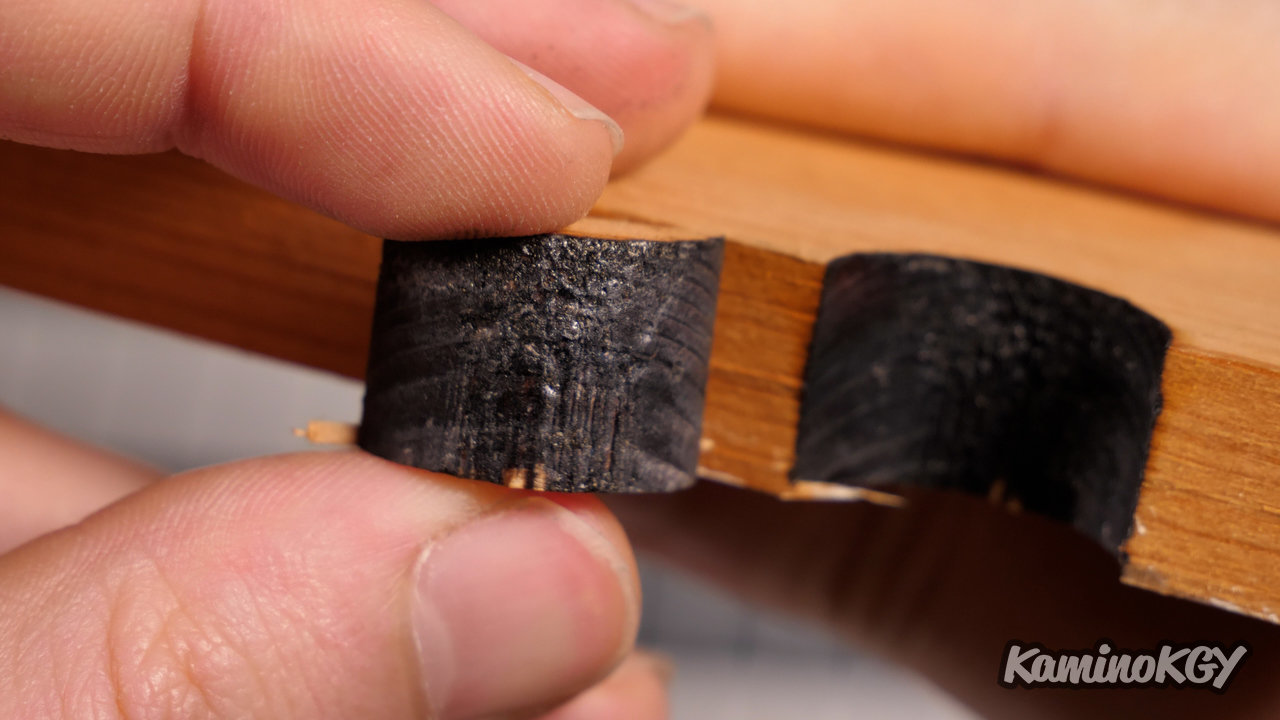
Then the 15mm board was traversed in 4 passes and released in 6 passes with the laser at max power. This shows that the laser is really powerful and can be used for other purposes than engraving.
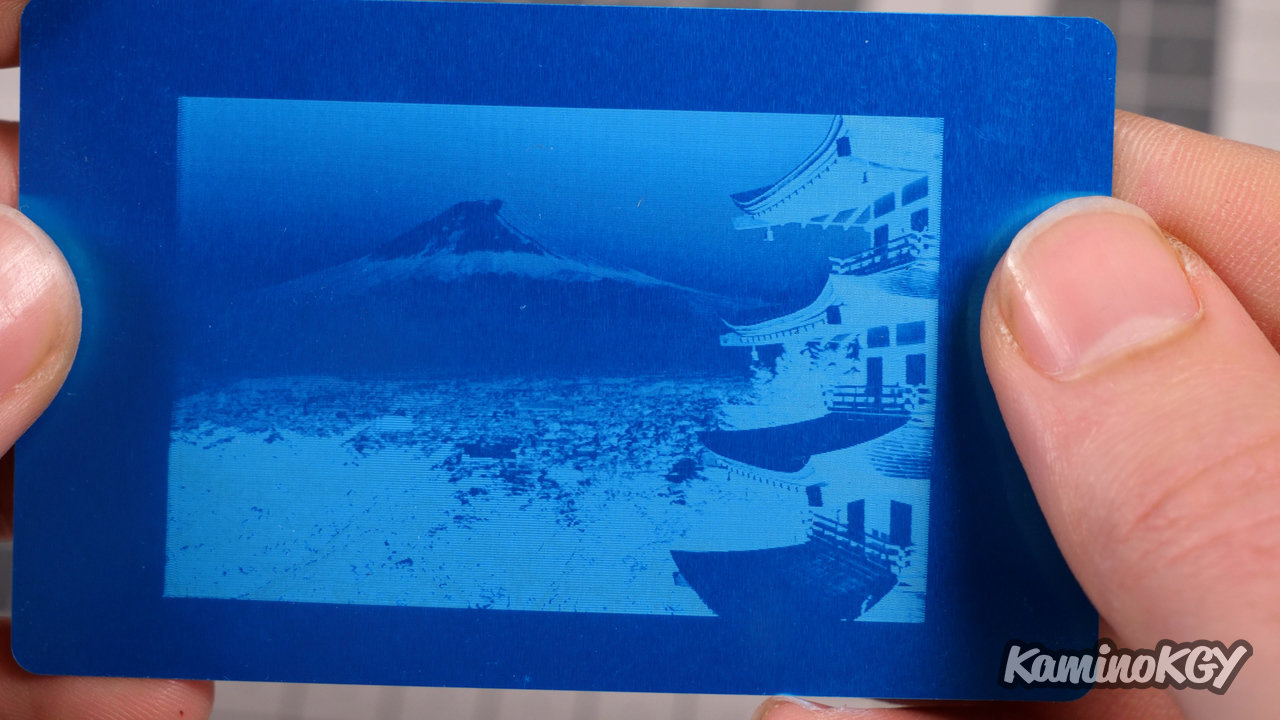
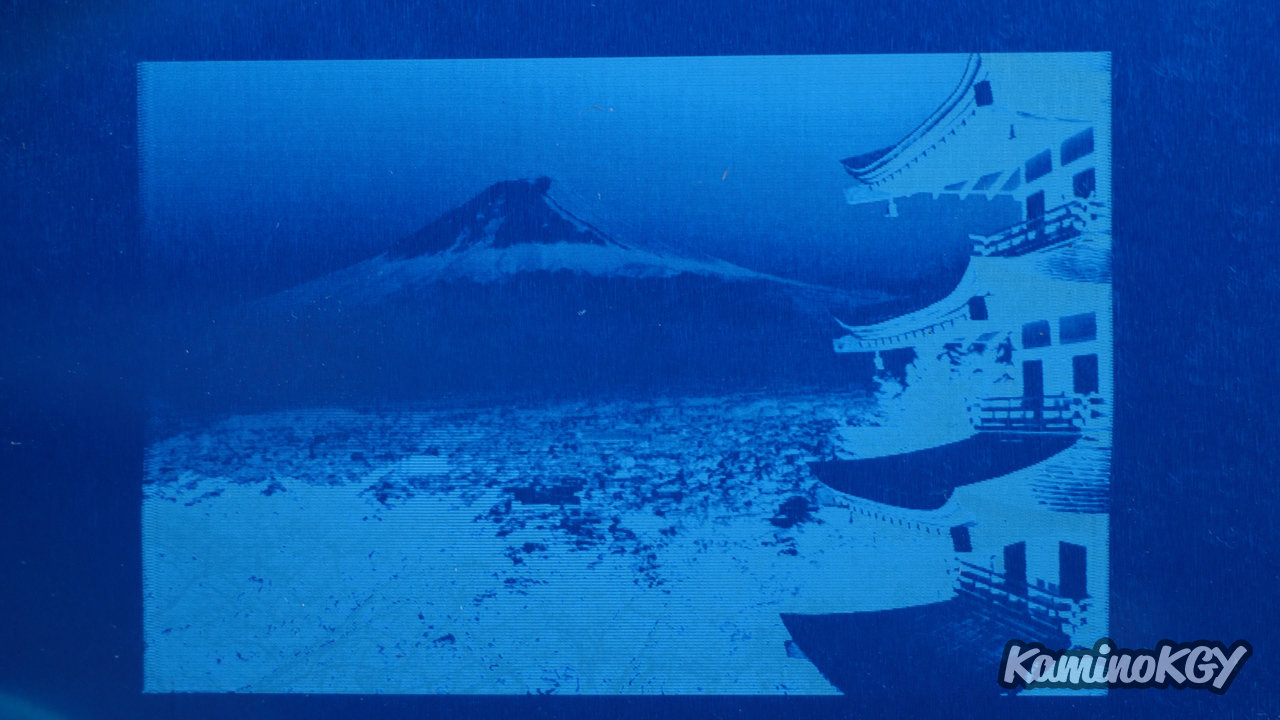
On a small aluminum card now, we can see that the parameters proposed by Ortur are powerful enough to mark the surface without attacking the aluminum with a white and gradient effect. The result is really beautiful and extremely detailed.
Review
In the end, all the engravings, except the aluminum, were made with the laser at maximum power and only playing on the speed to manage the intensity of the engraving. And frankly, the machine follows really well, which was not the case on the machines of other brands that we were able to test.
To go up a notch, it will probably be necessary to add the Air Assist and there, we will undoubtedly obtain even better finishes than what we could have had there. It's a bit of a putaclic phrase from Youtubers, but honestly, I'm amazed. Especially when I compare to the other laser engravers and cutters that we have been able to test in recent months. It's really nice to have a machine where you don't have the impression that you're going to struggle to find the right parameters, where you're going to have to reduce the engraving speed and the maximum power of the machine, because you have the feels like it's going to go to pieces.
This means that we can make engravings with the laser at full power and at a really high speed, like on cardboard for example, and have a perfect result. Honestly, hats off to Ortur for this Laser Master 3, which performs both aesthetically and technically.
Bye bye!