Today we are going to test a product a little bit different from the usual one, but which will undoubtedly find its audience among some of you, who have a more nomadic life or I don't know... who work in a garden shed in the middle of the forest. Anyway, we're going to test the UA550 from FlashFish!
Unboxing
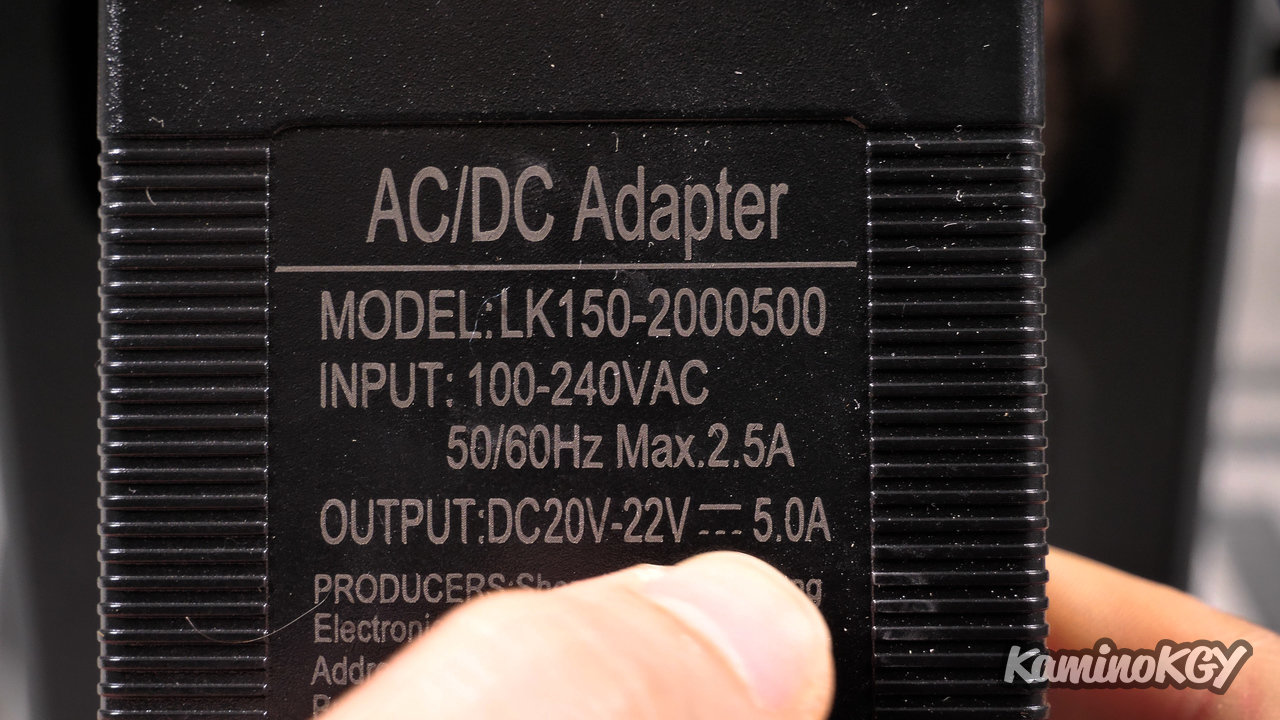
In the box, we find a small documentation, a box containing a cable for charging on cigarette lighter and a power supply that charges at 20 / 22 V and 5 A, that is to say a hundred watts. And finally, underneath, we find the beast, the UA550.
Features
If we go around the battery, we will notice right away a really neat finish in an aluminum casing. Its capacity is 550Wh which will allow theoretically to feed a device which consumes 100W during 5,5h. Note that there is no button to turn it on, because the device is more or less in standby mode as long as you do not ask it to power a type of circuit.
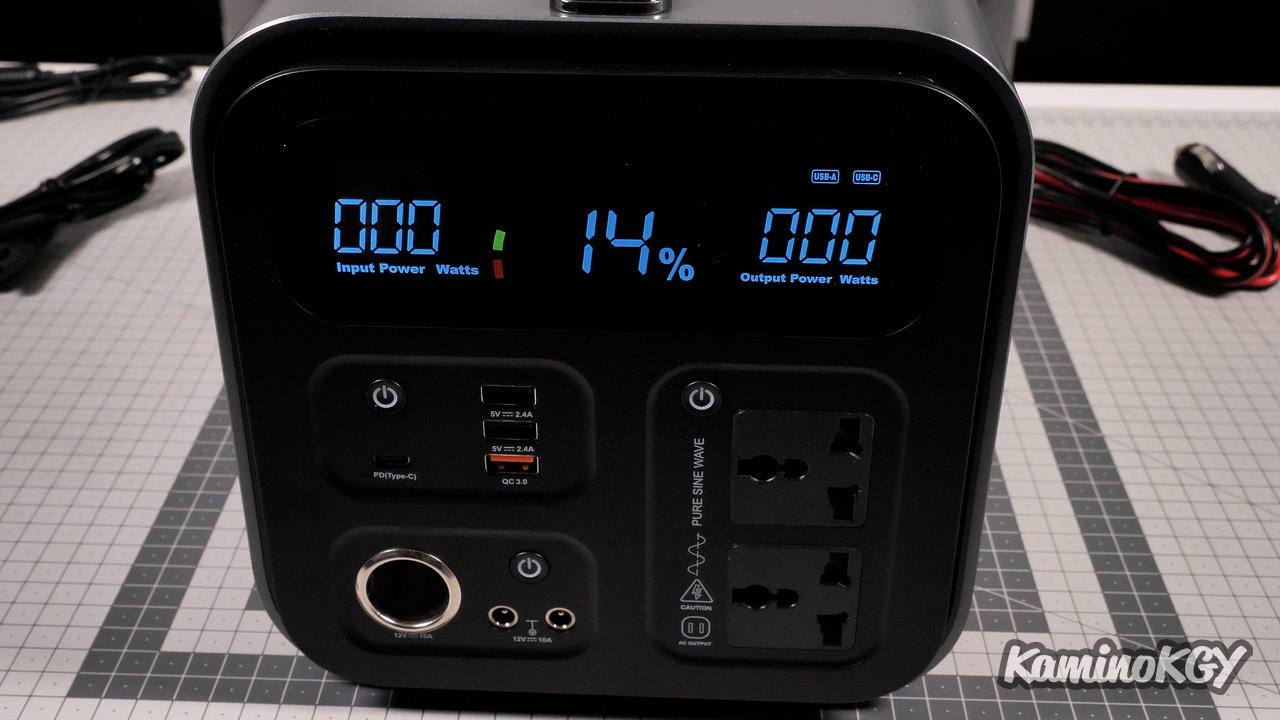
We will find, on the top left, the USB part with 2 USB A of 2.4A max, 1 USB A Quick Charge up to 60W and a USB-C port.
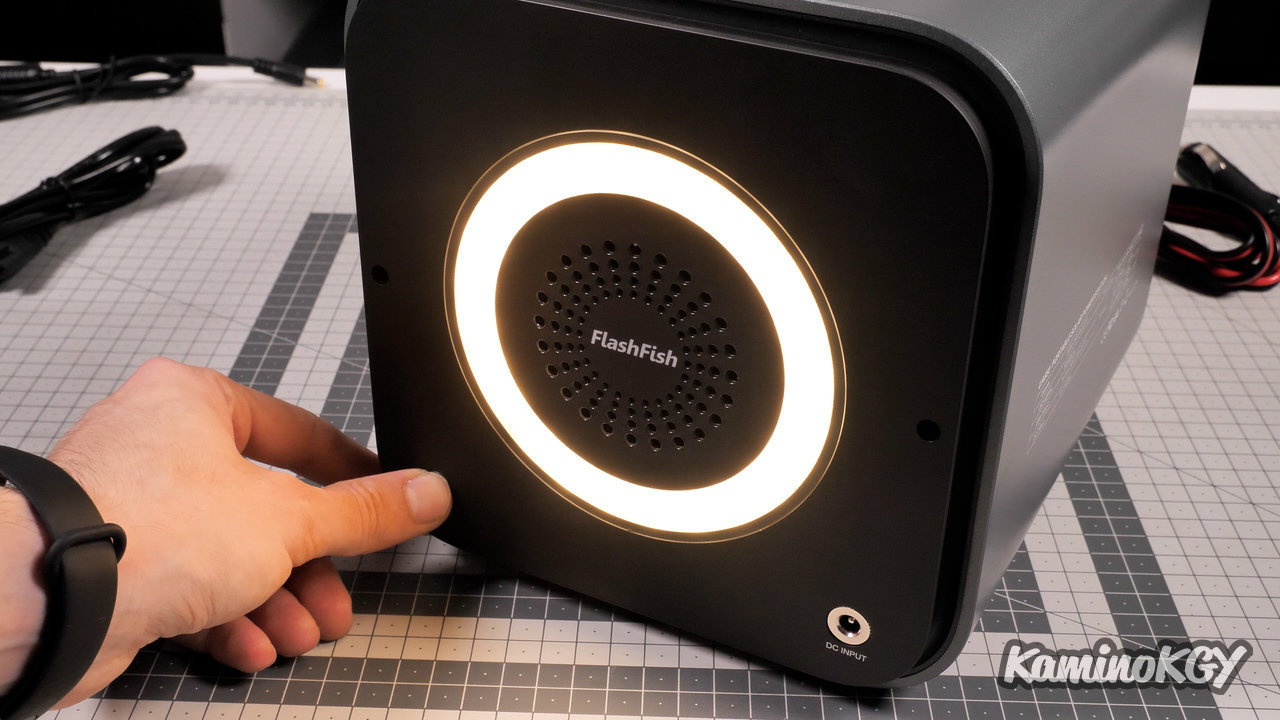
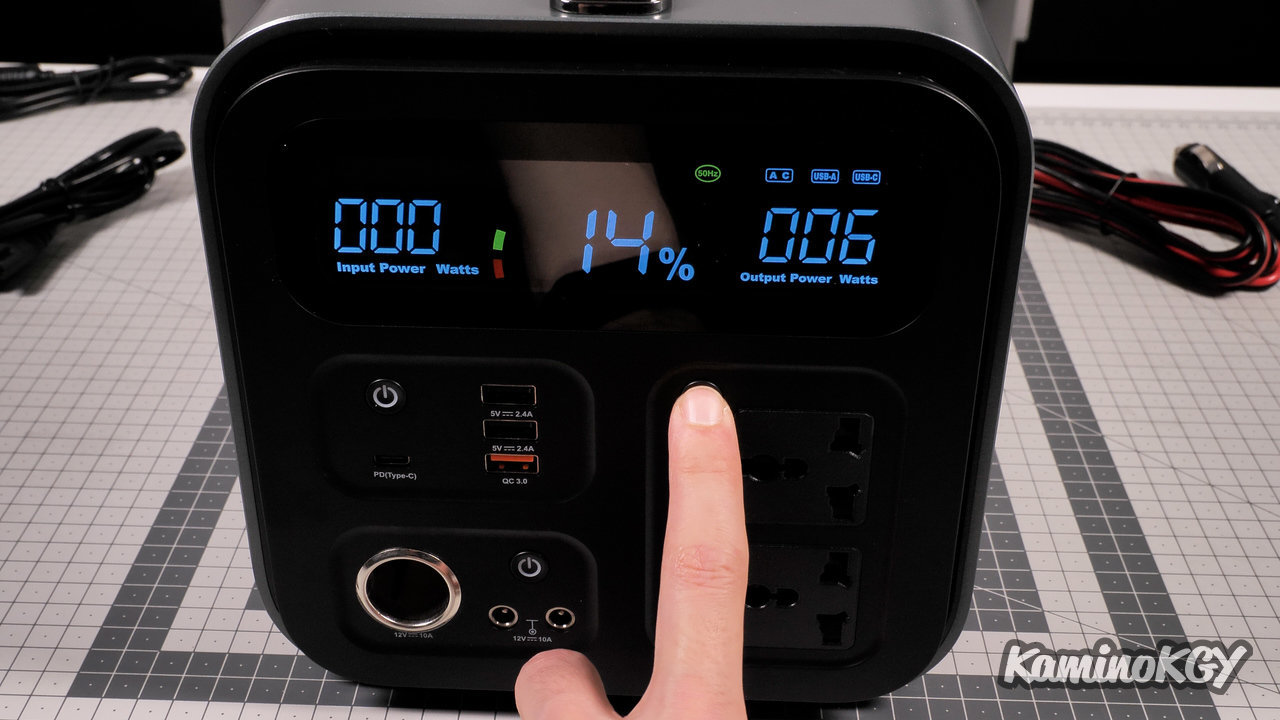
Then at the bottom left is the 12v DC power supply part. On the right it is the part with the power outlets of sector type with universal slots. Once we have turned off all the zones, the battery will automatically turn off. Finally, on the other side, we can also turn on a 5W LED circle that illuminates at 450lm. And the socket to charge the battery at the bottom right.
On the screen, we find the percentage of remaining battery in the middle, the input power of the battery on the left in W and the consumption on the right, also in Watts.
Consumption tests
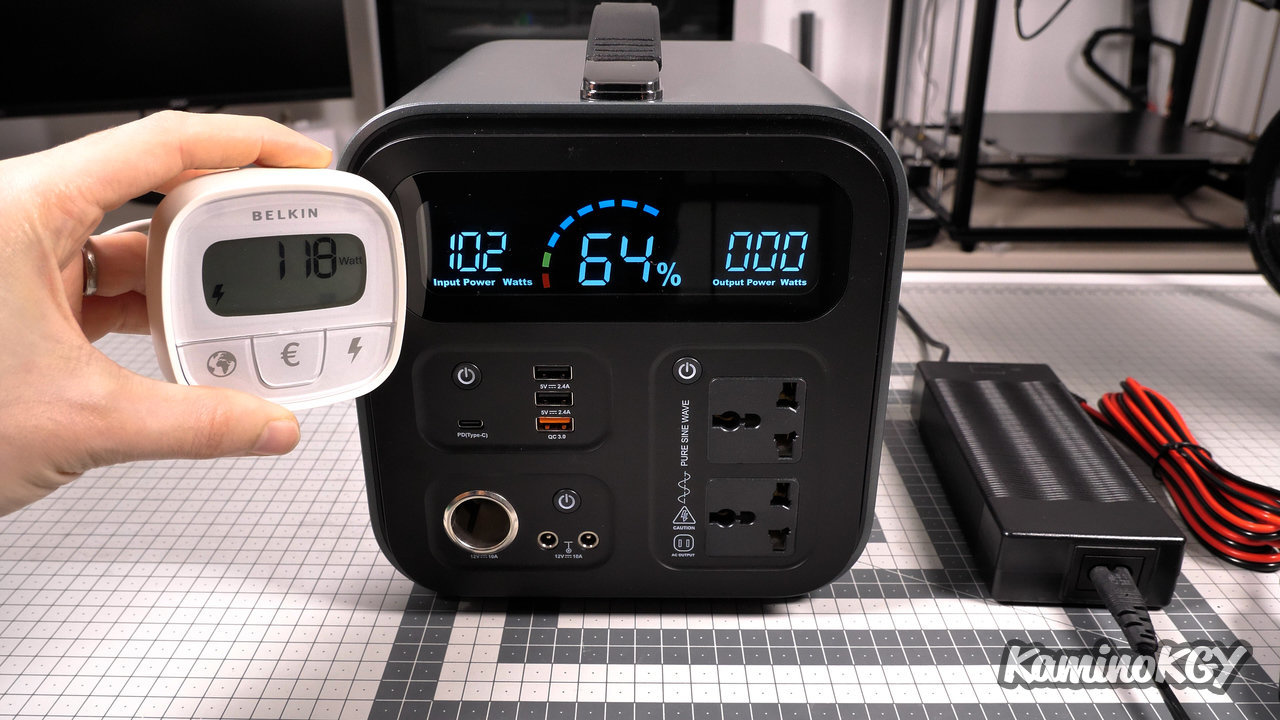

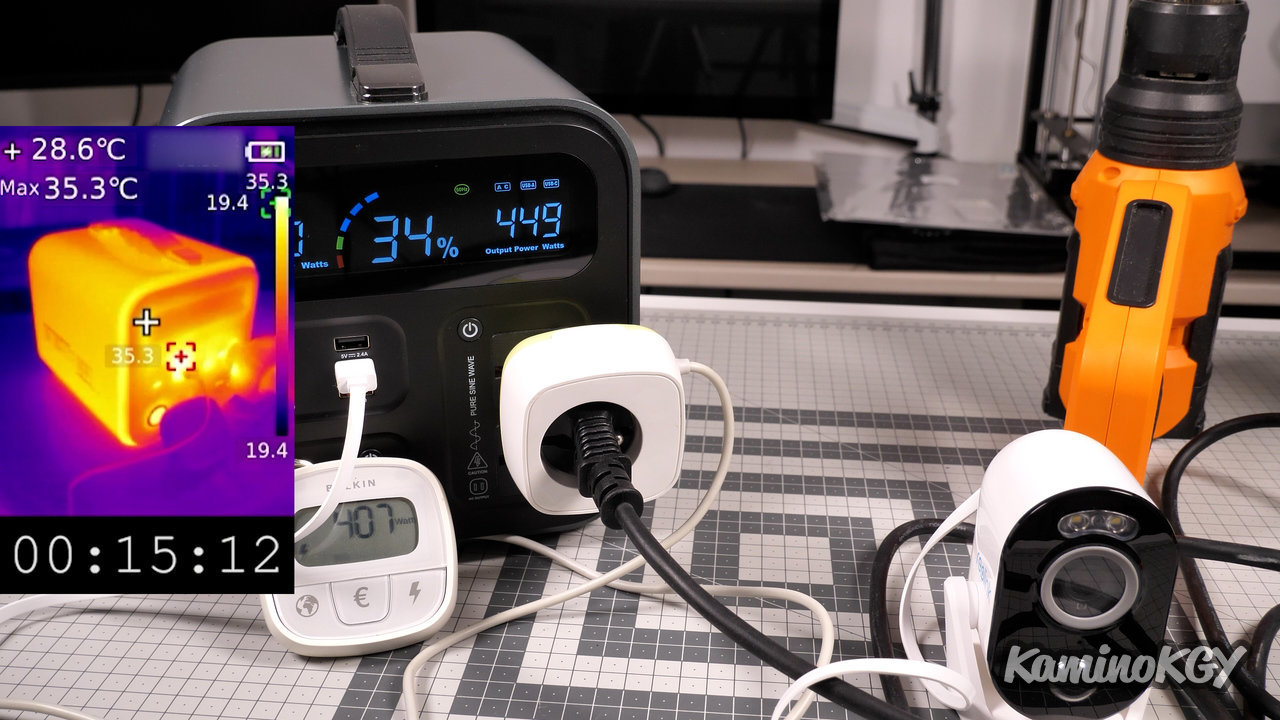
If we now use the mains charger to recharge the battery. We can read that it normally delivers 110W maximum. If we look at the device of measurement of the electric consumption at the level of the socket we can see that we have 102W announced by the battery and 118W by the device of measurement. What makes that we have a difference of a priori 16W between the 2. What is not nothing taken like that, but it should not be forgotten that we have losses at the level of the power supply certainly, but we have potentially a difference of measurement at the level of the plug and at the level of the battery. Knowing that the battery makes perhaps function its display and calculator via the sector directly.
If we activate the different zones of the front panel, it estimates to consume about 8W without load.
You can also use the cigarette lighter adapter and charge directly in the car. It's very practical to charge via the alternator of the car when you drive in thermal.
Alternatively, you can use solar panels, and there it becomes really interesting if you work in a place that is not connected to electricity. You won't have to be too power hungry for it to have time to recharge. But you can always put several panels in parallel to go faster. Even if it does not say how much you can go, the minimum is 100W.

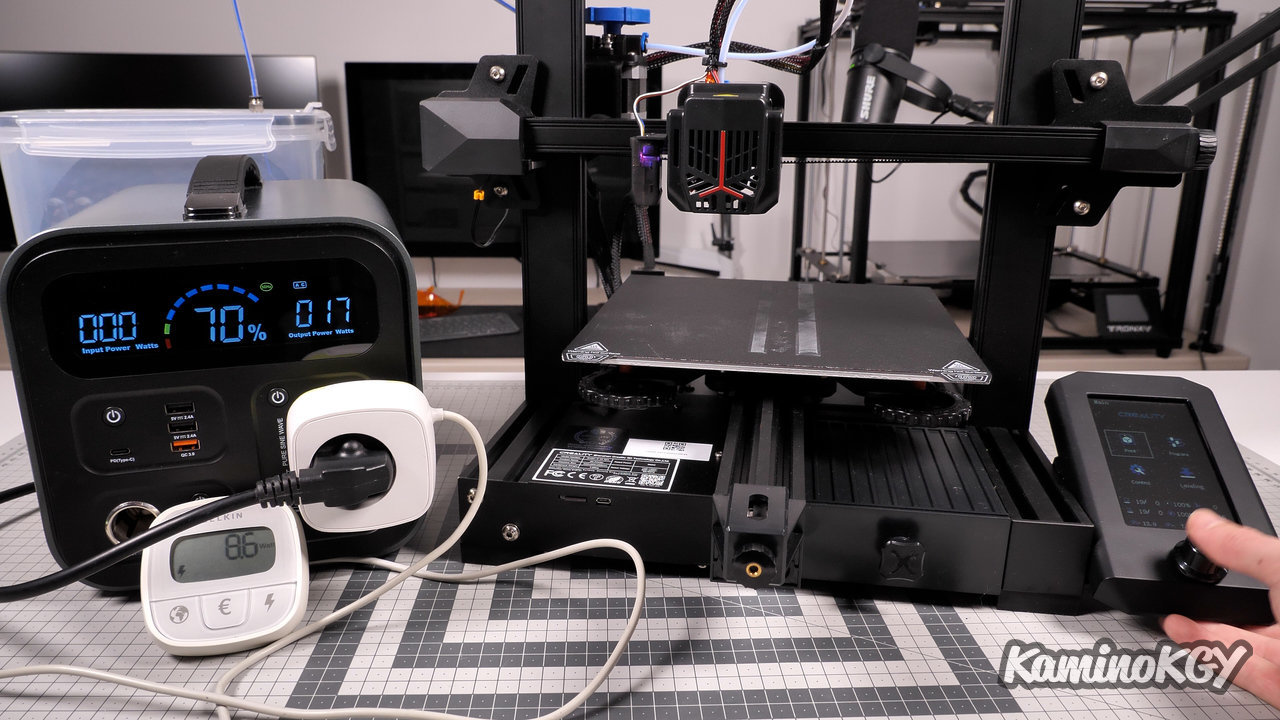
If we now do a small 3D printing test with the Ender 3 v2 Neo connected. We consume about 8W at no load by the printer. As soon as we start printing with the preheating of the nozzle and the plate, we immediately go up to 300W. It will be necessary to use in the 4% of battery to finish.
Once the printing started, we turn around 120W on average to maintain the nozzle at 200°C and the tray at 60°C. The printing ends with 54%, or 16% of the battery capacity used to make 30 minutes of printing including the preheating. On this basis, one can estimate to be able to print 4 minutes of preheating, then 4 % of battery and 26 minutes of printing take 12%. One could thus make a 208 minutes printing with only one load, that is to say approximately 3h30. Which is still rather honorable.
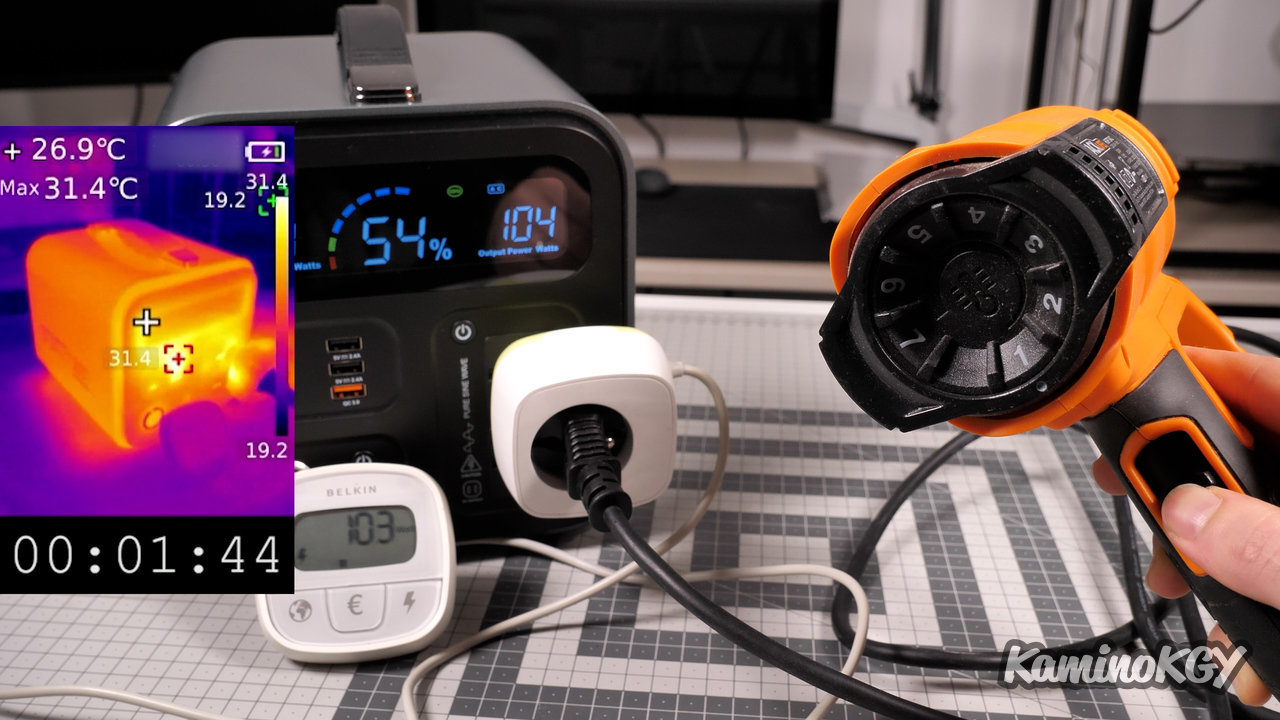
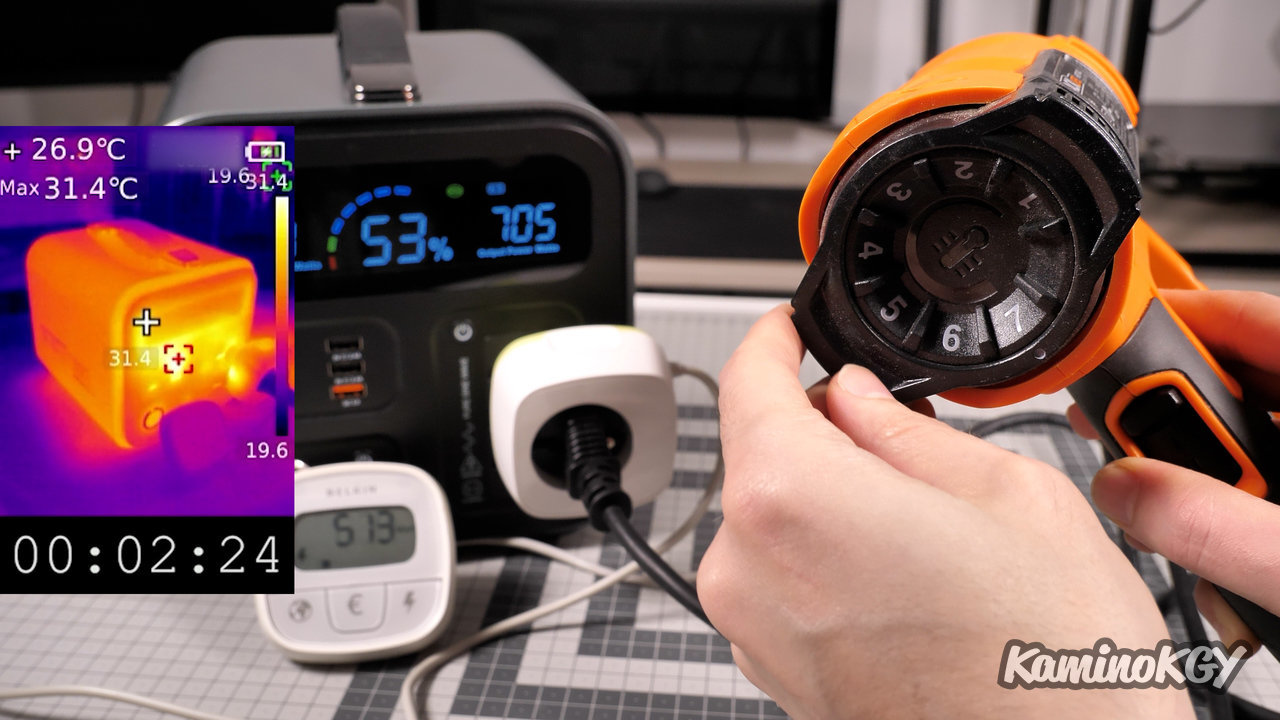
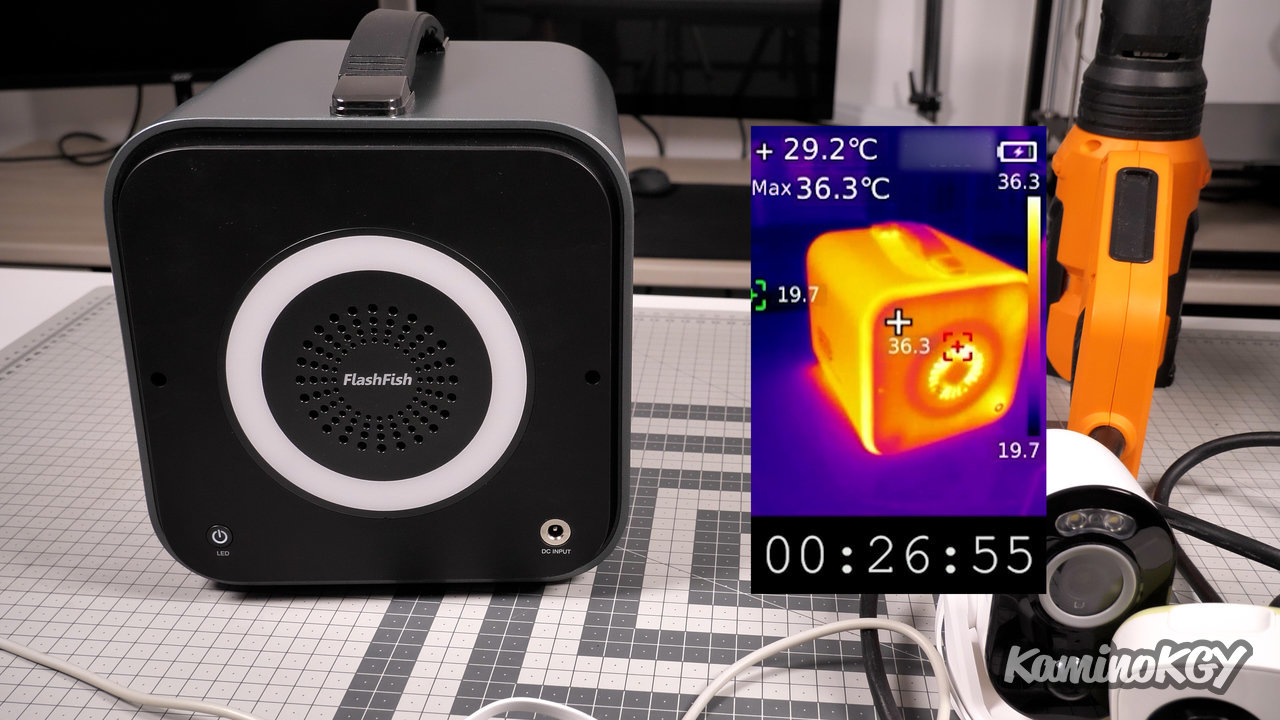
To see a bit of the battery's temperature rise, I let the heat gun run at a power draw of just over 400W. And on the USB, I put a surveillance camera and a fan on load. Note that I removed the fan at one point because it was getting hotter than the battery and was distorting the max reading on the thermal camera a bit.
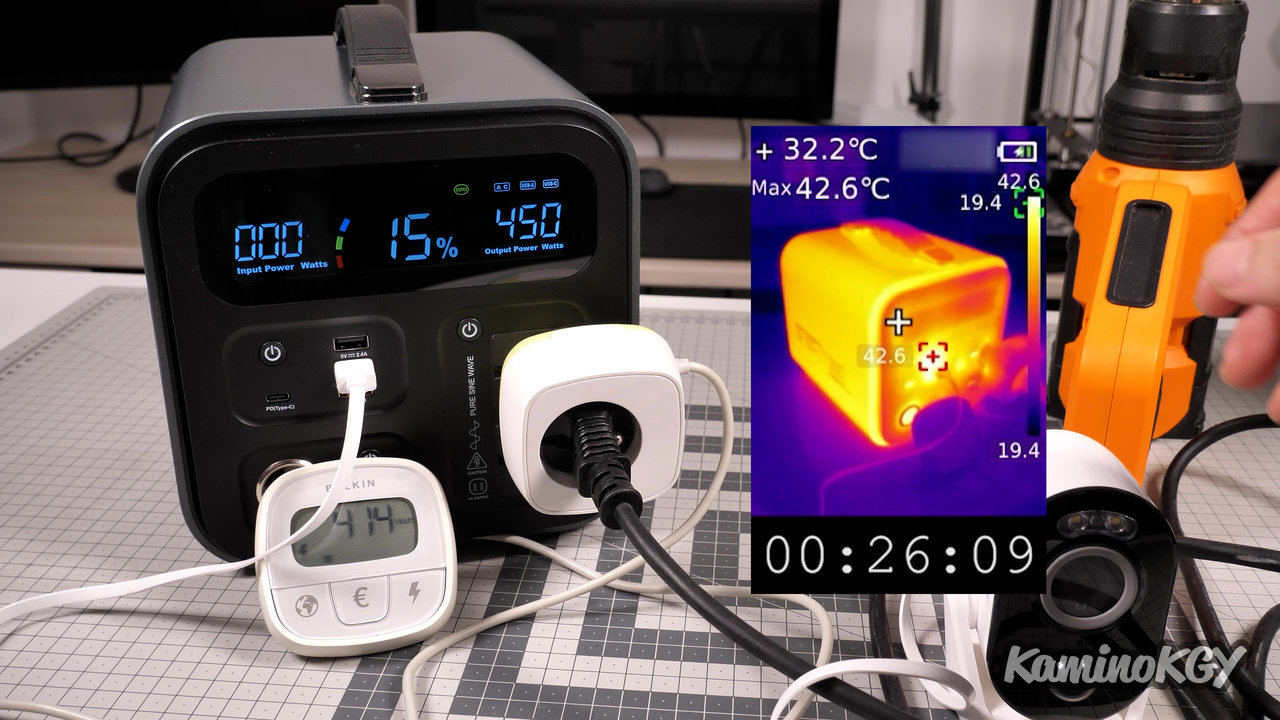
I shut down after 22 minutes and 37% of the battery consumed. We went from 29.9°C as a starting value, after 3D printing, to 42.6°C. Which starts to rise in temperature, but frankly it remains really reasonable and slightly warm to the touch.
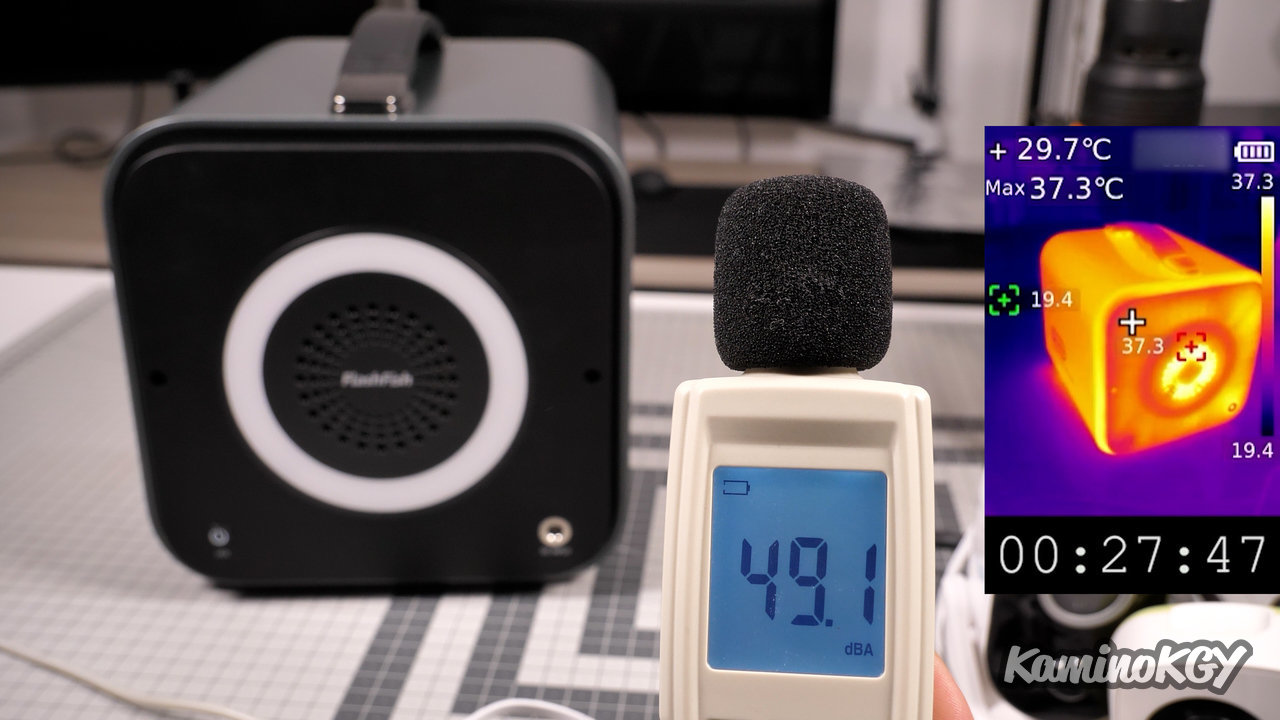
With regard to the noise level of the cooling fan, we are at about 49 db, knowing that the measurements are taken at only 20 centimeters away. That's largely sustainable, especially since it's only going to go off after heavy use like here. It hadn't even had to trigger following 3D printing.
Frankly I will not have much to say about this battery. It is really well made and inspires confidence, unlike other products that look much more cheap. I could have looked at what's inside, but I don't hide from you that I don't have enough knowledge to be really critical on this kind of product, and tell you if such or such component is suitable or not.
Small teaser, but this battery is actually going to be very useful for a big project, which I will announce soon on the channel.
Salut salut !