Today we are going to test the Ender 5 S1 from Creality, a 3D printer that looks like CoreXY, without being one. The big advantage of which is its printing speed of 250 mm/s maximum. But will we really be able to reach them and especially for what quality of printing? If you're thinking of buying it, you really should watch the rest of the video.
Unboxing
In the box, there is a pocket with documentation and stickers, a box containing SD card, screws, tools & accessories, the power cable, spool holder and spatula. Fasteners to fix the plate, brackets to maintain the structure of the machine. We have the Z axis upright, the supports for the plate. Below, there is a spool of filament to do some tests. We have the top frame of the printer with handle on the sides and hotend pre-assembled. We find the heating plate with the flexible magnetic plate. Finally, we have the aluminum profiles serving as the upright and the base with all the cables to be connected to the back.
Assembly
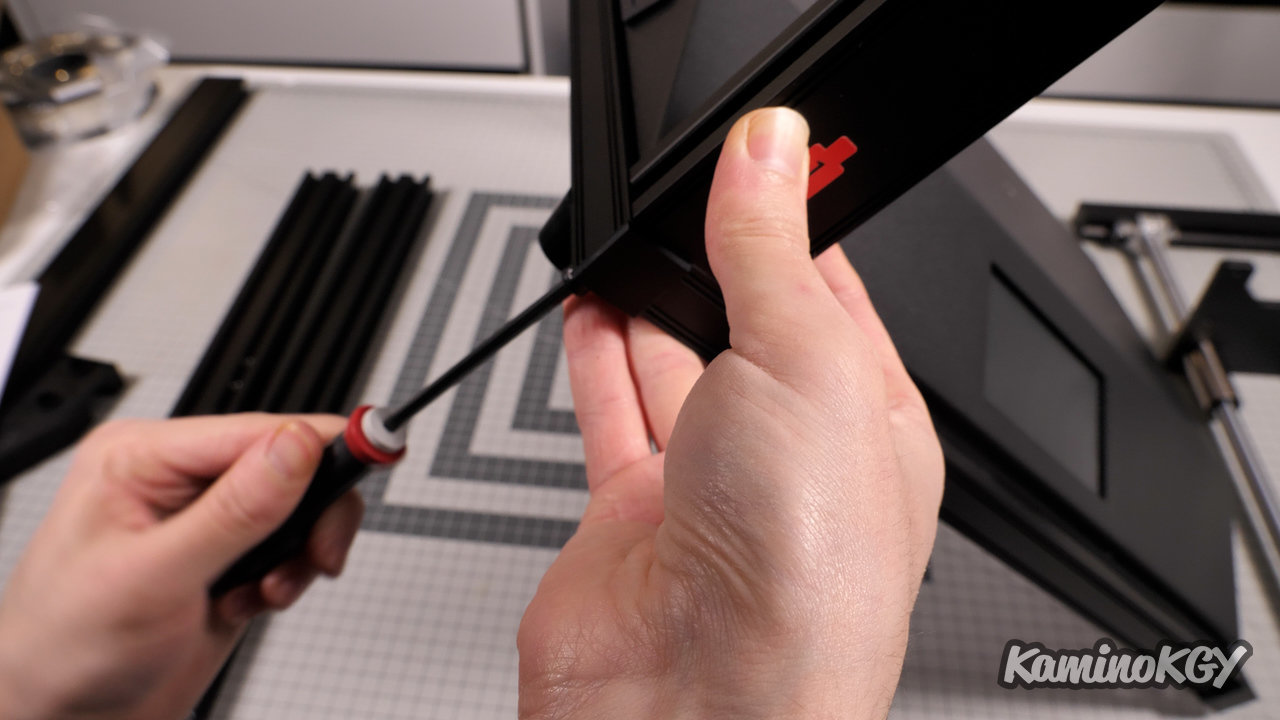
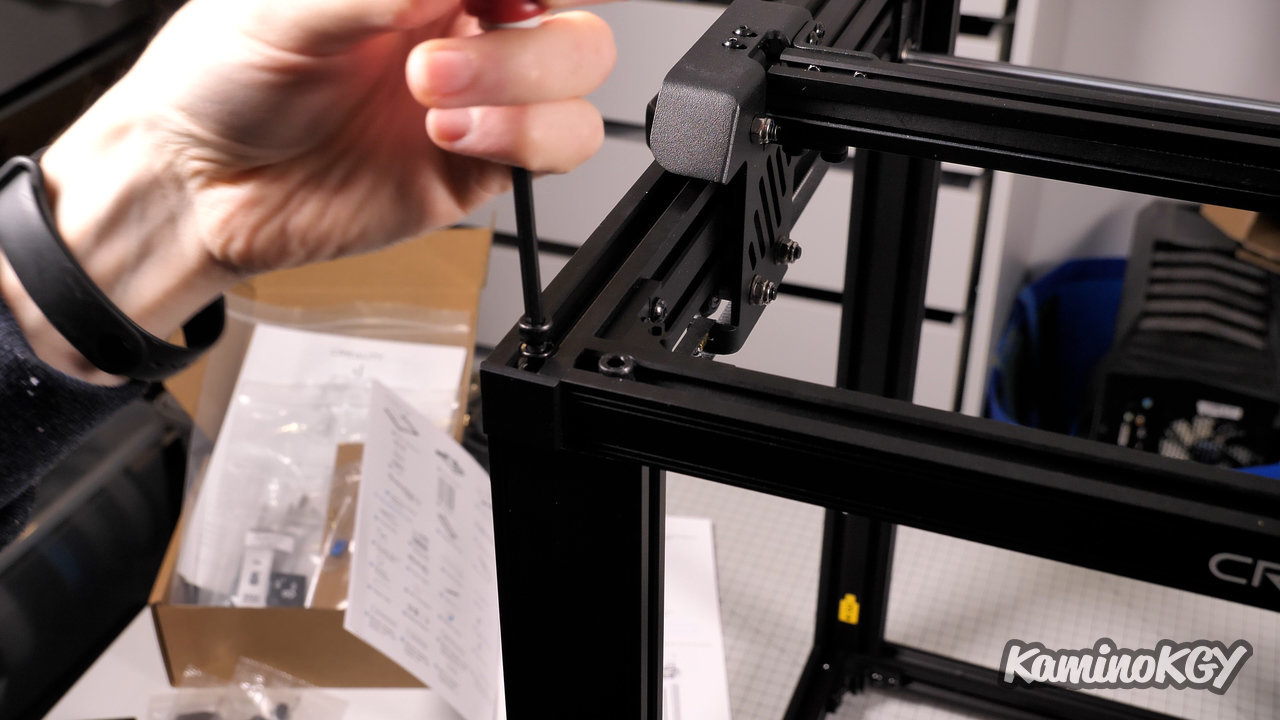

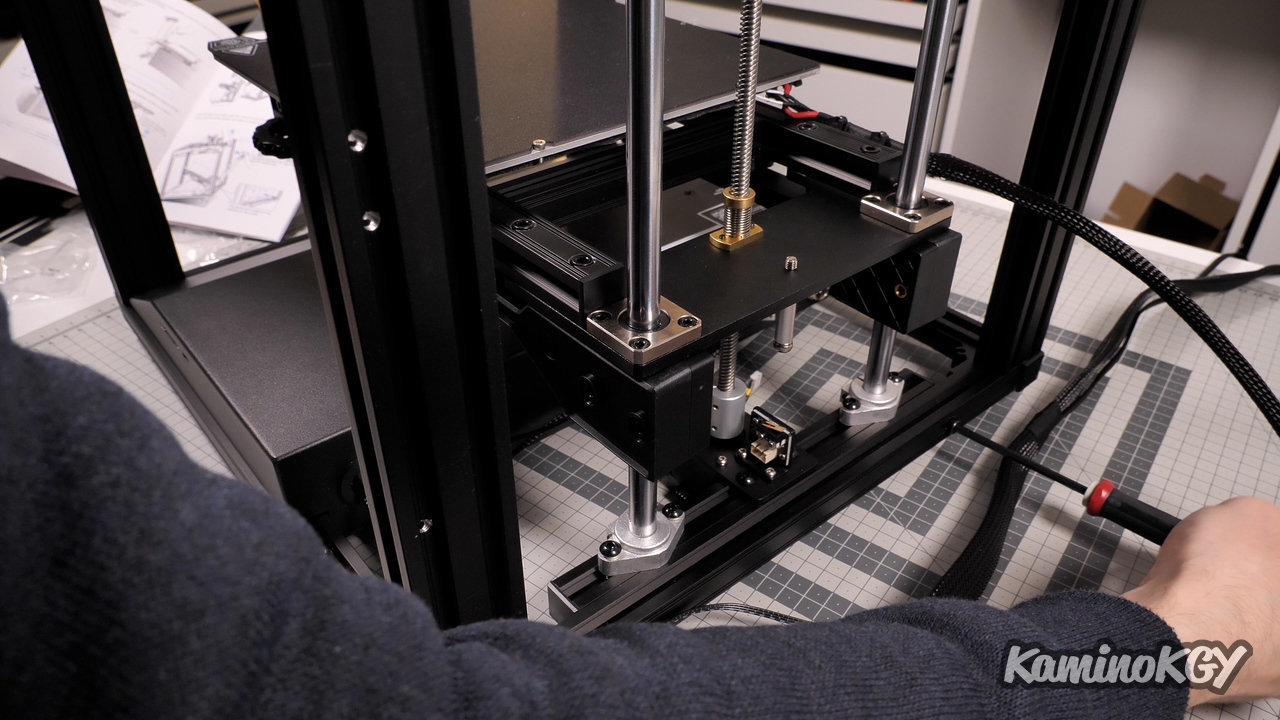
Regarding the assembly, it takes a little longer than on the other printers that we test the most on this chain. But it remains a largely pre-assembled machine. So we start with the aluminum profiles that are screwed onto the base. We do the same thing in the 4 corners. We do the same on the top of the machine. We just screw the heating plate on the upright of the Z axis, the fixings on the bottom, which are taken up on the linear bearings. Everything is fixed on the back of the machine by sliding the plate. The structure of the machine is reinforced with the brackets which are placed at the rear, on each side. Next, it's the turn of the spool holder. We connect the X axis motor and the hotend with its tablecloth on top, the end of filament detector on the side of the machine, the X axis motor, the heating plate on the base, the PTFE tube . We do some cable management for the X-axis motor, then we hold the cable on the back with plastic ties.
Features
Regarding the characteristics, we have a print volume of 220 by 220 by 280 mm. Which is a fairly classic base, with a slightly taller height. On the maximum temperature side, we will have enough to do with 300°C for the nozzle and 110°C for the bed.
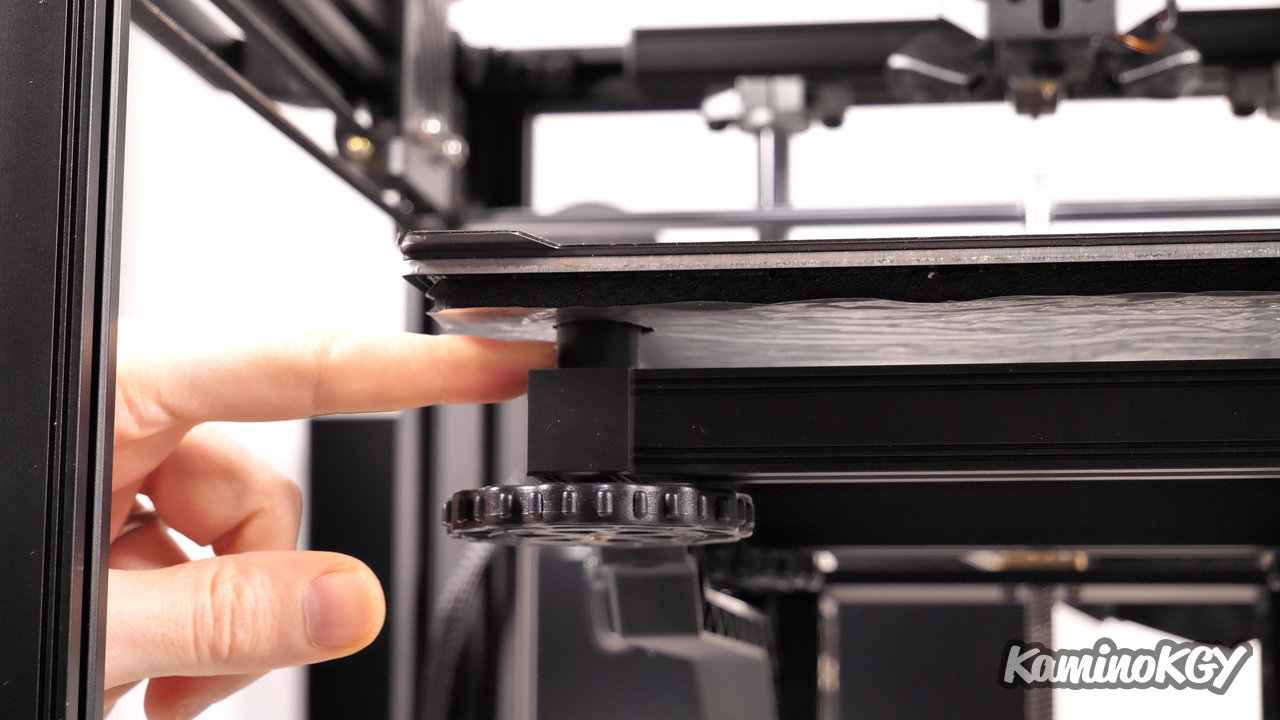
If you take a look under the deck, you will find wheels for manual leveling. And we can notice that there is no spring to keep the plate under pressure, but silicone cylinders which should stay under pressure better over time, but give a fairly low margin of maneuver.
Small practical point, we have carrying handles on the sides of the machine. It's good for moving it from one place to another without having to catch it by the profiles.
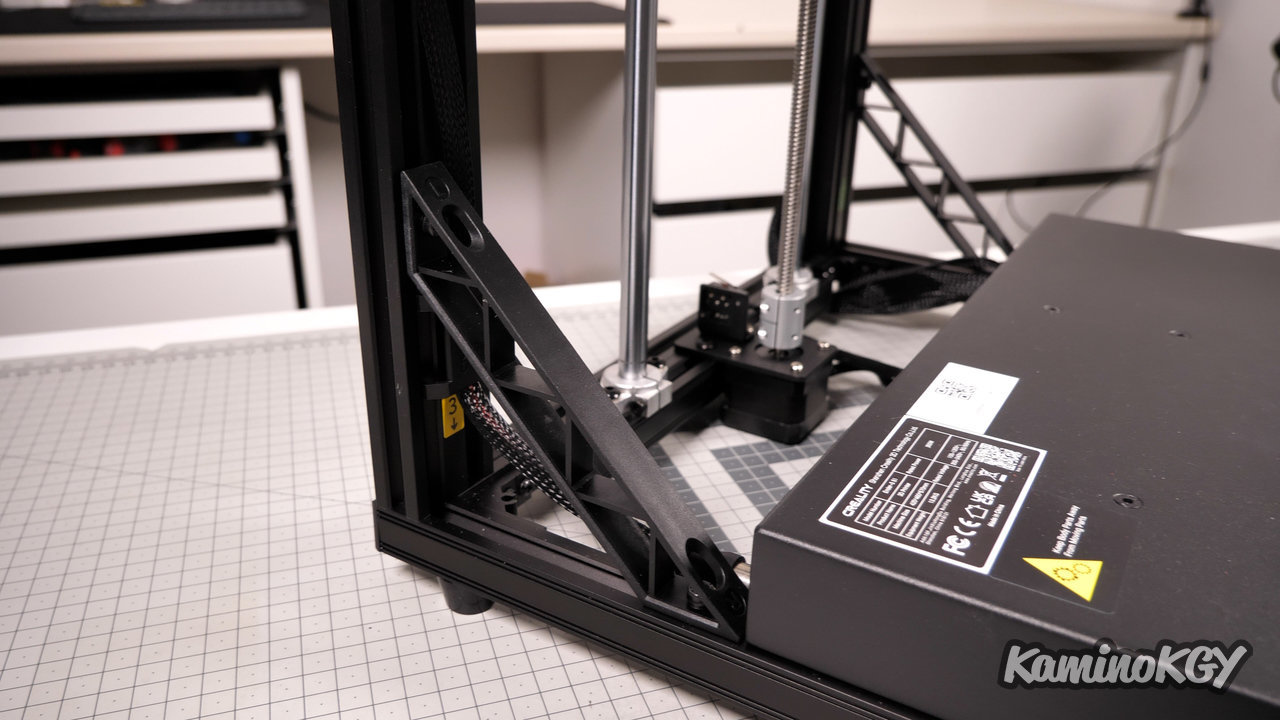
As we saw on the assembly, we have brackets in the corners of the bottom of the machine. So, I don't know if it will play a lot during the printing phases, but it has the merit of being aesthetically pleasing and of avoiding the risk that the machine will move, if only a little during its transport precisely.
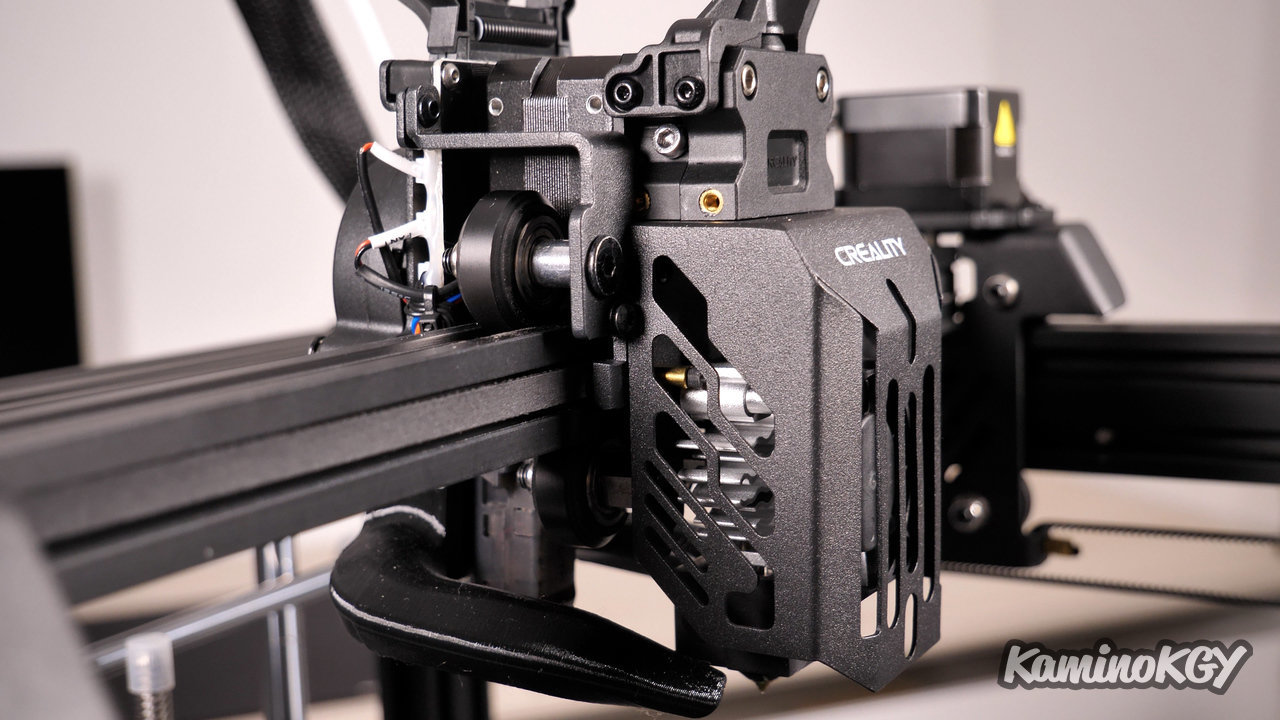
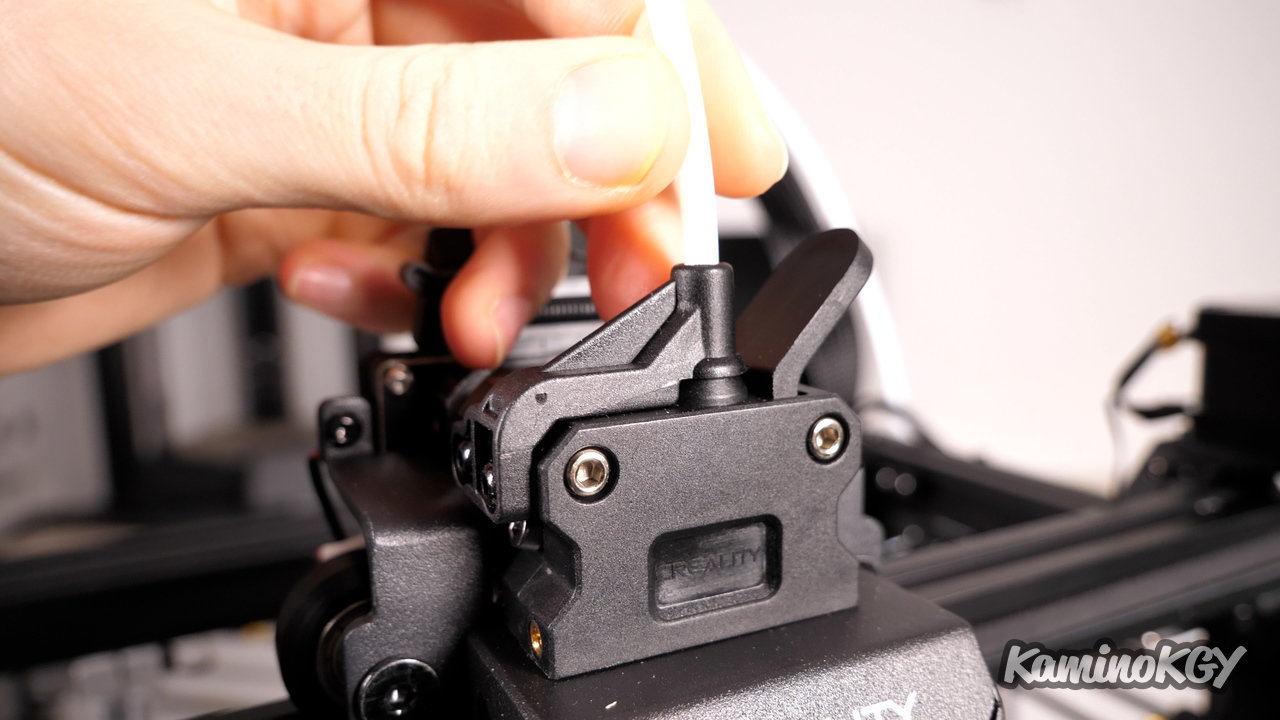
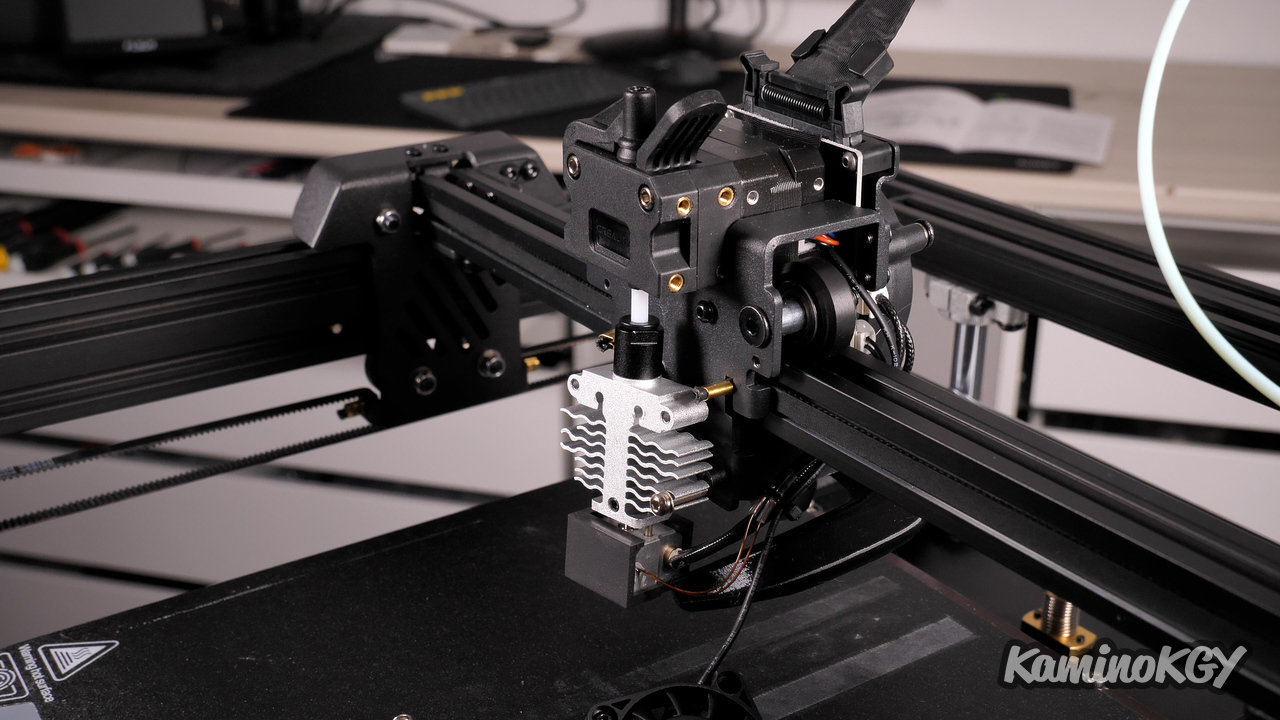
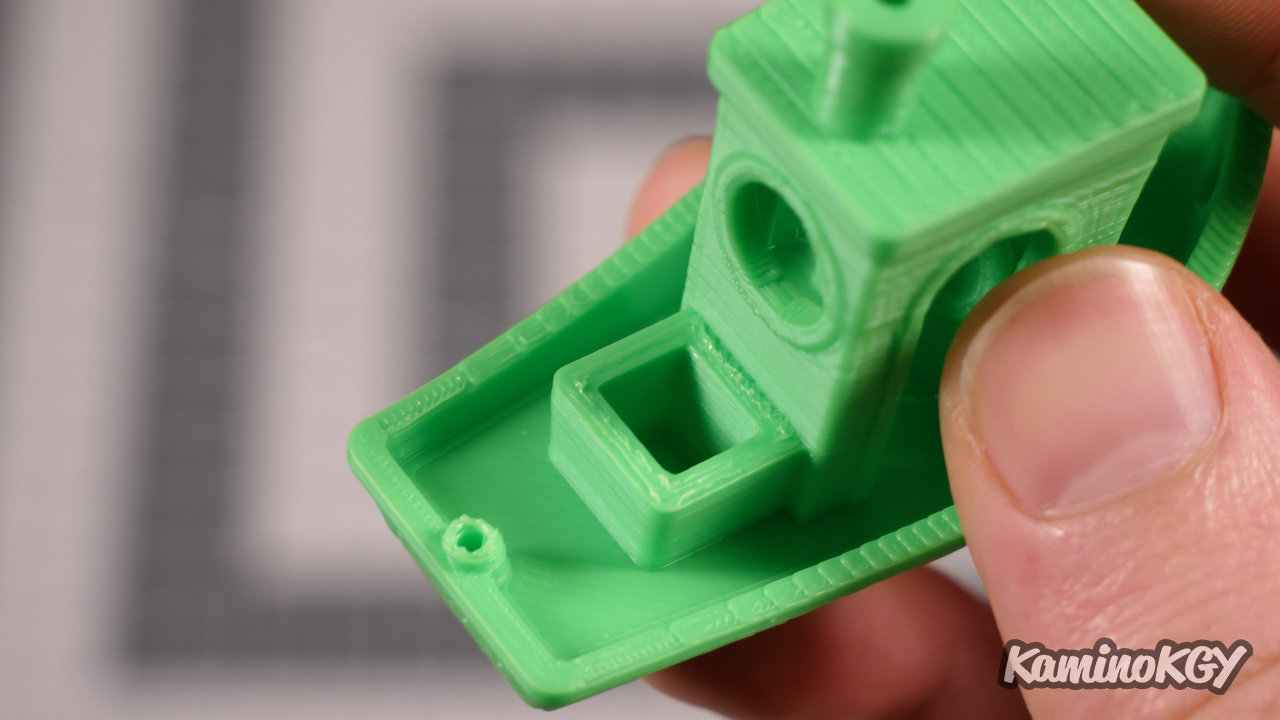
And as its name suggests, with the S1, we are entitled to the in-house Sprite direct drive from Creality. The structure of the direct drive hotend is a bit special with the extruder which is remote and with a large radiator underneath. The motor is centered on the aluminum profile to limit the weight on the side of the cart. That way, we have less effort on the side. And small difference with the Ender 3, it is the part at the entrance of the extruder which allows to insert the PTFE tube and can go up a little probably to let the filament go up more easily during the retraction phases.
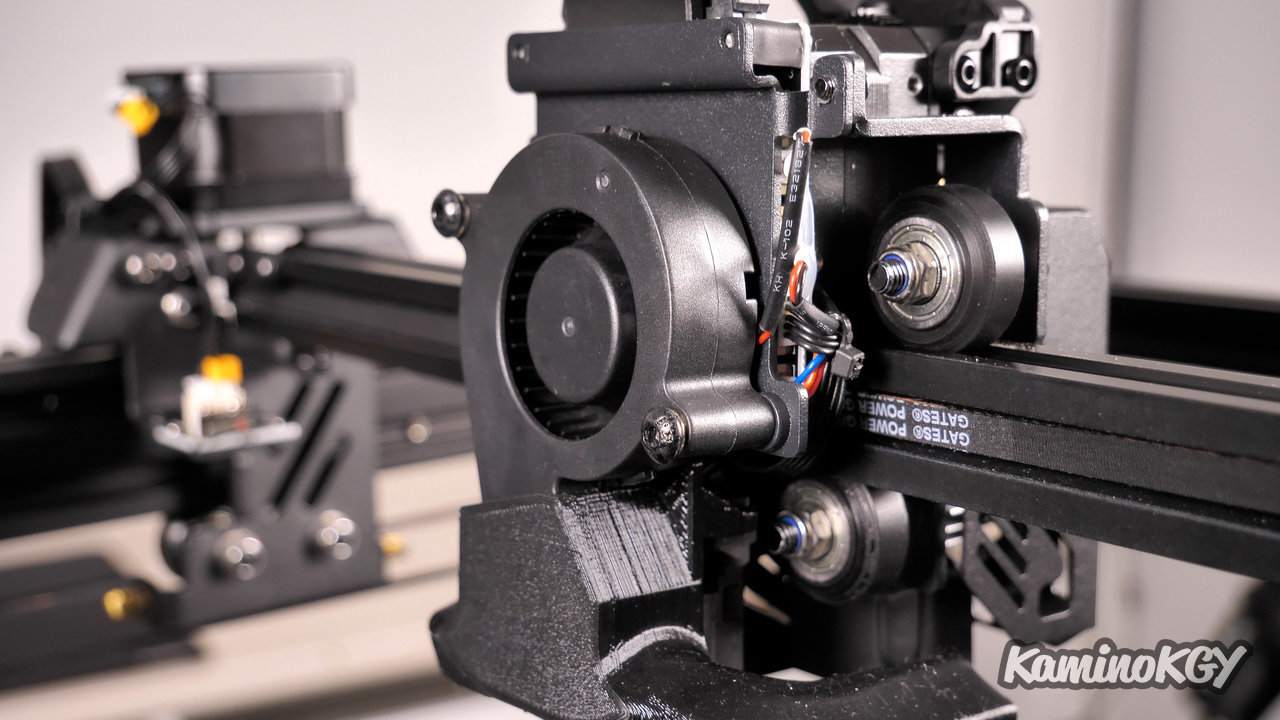
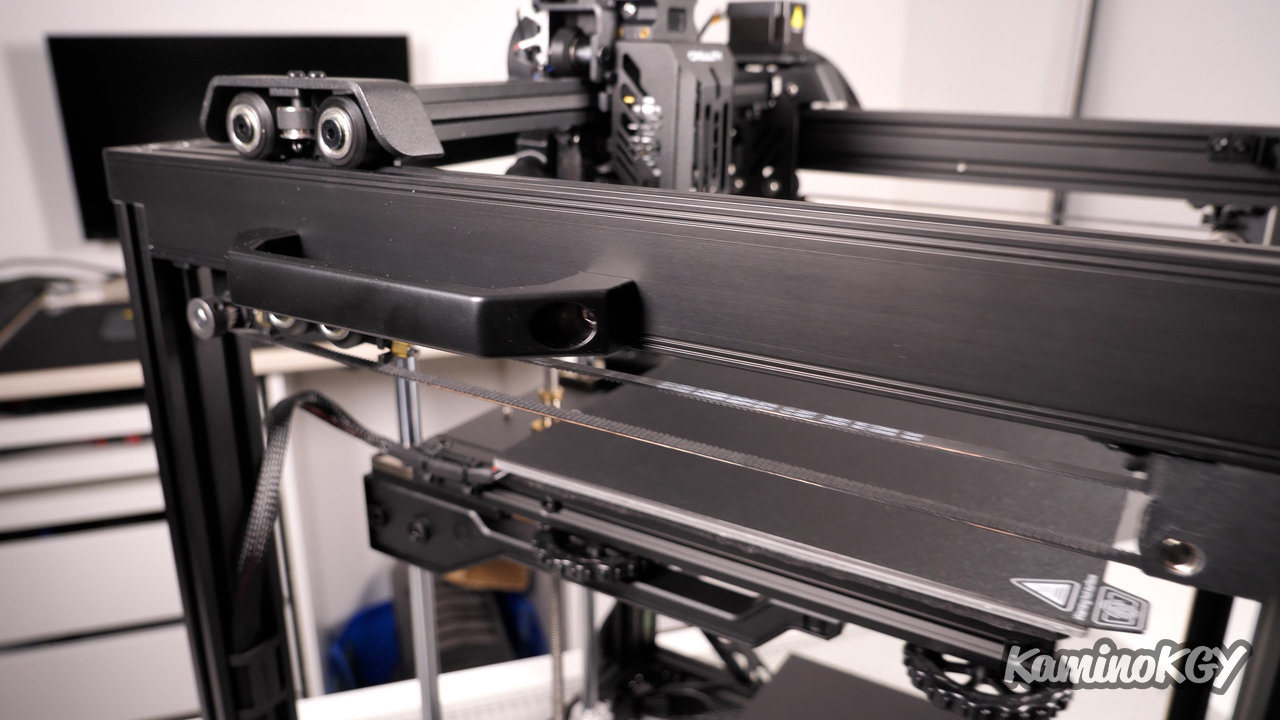
Then we have a single blower on the back of the cart, but large, with a 5015 model, and with a fanduct that makes a double flow of air on both sides, so that's good . The only thing I will note is that I find that the outputs are a bit far apart, so I think we lose a little bit of output power, but that's probably anecdotal.
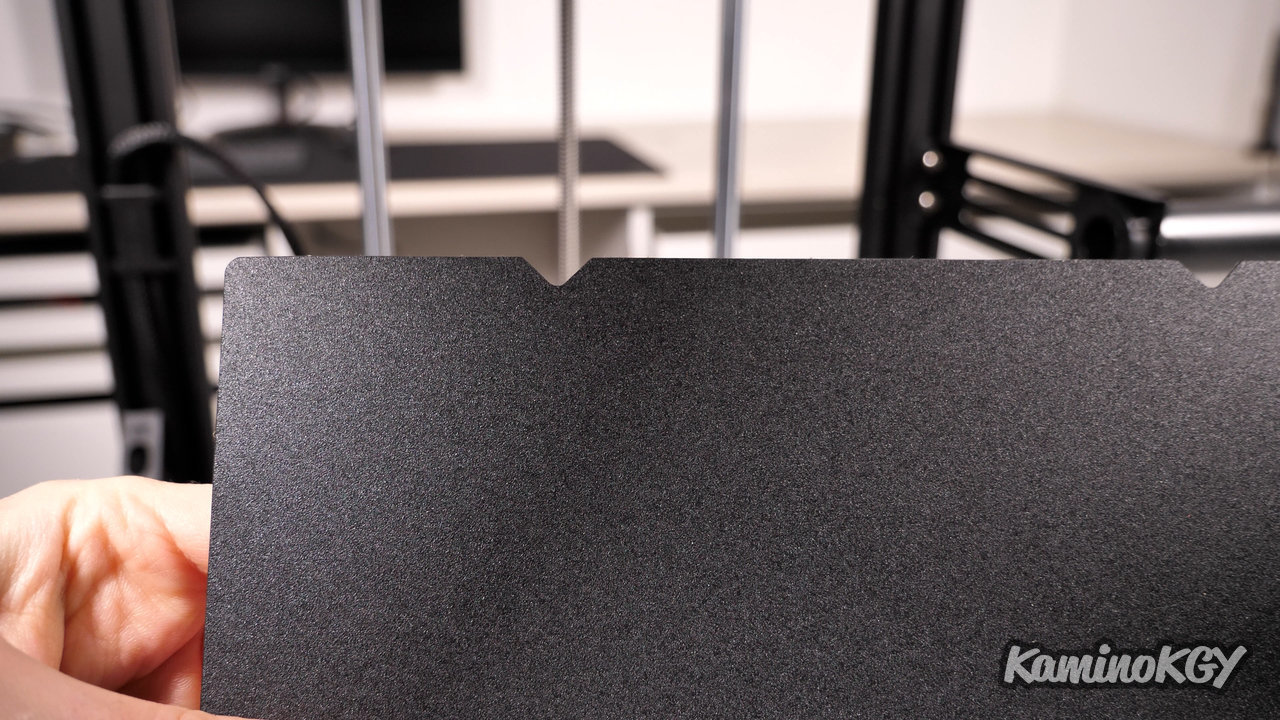
Regarding the platter, it is similar to that of the Ender 3 S1, with one difference, it is that there are small notches on the back to wedge it more easily on the magnetic platter. And for its upgrade we have a CR-Touch.
Finally, and this is still important to note, but this is not a CoreXY printer but just a classic Cartesian printer.
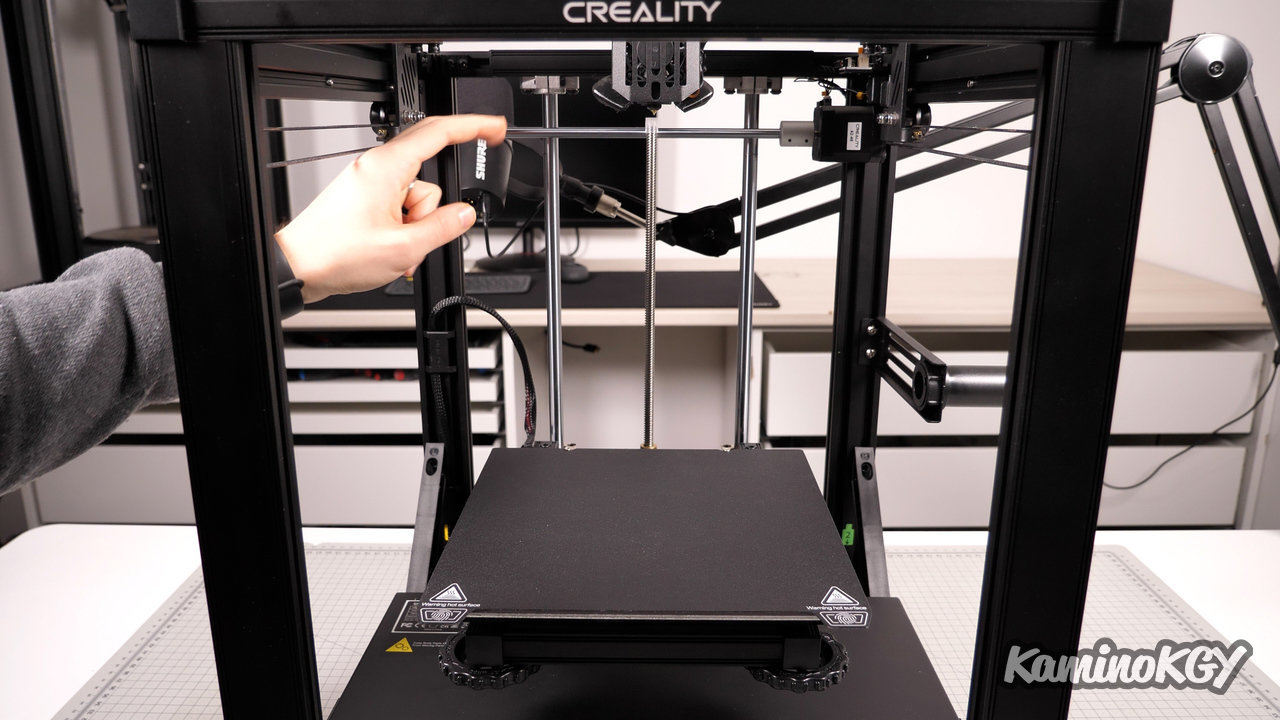
To use the machine, you can take advantage of a horizontal 4.3-inch color touch screen that controls a 32-bit motherboard.

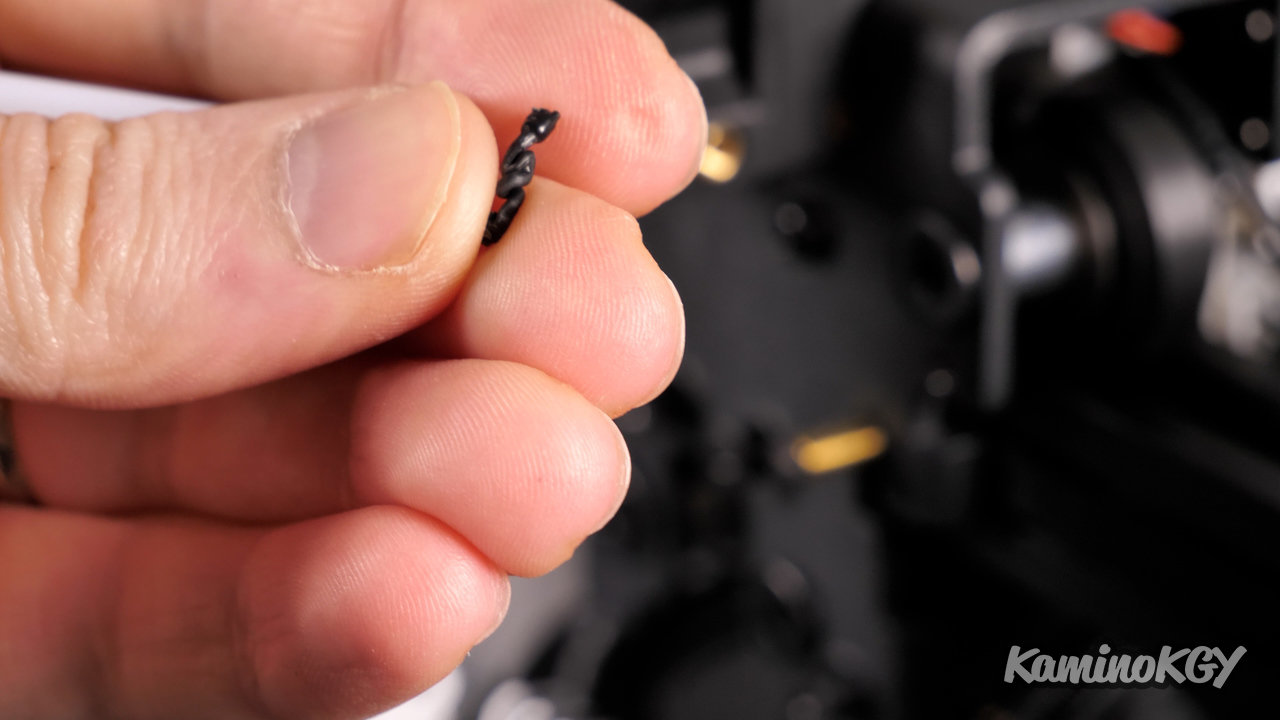
So I still have to tell you, but I had a difficult start with the machine. When I started wanting to print a small calibration cube, I ended up with the extruder rattling. So clearly the filament was stuck somewhere. So I tried to see the length of the filament that I could enter by hand and realized that it was at the entrance of the radiator that it was blocking. So would a small piece of my filament get stuck and break, possible. So I disassemble the hotend, then the heatsink. There I realize that it is in fact 2 tubes of PTFE put end to end, not sure that it is terrible but hey, we will continue to test the machine as it arrived. And there we can clearly see this little piece of test filament that got stuck in it, obviously it was retracted a little hot and pulled out by force and it broke inside. Well, too bad for me, but these are things that can happen. You just have to say that the gas that removed the black test filament, he must not have gone too far on the machine.
Now we just have to put everything back together. But it will have allowed us to take a look inside the hotend and its design. We can see that the extruder on the top of the carriage is relatively far from the radiator with this PTFE tube and that the fan is fixed at a distance from the radiator, with spacers.
And to put an end to this complicated start, I will just note the description of the printer on the Creality site which says it can operate for 1000 hours without clogging, according to data from the Creality Lab. Bah, it's a little missed because we didn't even have time to use it for once.
Inside the printer
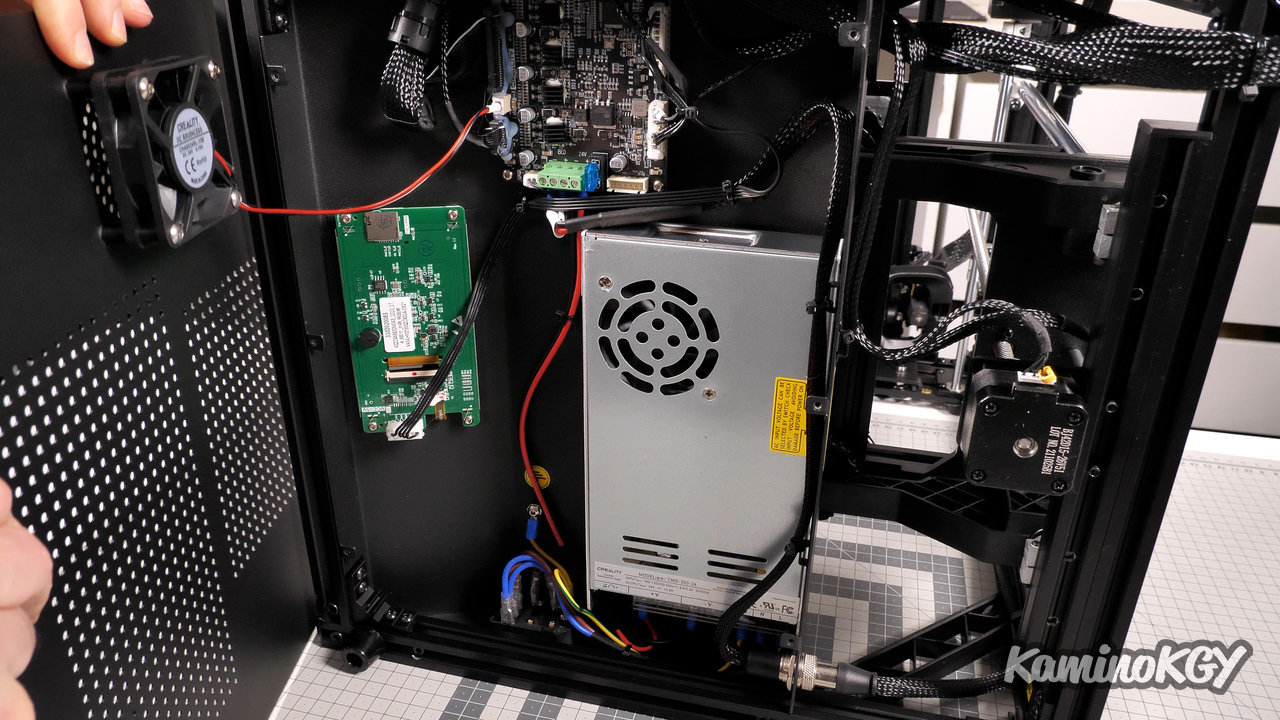
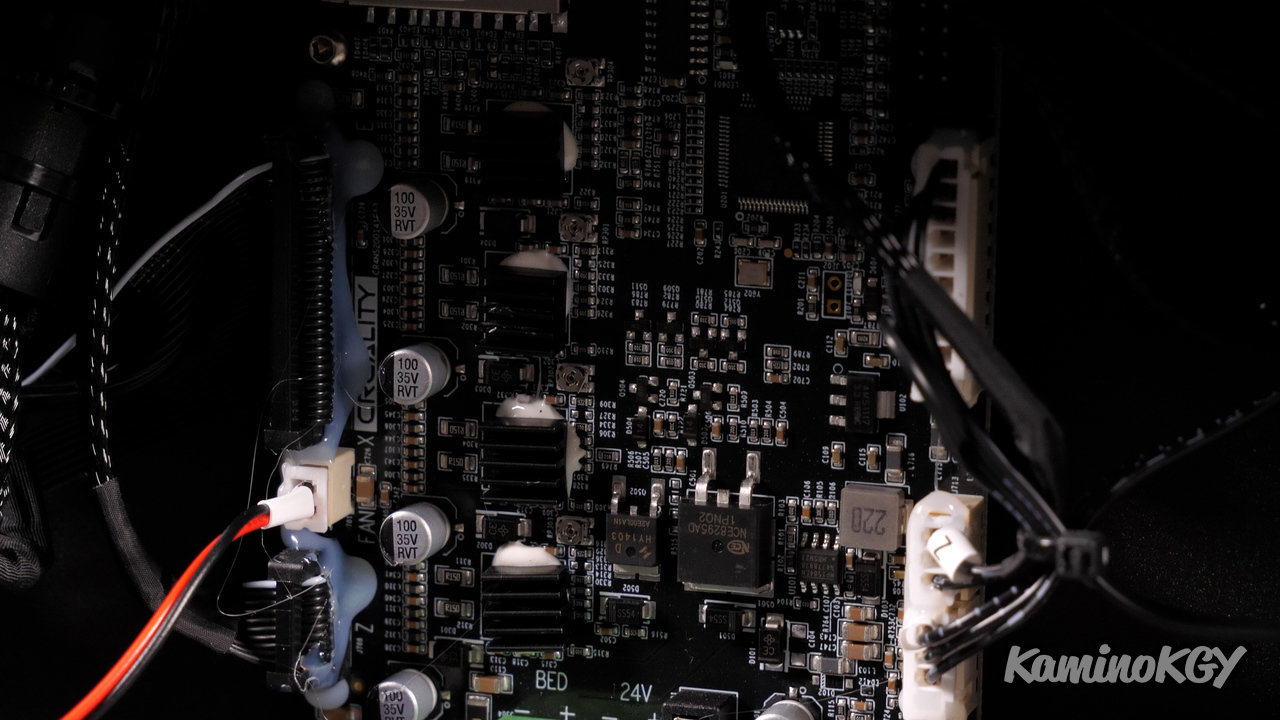
Inside the printer, we find the power supply on the back of the base, the touch screen and the Creality 32-bit motherboard with a specific connector for the Sprite.
To be improved
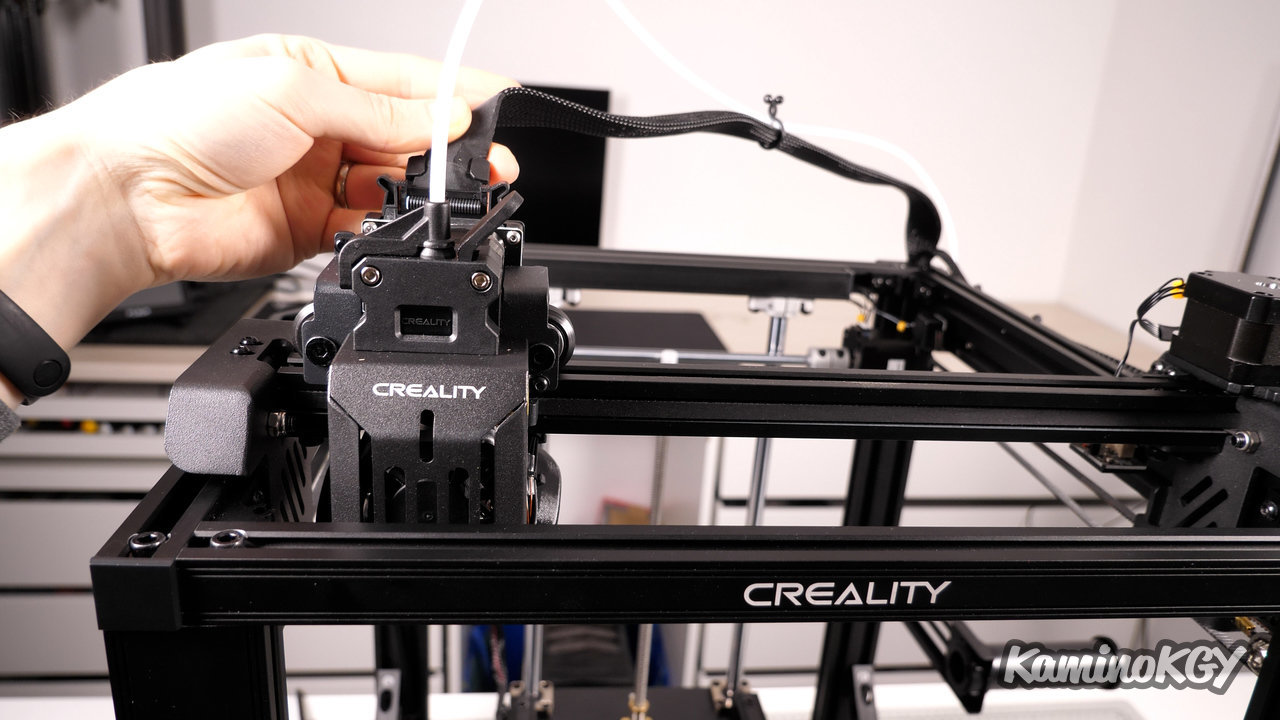
In the few points for improvement or attention, we already find the same cable to connect the hotend as on the other printers equipped with the Sprite direct drive, but when we go to the origin of the tray at the bottom left , it is really very tight I think a few more centimeters would have been appreciated.

Then the beep on the screen is unbearable, especially since it is extremely loud compared to other printers. It's good to be notified of a problem, but in the menus, it's really useless. You may need to plan to redo a firmware just for that or remove the beeping component. Because I tried to make a small cache to put on the beeper, but the difference is not very important with only 4 or 5 dB. It's better, but it's still too strong for my taste.
The tray leveling that goes all the way down is understandable, but it's long. So you have to allow a little more time if you want to see the start of the print and see how at least the first layer prints. Knowing that we obviously have to count the time to do the leveling at several points, once the plateau is at the top. But personally I prefer when you do a G29 at each print start to map the bed, especially when you have a removable bed that could potentially have level differences from one print to another.
So we already mentioned it when the hotend was clogged, but I'm not very convinced by the double ptfe tube in the hotend.
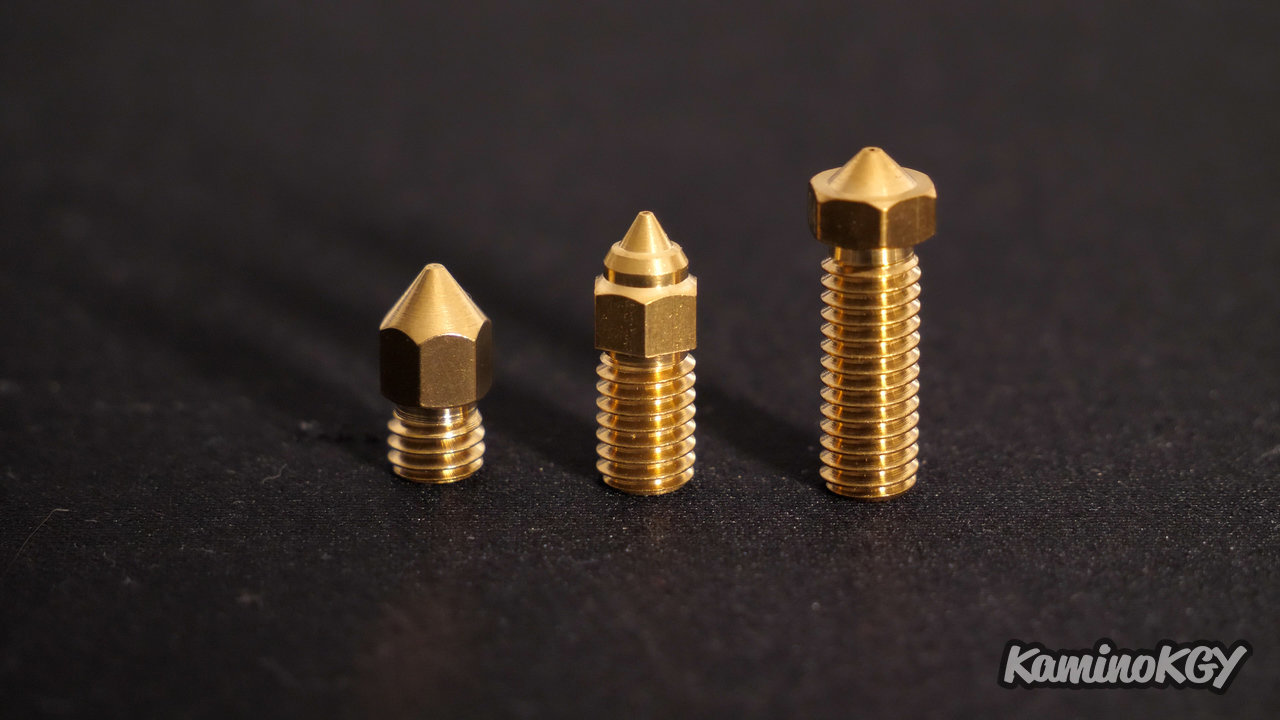
Then, if we stay on the hotend, you should know that the nozzles are proprietary nozzles longer than normal for MK8 M6, but shorter than volcanoes. Here we have a nozzle that has an intermediate length. And if you want to change it, you probably have to go through an official product which is only available in 0.4 mm from what I have heard.
As for using the machine, I should note that the folders are not visible on the microSD card and you cannot enter them via the menus. In fact, we see that they are listed because we have empty places in the list of files, but that's all, we can't do anything else with them. It's a shame, especially since it almost seems more like a bug or a configuration problem.
Finally, the last point on the points for improvement, on which we can act, and fortunately, it is that I find that the printer hits really hard during these changes of direction. The acceleration is probably a little high, which obviously makes it possible to print faster, but it may be necessary to check the impact on the quality of the prints, and therefore the associated machine parameters, but we will come back to this period.
Rise in temperature of the plate
As for the rise in temperature of the plate, it is relatively homogeneous. What is a little different from what we usually see is that it is rather the edges that heat up first. We find, on the other hand, as so often, the locations of the screws that hold the tray and the right rear corner, with the cable, which are cooler. The plate seems to heat quite strongly because we have a temperature of 66°C for an order at 60°C. Platen temperature will need to be reduced or recalibrated. And the tray is hot after 3 minutes.
Sound level
Regarding the sound level now, we are at 45 dB with the printer when it is not doing anything. We're more on 56 dB when we're in print, but we've seen worse, it's still quite reasonable when you're standing next to it.
Power consumption
On the point of power consumption, we are at 360W when we have the preheating of the plate and the nozzle at the same time. And in printing, we oscillate between 65W and 270W, but here it depends on whether the nozzle needs to heat up to maintain its temperature and even more if it is the plate as we see it.
Test prints
We will now move on to test prints. And I want to clarify that the impressions are made with the basic firmware, because I did not find an update on several brand sites. Even if there is usually one available at the exit of the machine, there not.
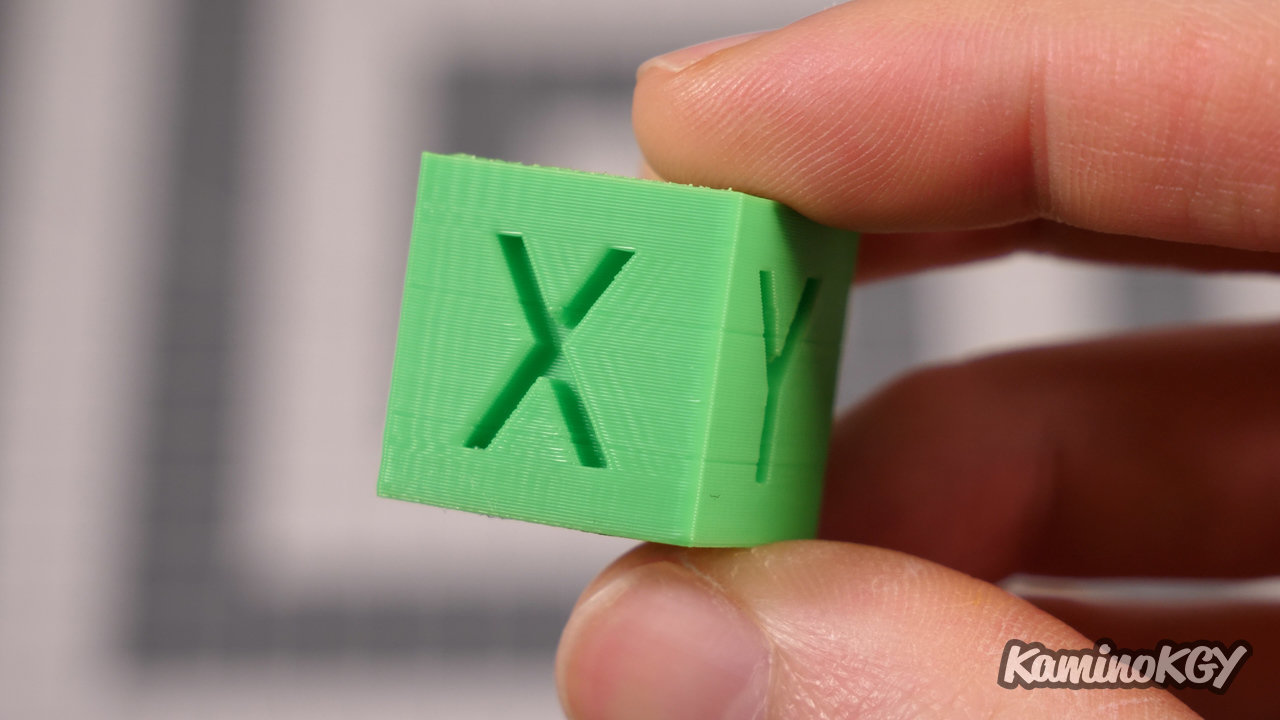
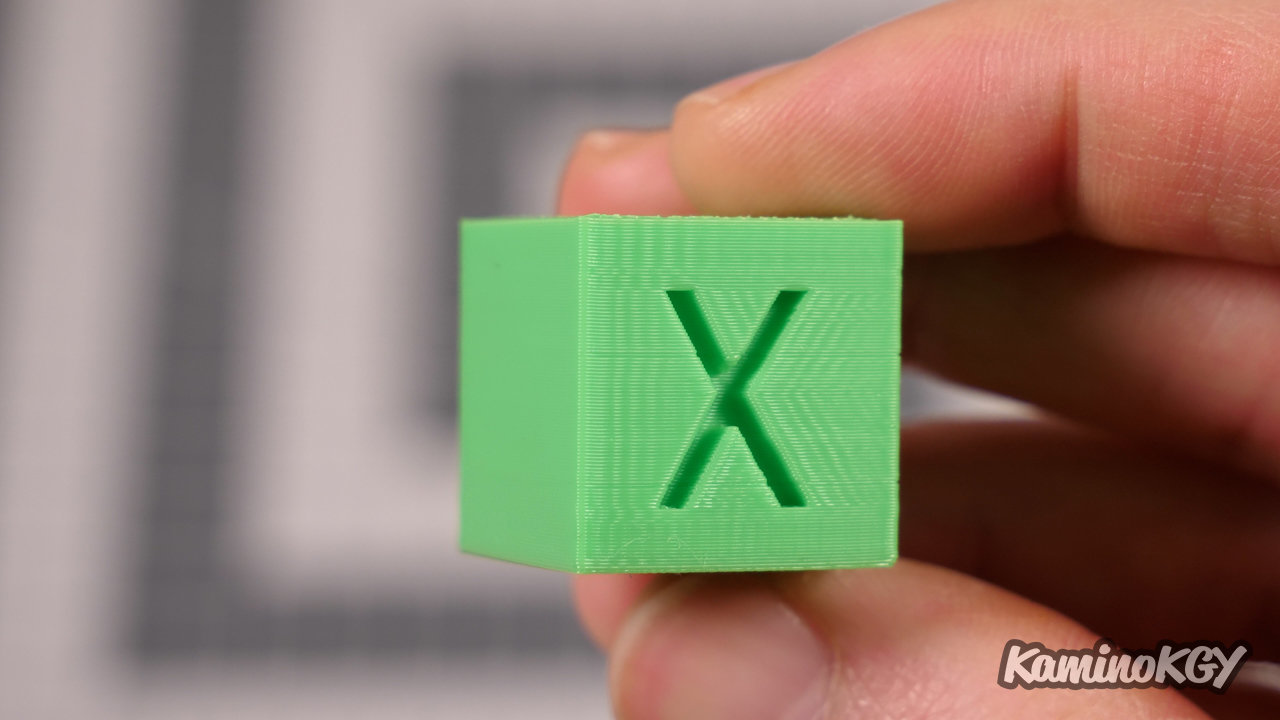
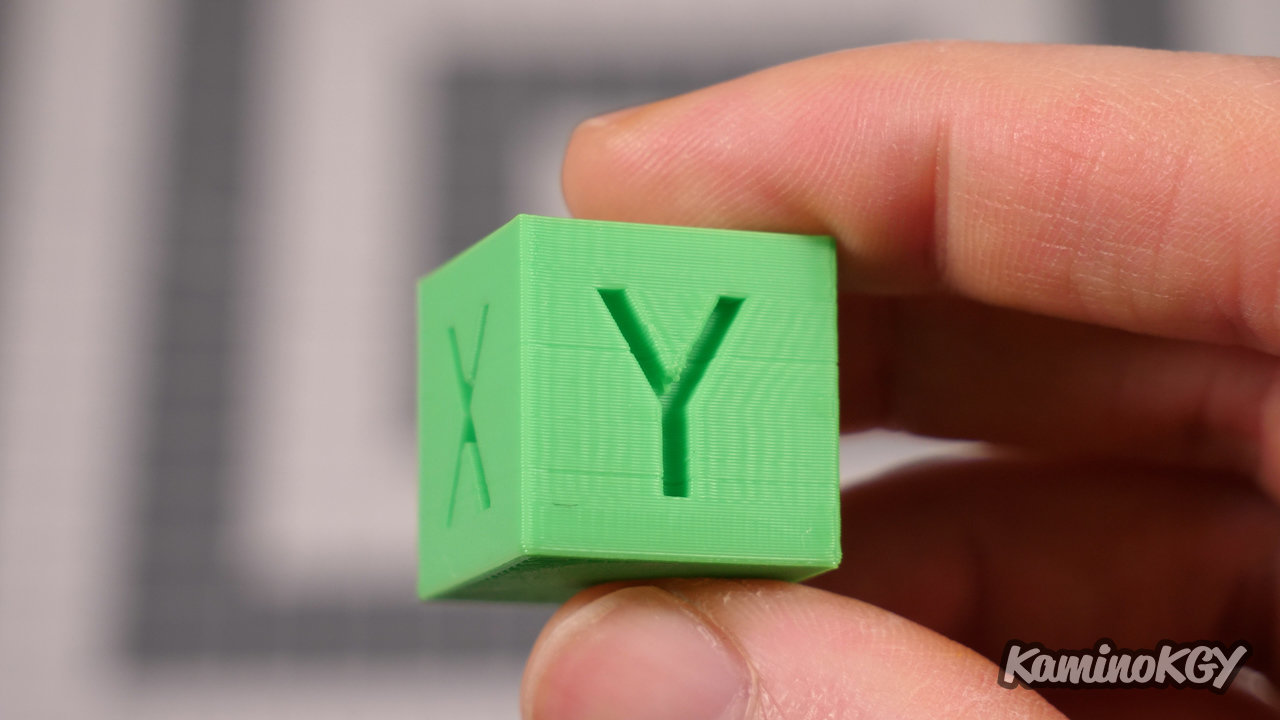
I started with prints made with the basic settings of the Creality Slicer with the profile for the Ender 5 S1, with its speed of 120 mm/s. The calibration cube shows significant signs of ghosting. So I moved the machine to see if trying another support, perhaps more stable, would help, that's why we have 2 horizontal lines which correspond to the times when I moved it. And I do not see any improvement in the quality of the printing surface. Knowing that it is visible on the X and on the Y. We can also notice over-extrusion on the top, which I did not try to compensate for for the rest of the tests.
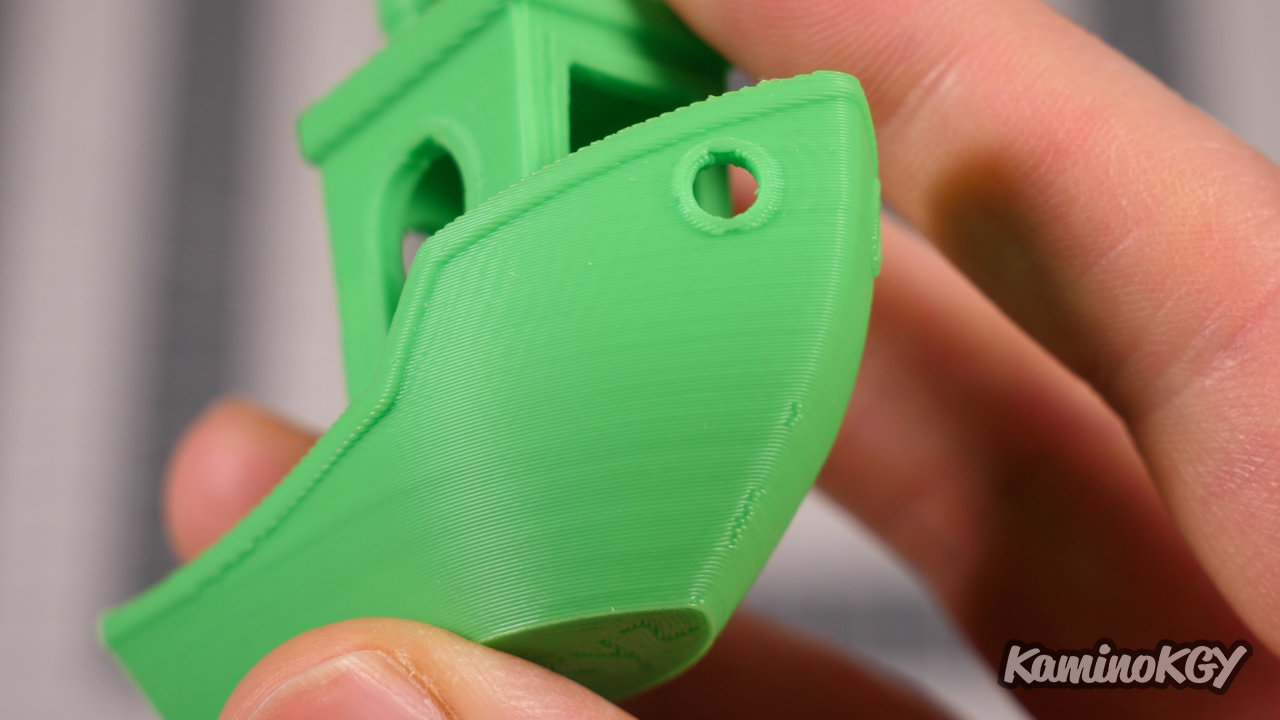
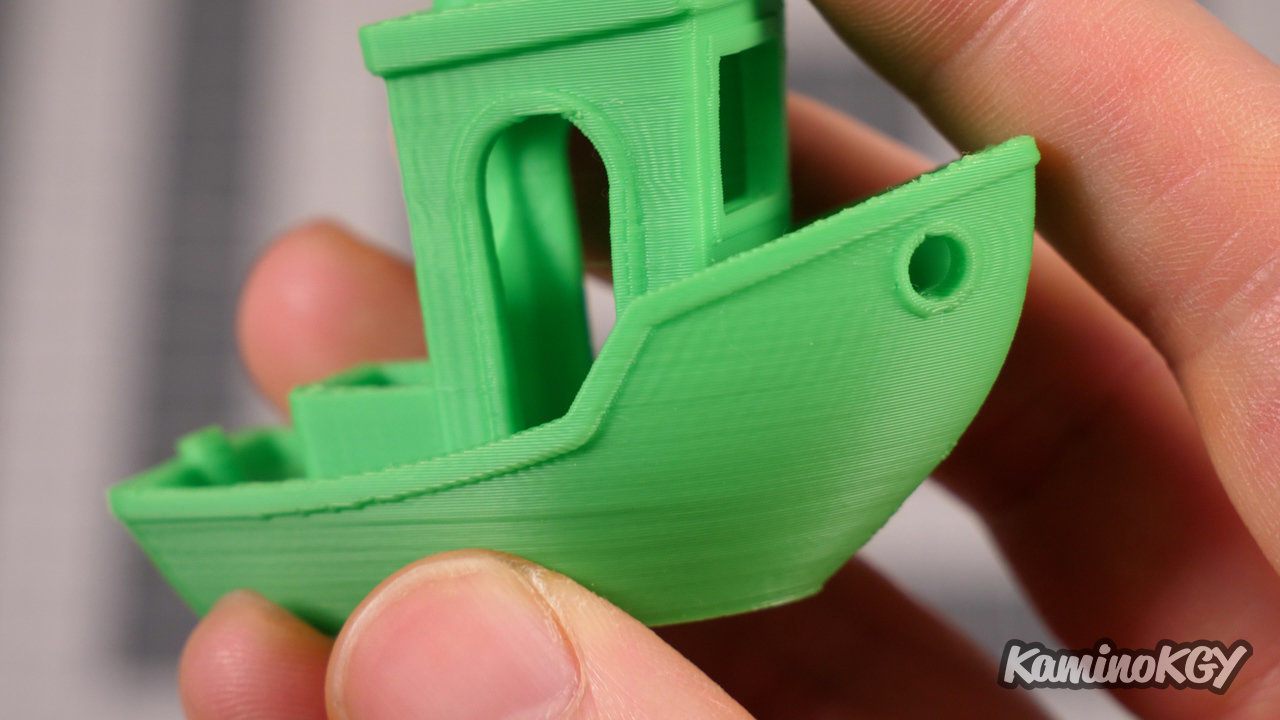
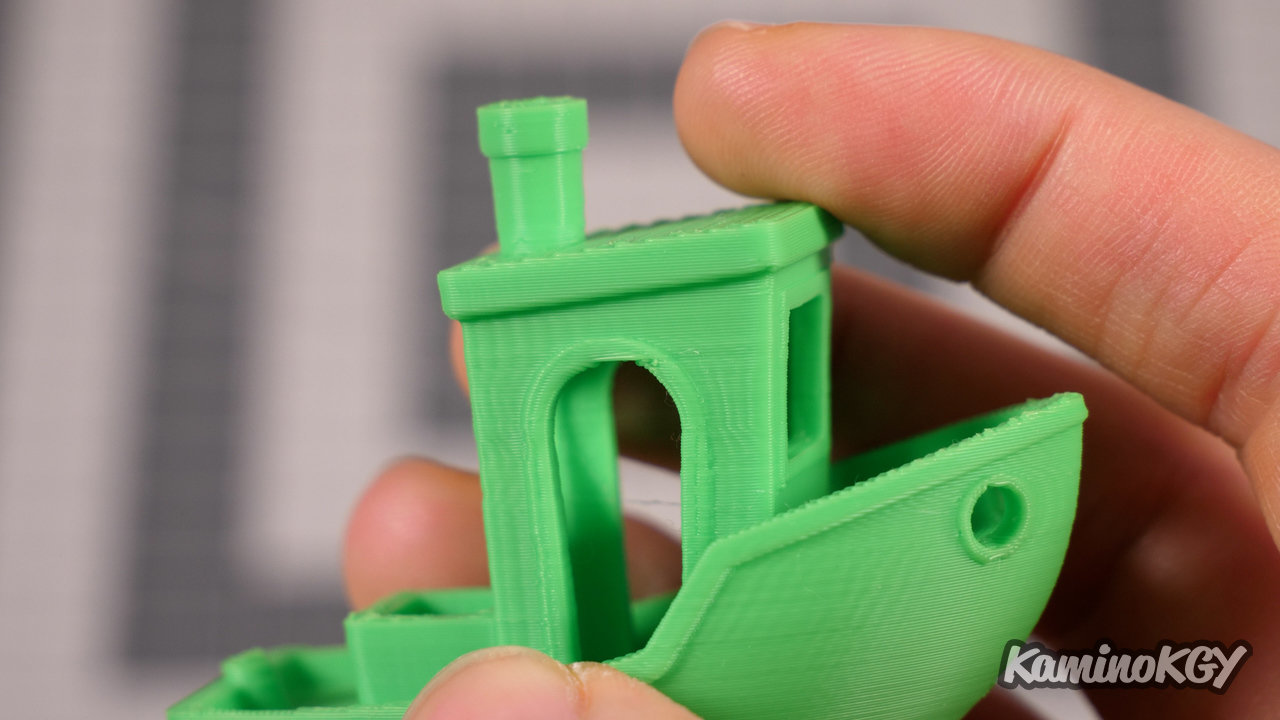
On the Benchy, the hull is well formed, you can see the z-seam on the front at certain heights. The ghosting is still quite visible. The cooling on the top of the cabin is good. And we have the over-extrusion on the saloon at the back of the cabin.
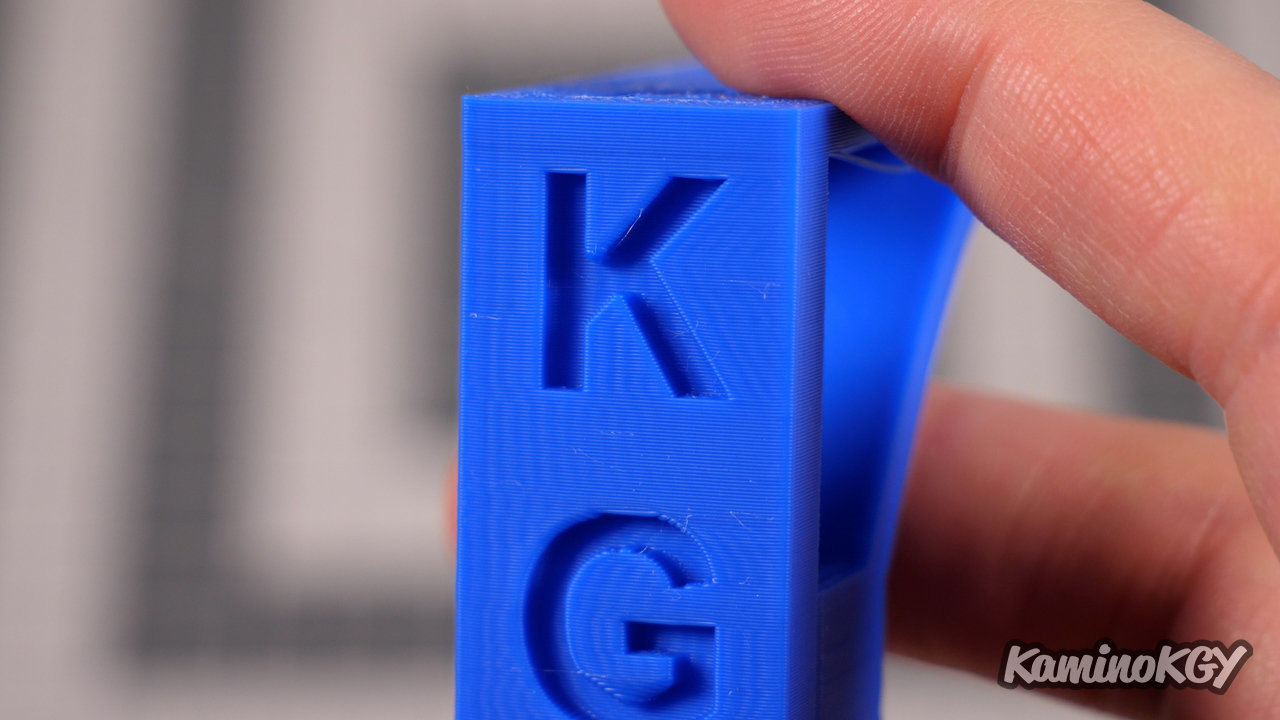
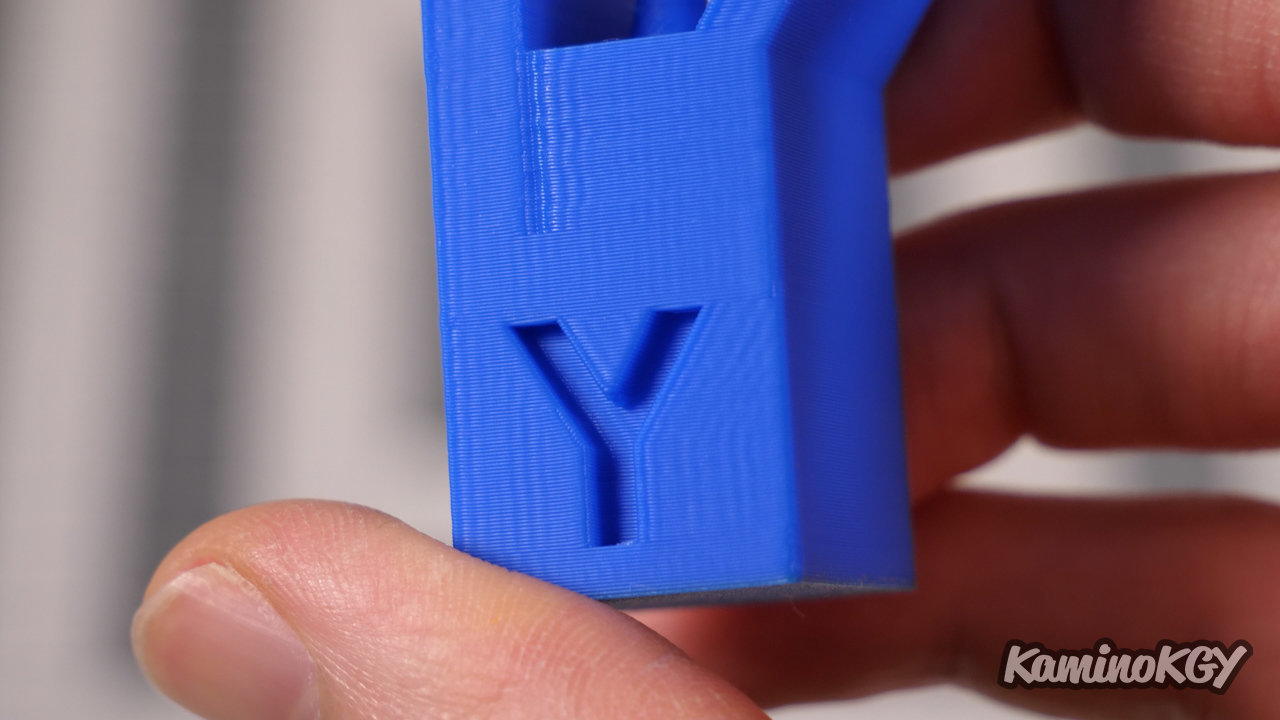
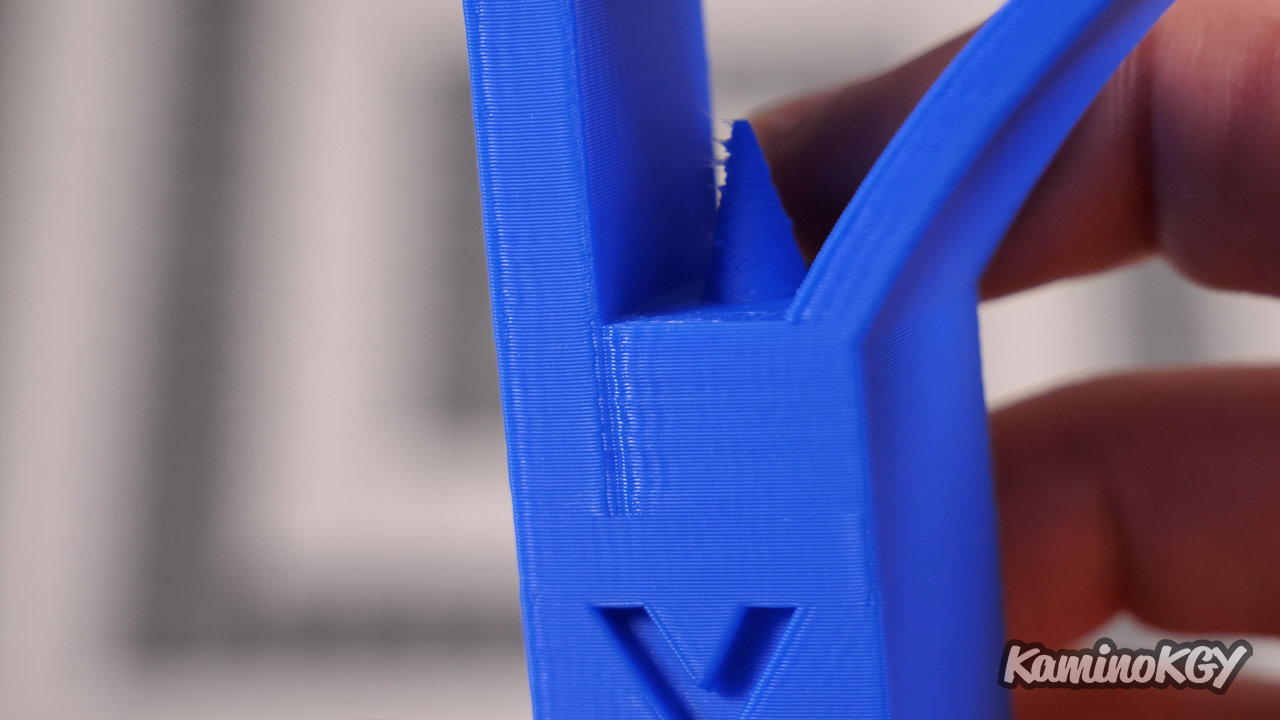
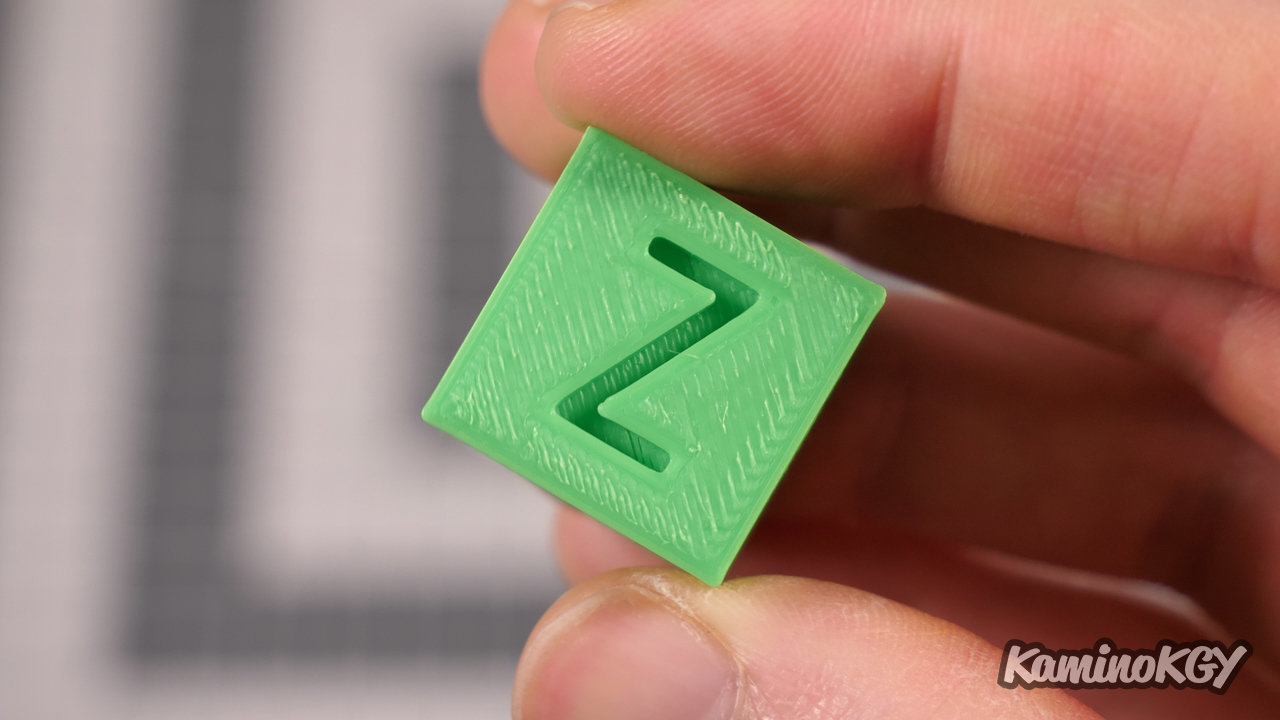
On the KGY, we have ghosting all the way up, but the letters are well formed and well cooled. We have the same results on the Y side. We see some stringing effects inside the model. I think a retraction adjustment should compensate for it. The overhang is really well cooled, even if the bridge isn't perfect, it's still very satisfying. And the top is fine.
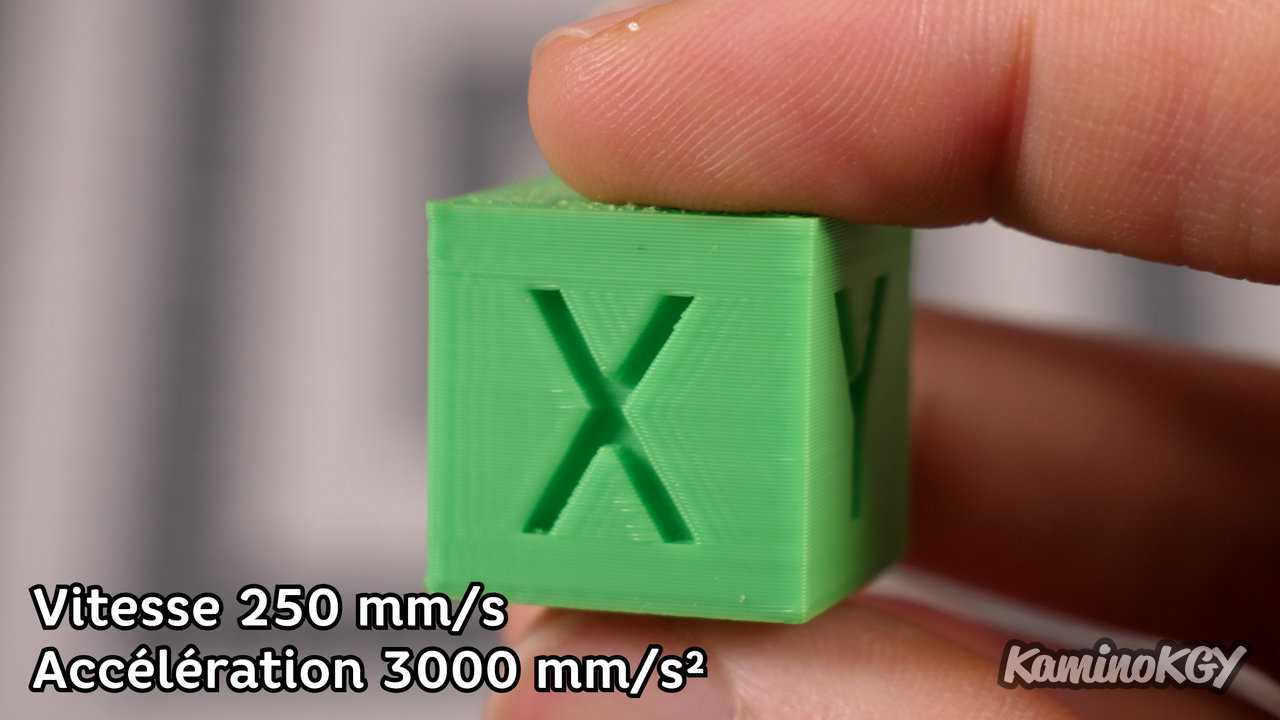
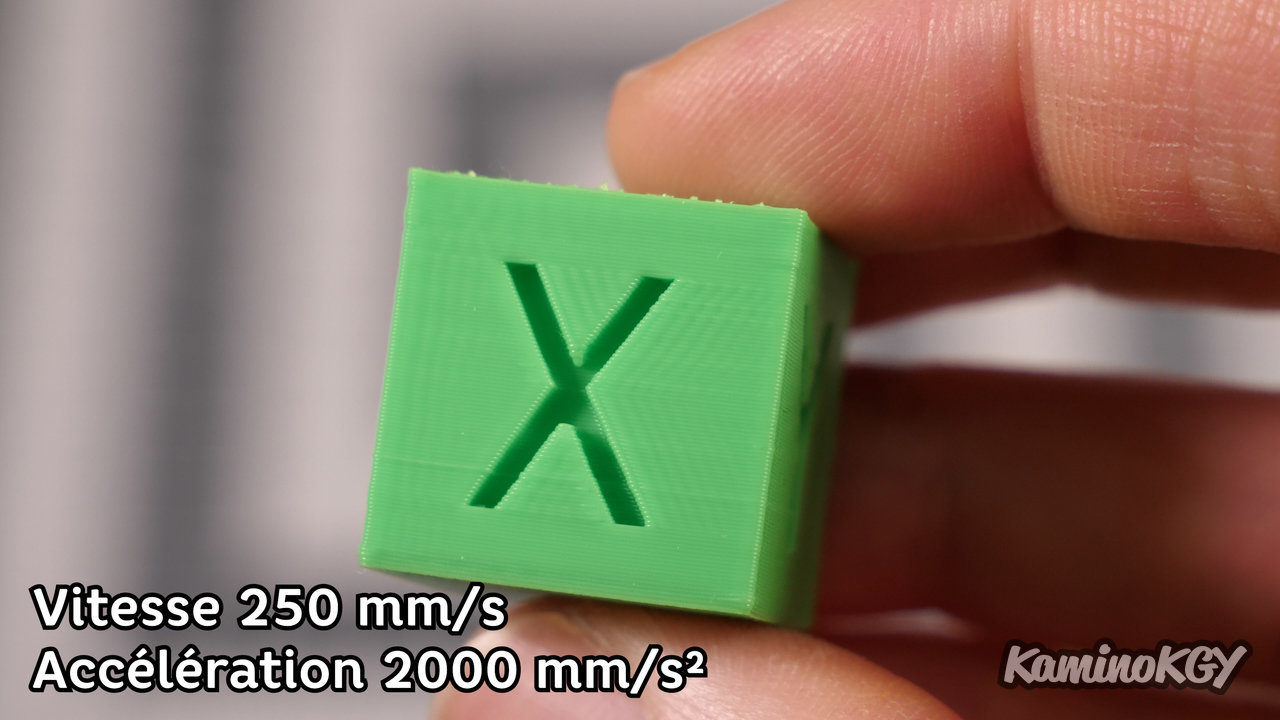
Now I switched to a speed of 250 mm/s with the maximum acceleration given for 3000 mm/s² in the printer settings.
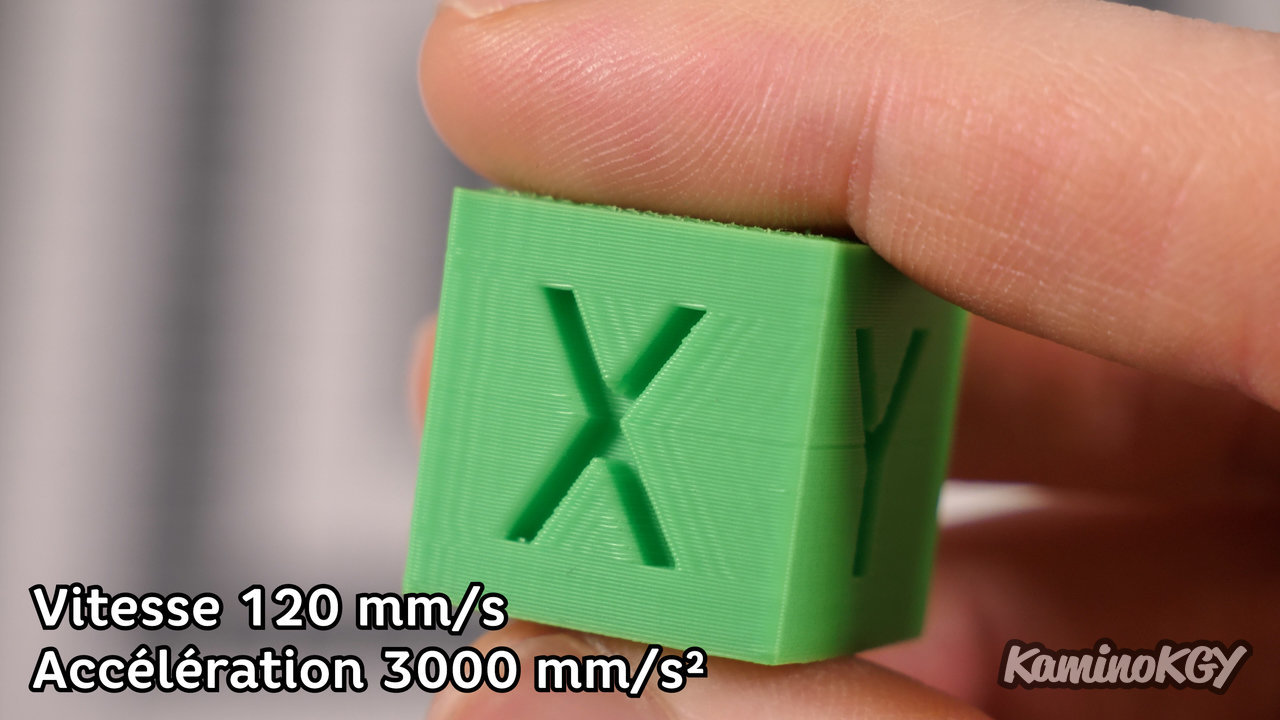
We find the very significant ghosting effect on this first calibration cube. On this second Cube we are at 120 mm/s and 3000 acceleration. I find that the ghosting is much less pronounced and the angles are better formed as well.
On this other cube printed in 250 mm/s and 2000 max acceleration, I find that it is still very visible and there is quite a bit of improvement compared to 3000 mm/s² of acceleration.< /p>
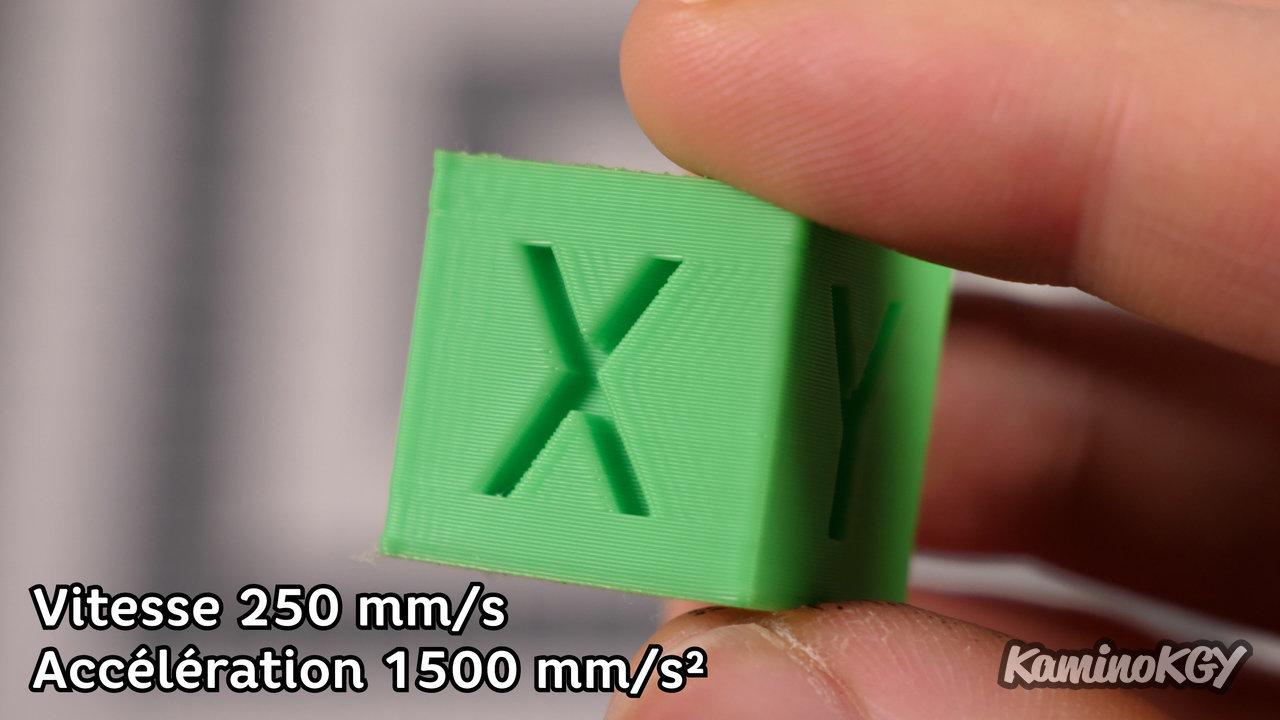
Here we have a cube in 250 mm/s and 1500 max acceleration. There, we begin to have a real improvement in the quality of rendering of the surface.
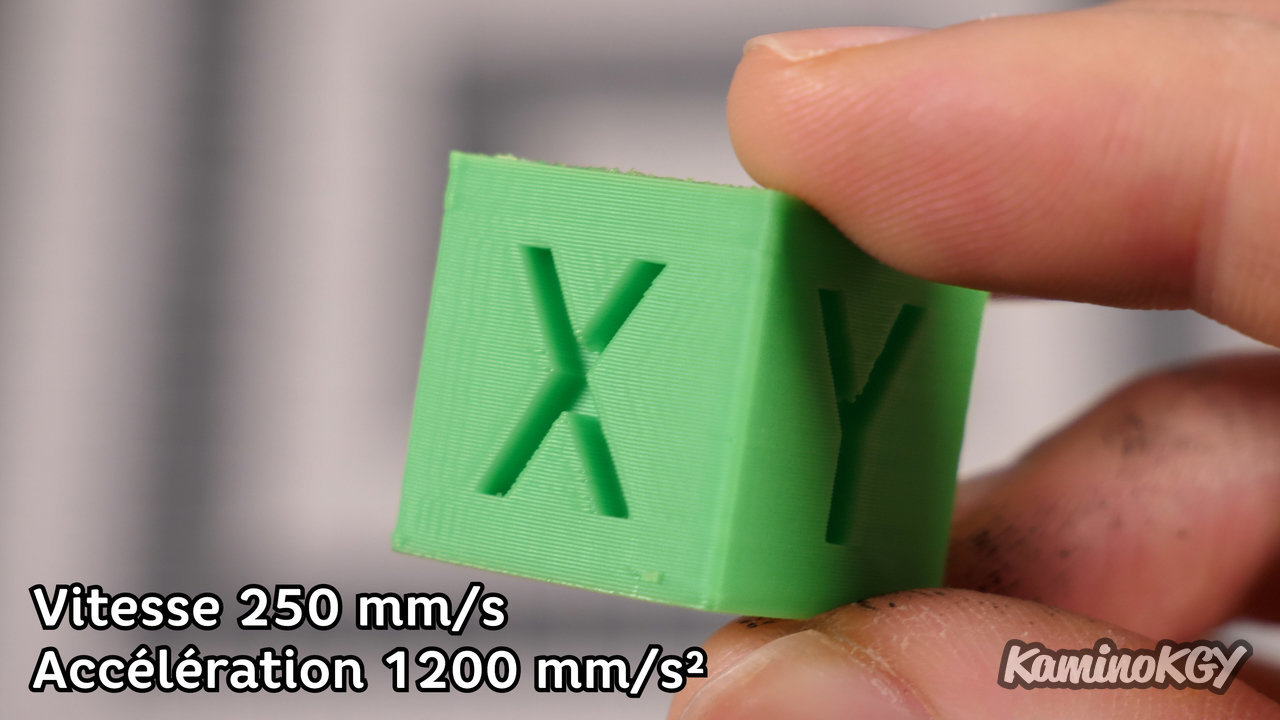
Note that the acceleration on the Ender 3 S1 is only 500 mm/s², so even if we start with a setting of 1200, we have already more than doubled the acceleration, so it's still more interesting to win in print time.
Printing a calibration cube takes about 2 minutes longer by greatly reducing the acceleration, knowing that the distances are so short that you don't have time to reach the maximum speed anyway.
Review
I think that an assessment is really necessary on this Creality Ender 5 S1 which is, I must admit, a machine that really hyped me up and that I really wanted to test, because the Ender 3 S1 I liked a lot, especially when the brand told me that they didn't want to send it to me to test, it still aroused my curiosity a little bit.
And we're not going to go over the points we've seen throughout this video, but we could see that there were some very good and some not so good. And where Creality may not have performed very well is on the announcements around the machine. It is good, but does not deliver up to what they have been able to say, even if we know that marketing always makes cases of it. I think it has its place and puts more competition with the Ender 3 S1 Pro rather than the Ender 3 S1. It has assets and offers a very good base.
It will be possible to print with relatively high speeds, but it is necessary to play on the acceleration to limit the effects of ghosting, ringing that can be seen on the prints during sudden changes of direction. Which is a small brake compared to what the manufacturer says, but without having tested it, I think it's still better than the Ender 3 S1 in terms of speed.
I'm currently preparing the Creality Sonic Pad test video, and I think we'll have to put the Ender 5 S1 into the test to see if we can't print, not necessarily faster, but increase the acceleration again and reducing ghosting.
And for those who are interested, there is an option that I don't have, it's the tinted acrylic panels to cover the lathe of the machine, but no closure on the top.
Bye bye!