Today we are going to test the A10 Pro from Atomstack. It is a laser engraver / cutter with an optical power of 10W.
Unboxing
In the box, we immediately find a handy metal plate to protect the support on which we put the machine, to avoid damaging its coating, or provide additional protection. Then, we find a well supplied documentation. We have the feet that will be screwed in the corners, the screws, some supports to engrave, an HDMI cable for the touch screen, a USB cable, the power supply and the laser module, very well made, which consumes 36W maximum, for an optical power between 10 and 11W. Then we have the touch screen, the aluminum profile of the bottom, the X axis with the carriage, the front profile, the power cable, the graduated side profiles, and finally the motherboard.
.Mounting
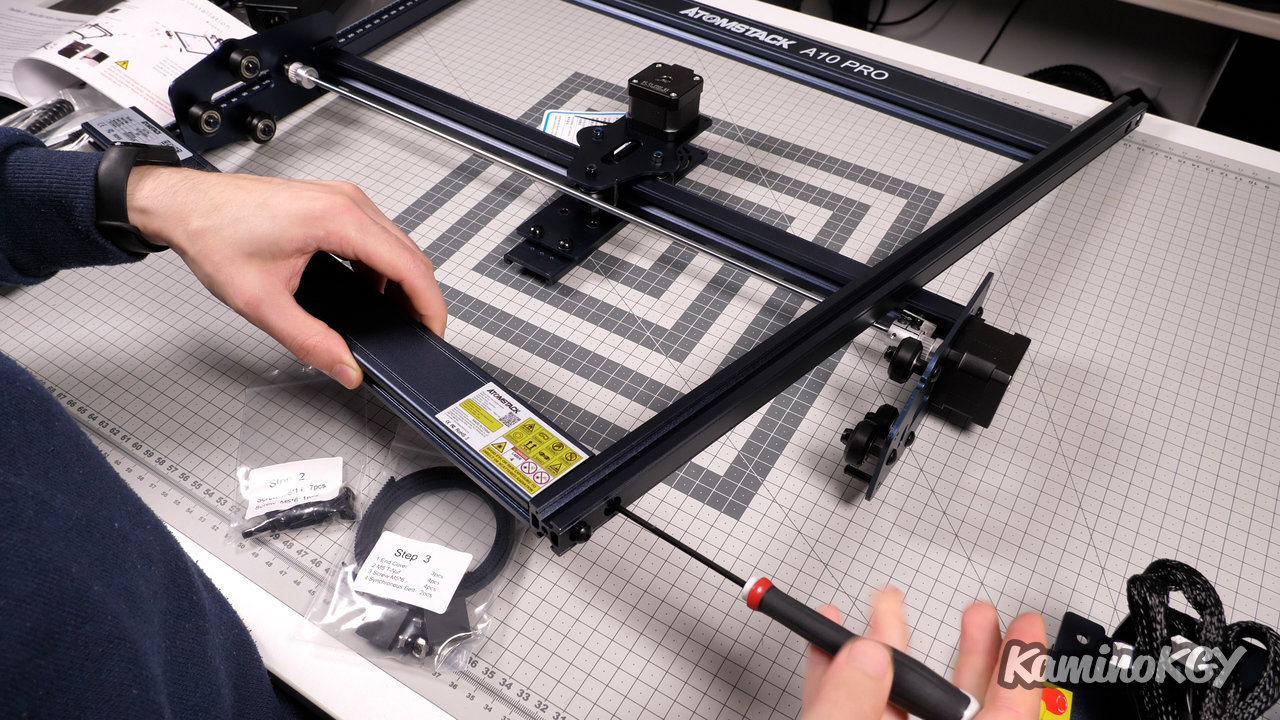
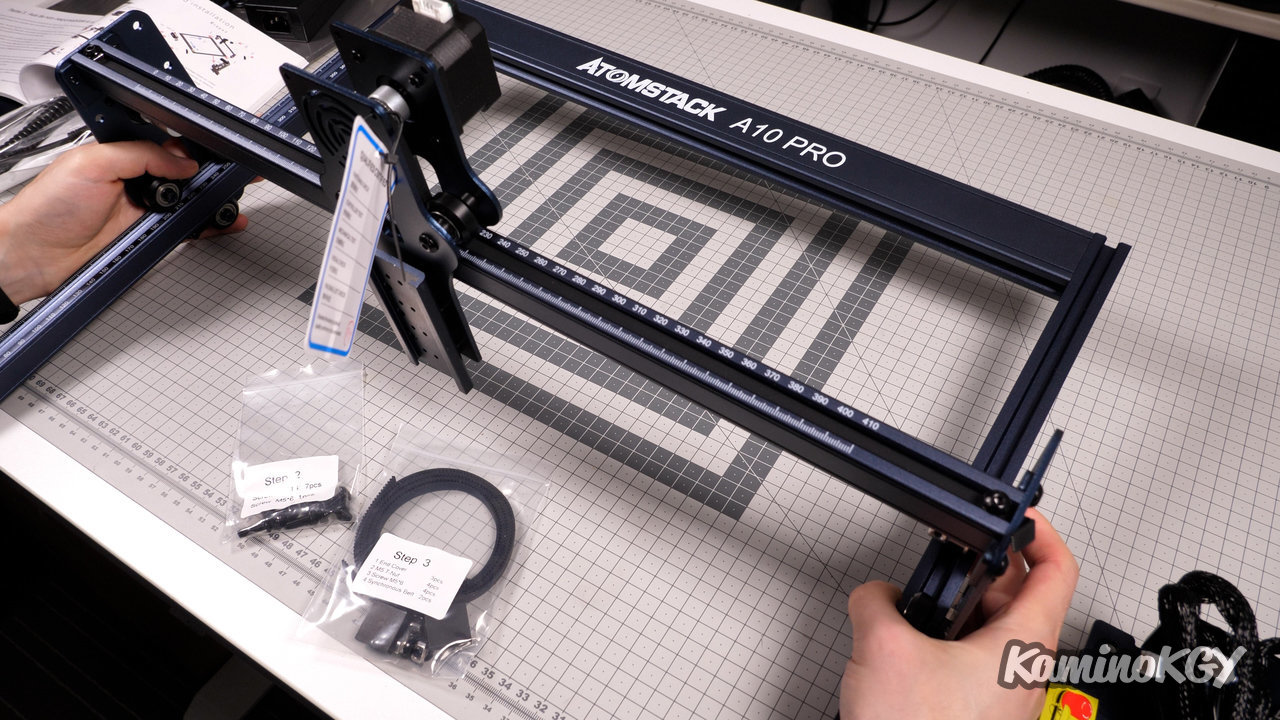
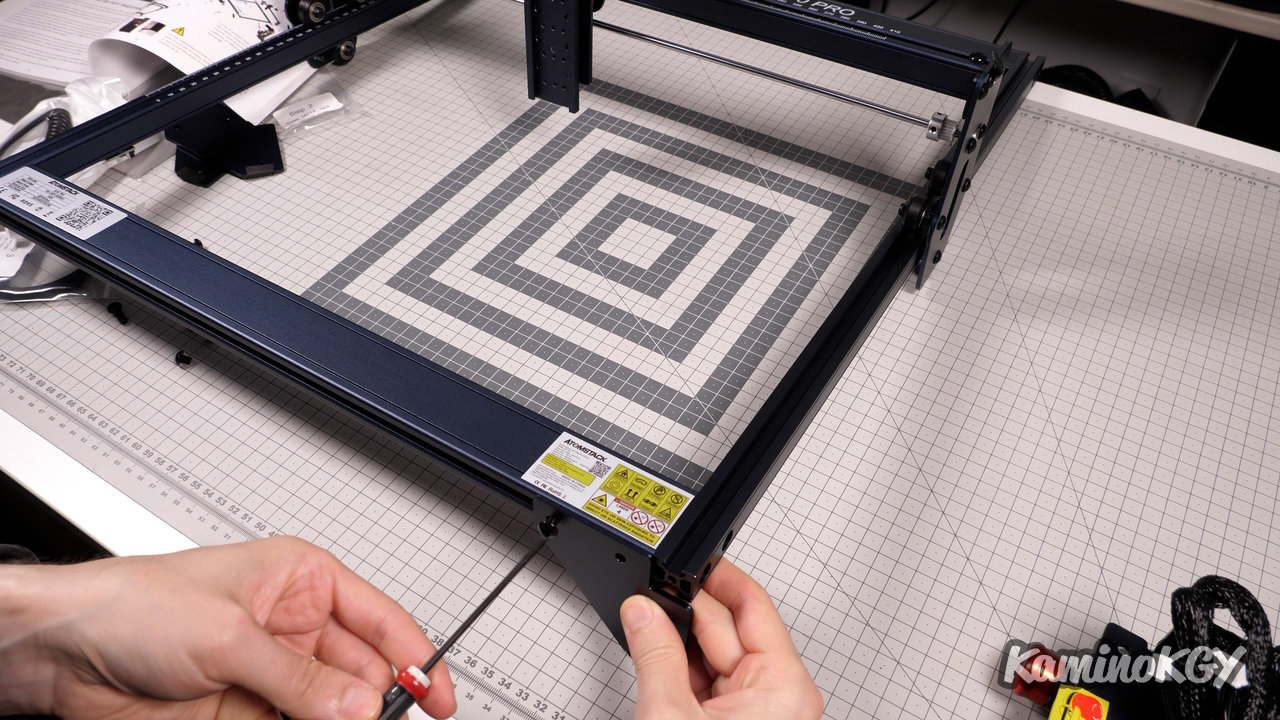

As for the assembly, all the bags are numbered step by step, with the assembly manual. We start by screwing the 4 corners of the machine to make the frame. One comes to slide the X axis. We screw the feet, as well as the motherboard. We slide the belts on each side, we tighten them, and we maintain them in place with a screw at each end. We install the cables, and that's it, we can start using the machine.
Features
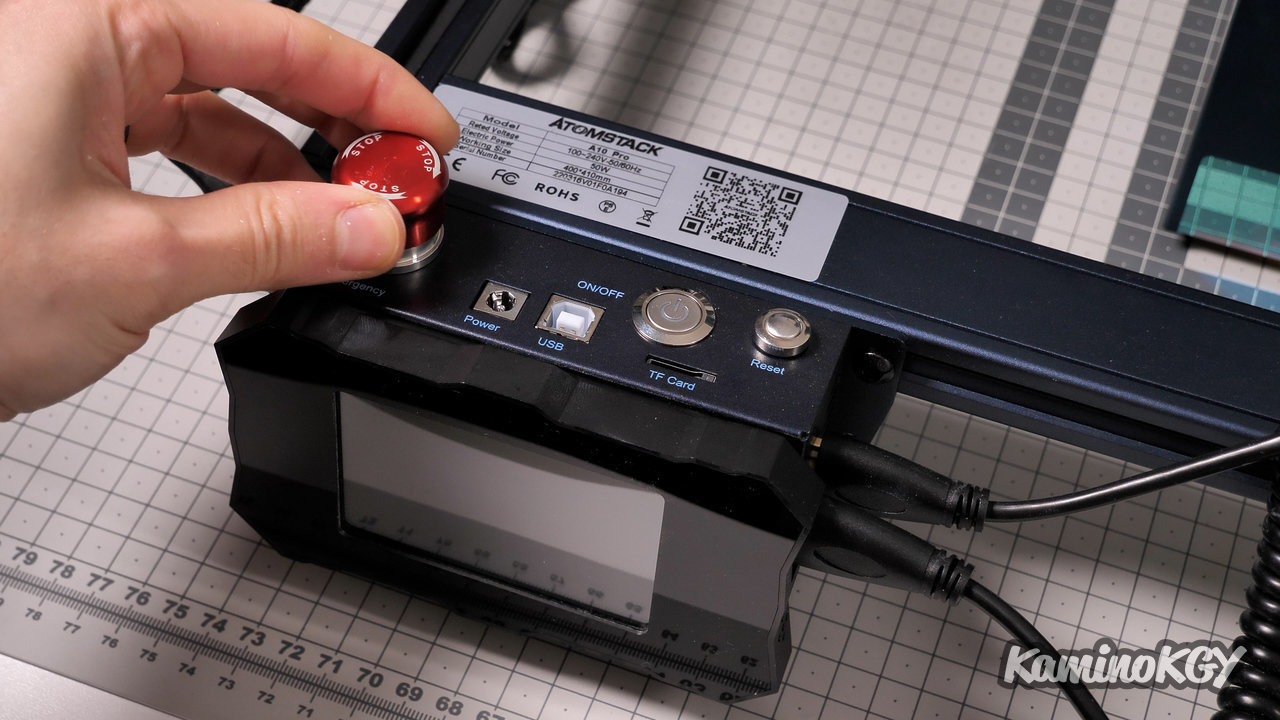
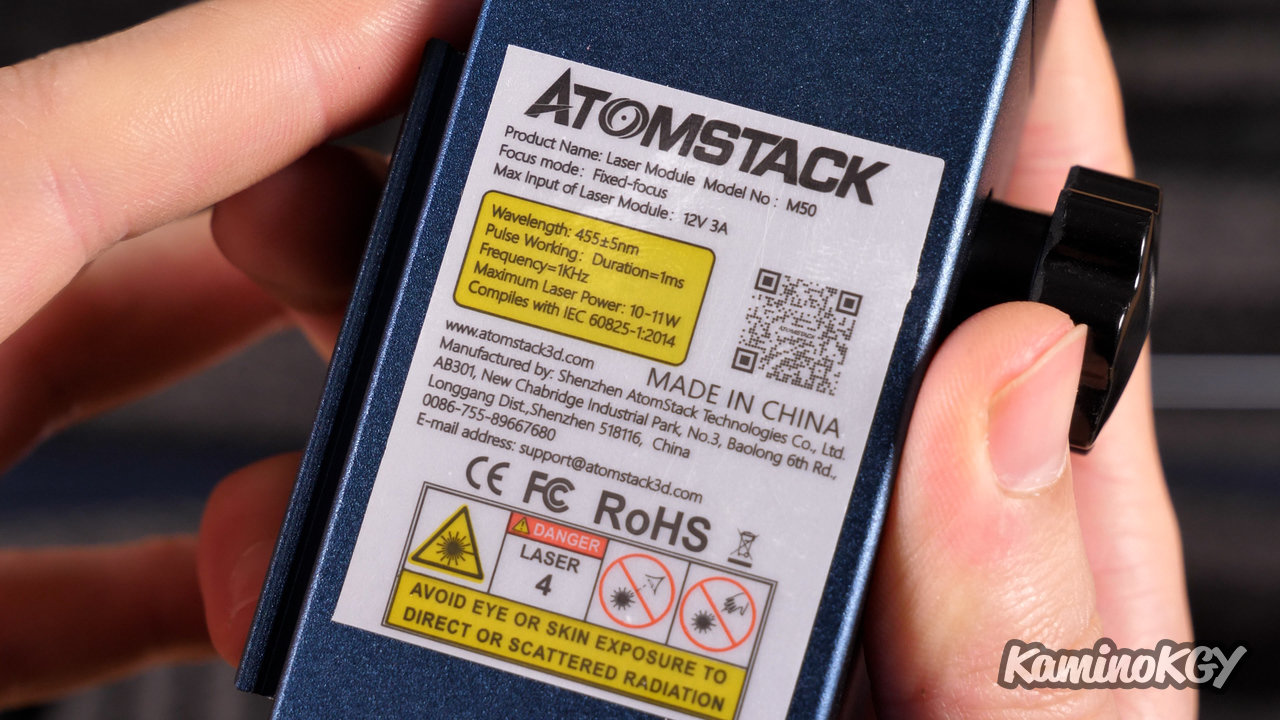

As far as features go, the work area is 400 by 410 mm. We have a 32-bit motherboard. The laser module has an optical power of 10W. The touch screen, which will allow the use of the machine without a PC, using a microSD card that is inserted on top, has a diagonal of 3.2 inches, it is connected by an hdmi type cable, and is magnetically glued to the front of the motherboard. There is a USB port to control the machine via a PC. And as for security, there is an emergency stop button that is clearly visible and accessible. We have a protection plate to put under our working area and that is really good because we almost never have one delivered with the machine. The Autohome possible to have always the same starting point from one job to another. Which is not bad when you want to run several jobs in a row.
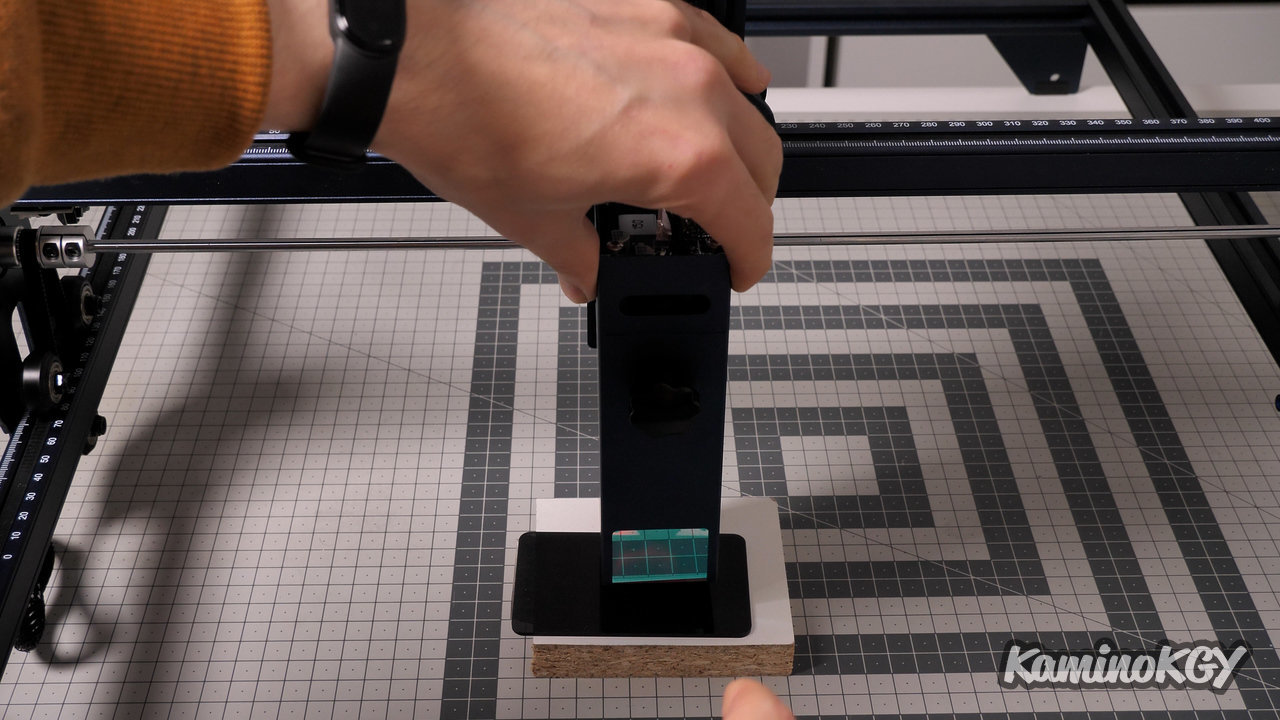
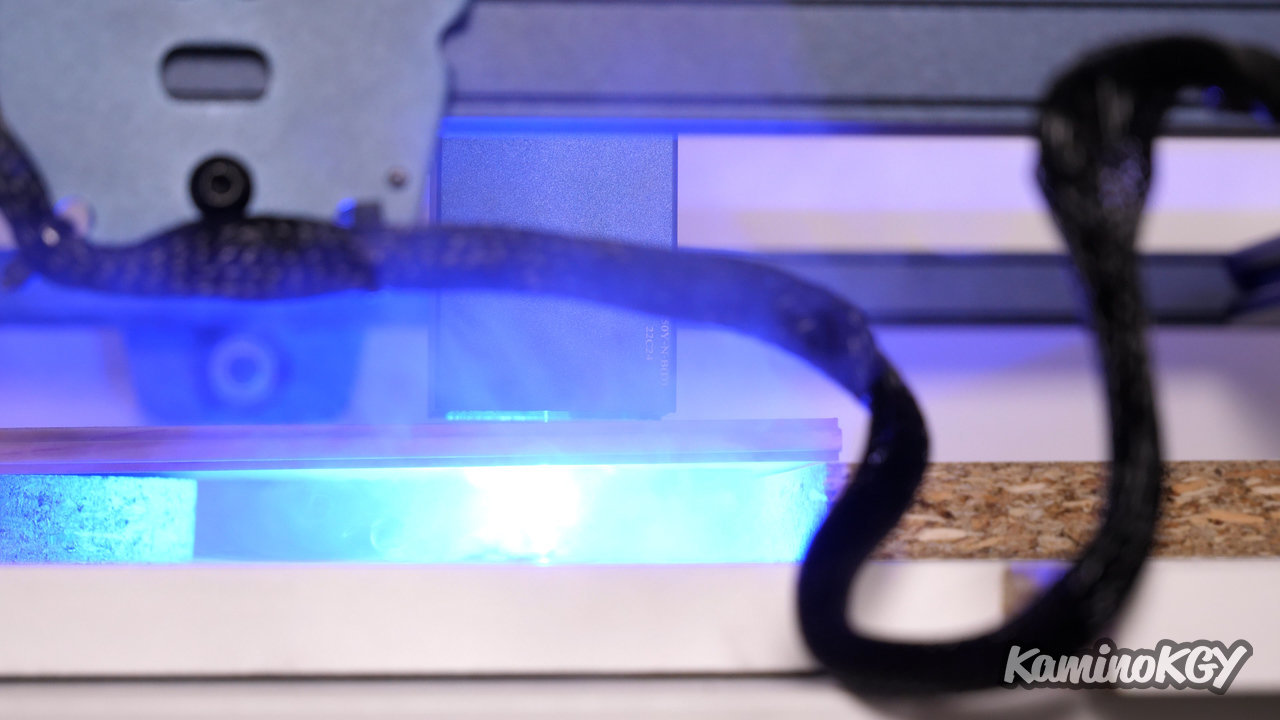
The laser focus adjustment is done by loosening the small wheel on the front of the laser module. You adjust the level by placing the shim underneath and tighten the front screw. The process is very simple, the wheel more easily accessible than many other machines, even if we still don't have the precision of a carriage that goes up and down with a worm screw, it is a good compromise. And we can notice in passing that the space underneath is really thin and unlike others, we can not remove a cover that is underneath.
The laser can cut up to 20 mm of wood in several passes. And we can also cut up to 15 mm of acrylic.
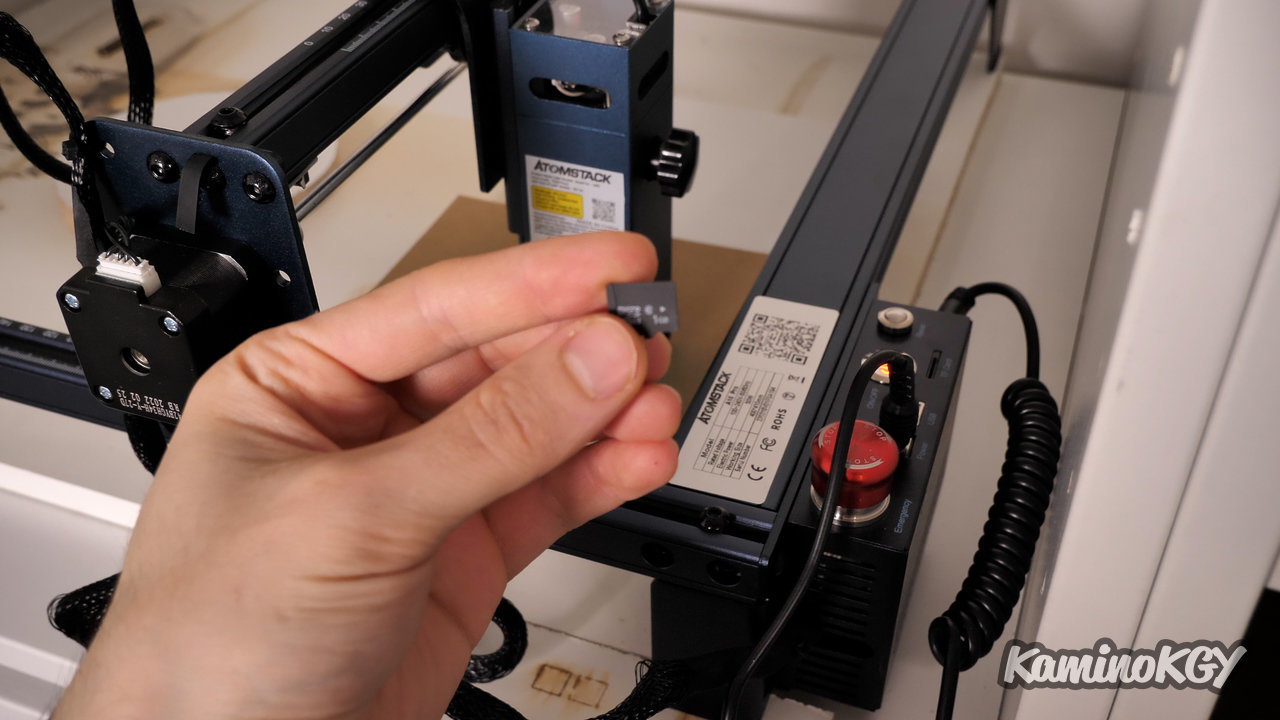
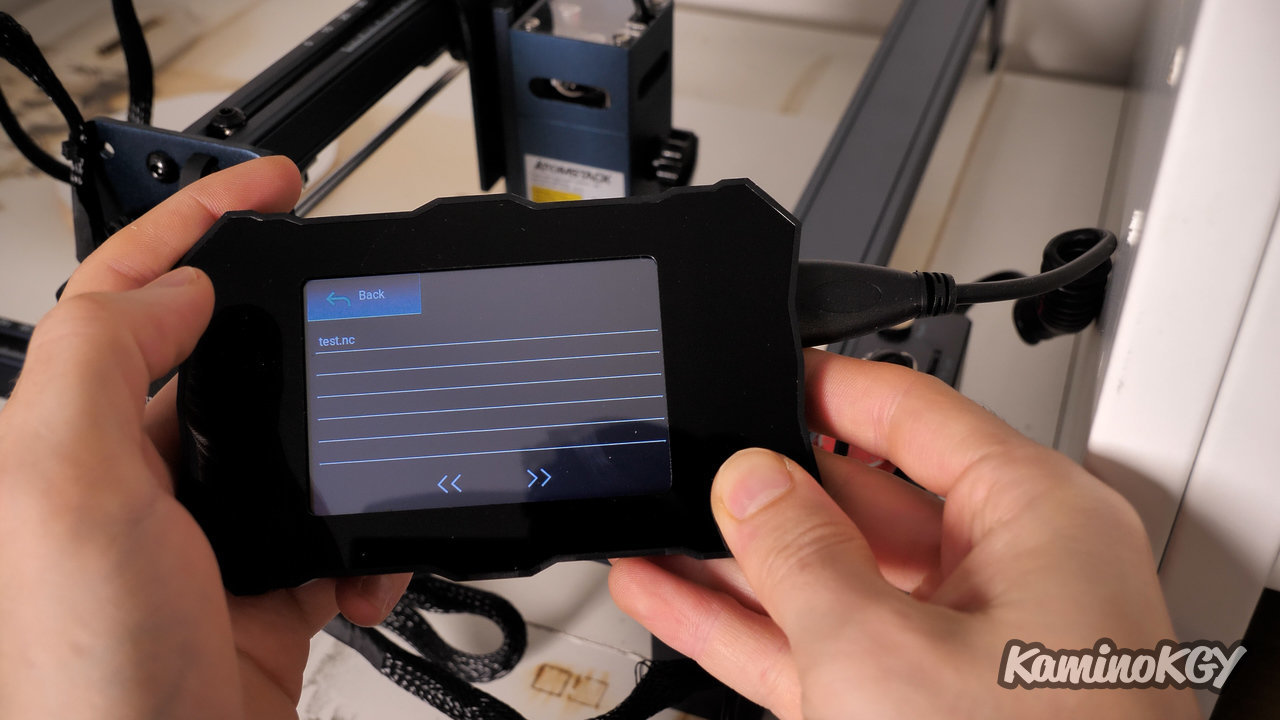

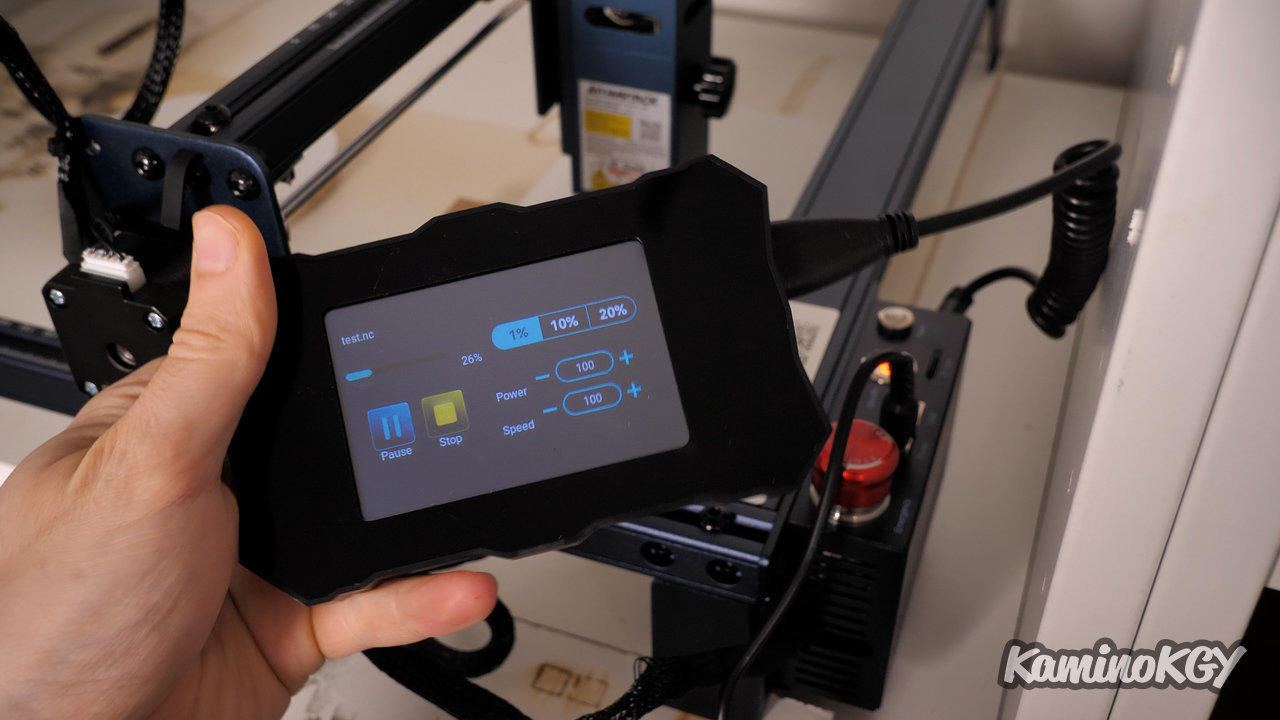
One of the very big advantages of this machine is the possibility of being able to use it in offline mode, without being connected to a PC so. Once the file to be burned, or cut, is on the microSD card, we insert it on top. We can go around the working area. It takes a little time because it seems to load the whole file to see the limits. You can move with the arrows in steps of 0.1, 1 or 10 mm, the house defines a new origin. When you launch the file to be engraved, it asks you how many times you want to run it. During the work, we have a percentage of progress. You can pause it and resume directly where you were, or press Stop to stop it completely. You can play with the power and speed in progress to adjust according to what you can observe. And when we're not using the screen, we can stick it on the front of the motherboard.
Getting out of the options available when we've run a file, there's only a button to mute the beeps and display the machine's firmware version. I would have liked to be able to use a directional cross, even without launching a file, but one can easily do without.
Engraving tests
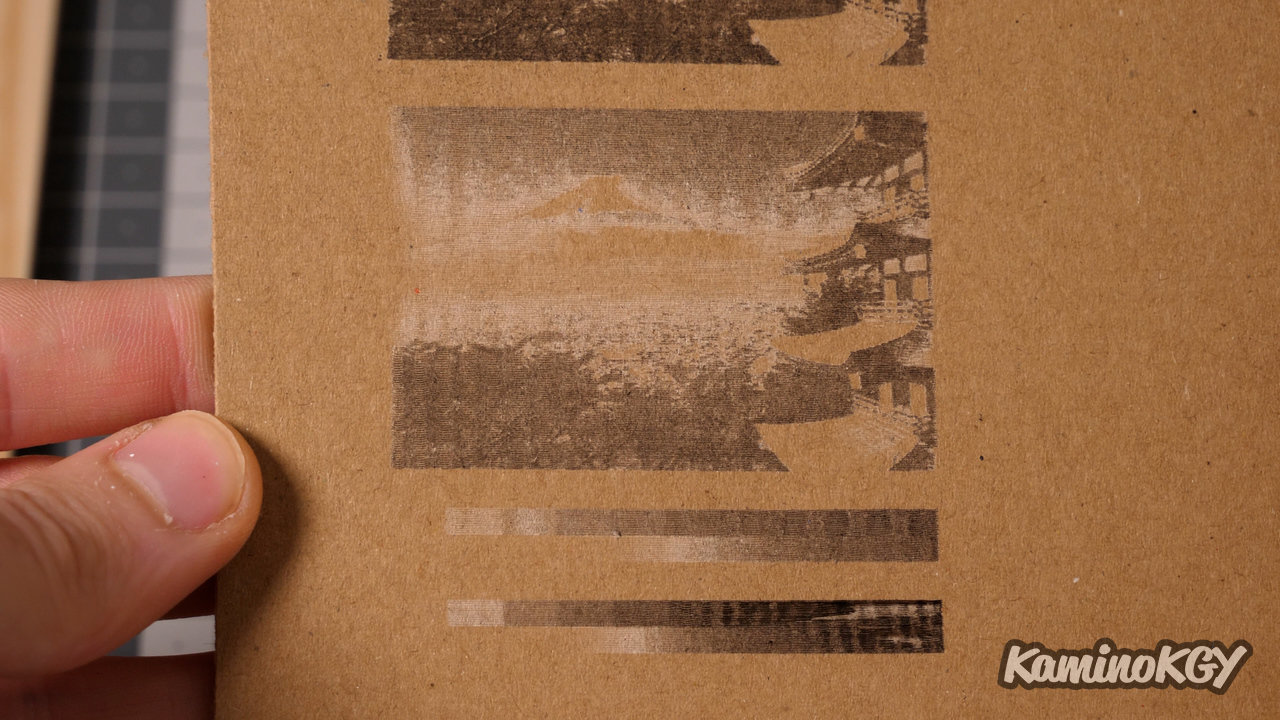
If we now look at a number of test prints and cutouts. On cardboard, you can see that I went a little hard on the first gradient. The second one brings out more shades of gray. The first Mount Fuji are not very satisfactory in terms of settings. Because we don't have enough areas really engraved. However, we already see a good contrast in the dark areas and, which bring out the trees in front and even more on the second. To correct it, we will have to make the laser fire with lighter colors.

Then I did quite a few etchings of Mona Lisa's head to try to bring out details and have etchings in those lighter colors mentioned earlier. To try to improve the result, I played with the minimum power of the laser, its maximum power, the brightness, the contrast and to a lesser extent the speed of engraving. All the engravings were done line by line and not with dots as we will see the result later. The last Mount Fuji is more beautiful. Note that the engravings are made in 8 lines per mm in height, which makes it quite easy to distinguish these horizontal lines. And still on the Mount Fuji, you can see a little shift on the right at one place, because the cardboard was not fixed and it must have moved a little.
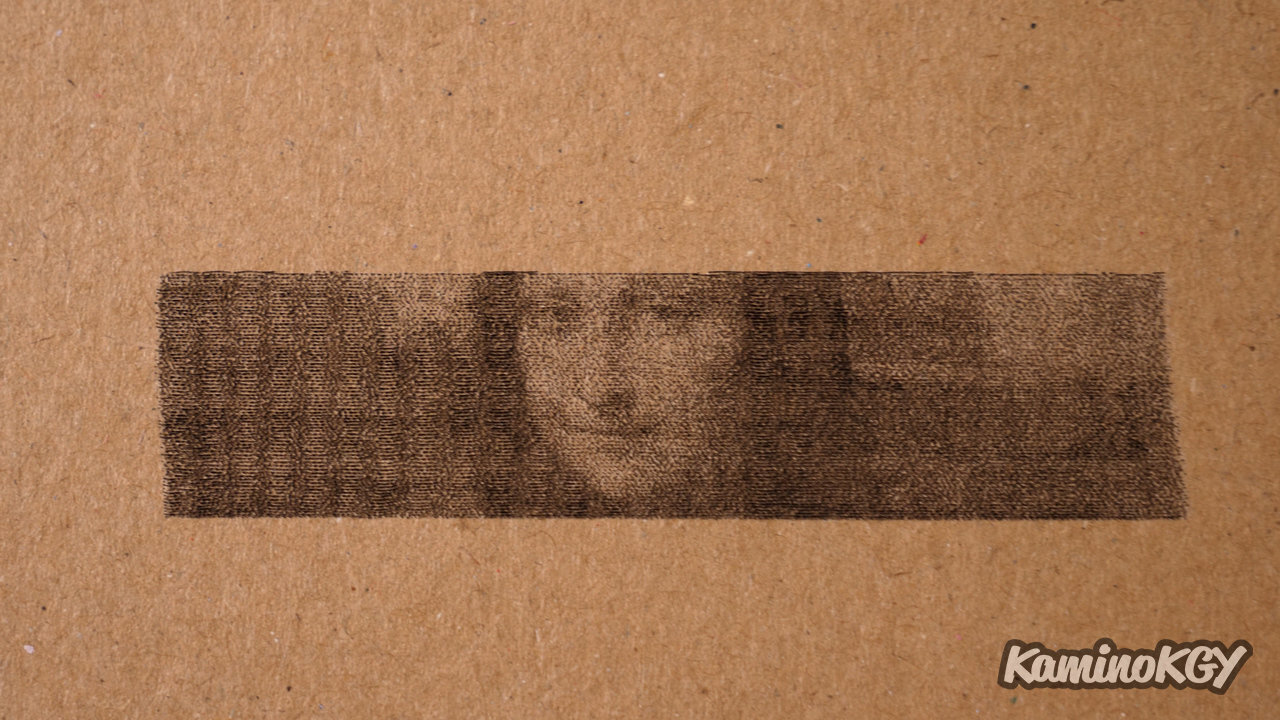
On this last cardboard engraving, I took the parameters proposed by Atomstack, no longer line by line, as before, but with dots in 10 lines per mm and at a speed of reduced by half compared to what I was doing, going from 6000 to 3000 mm/min. You can see the loan stitches, but I think the result is frankly not bad.
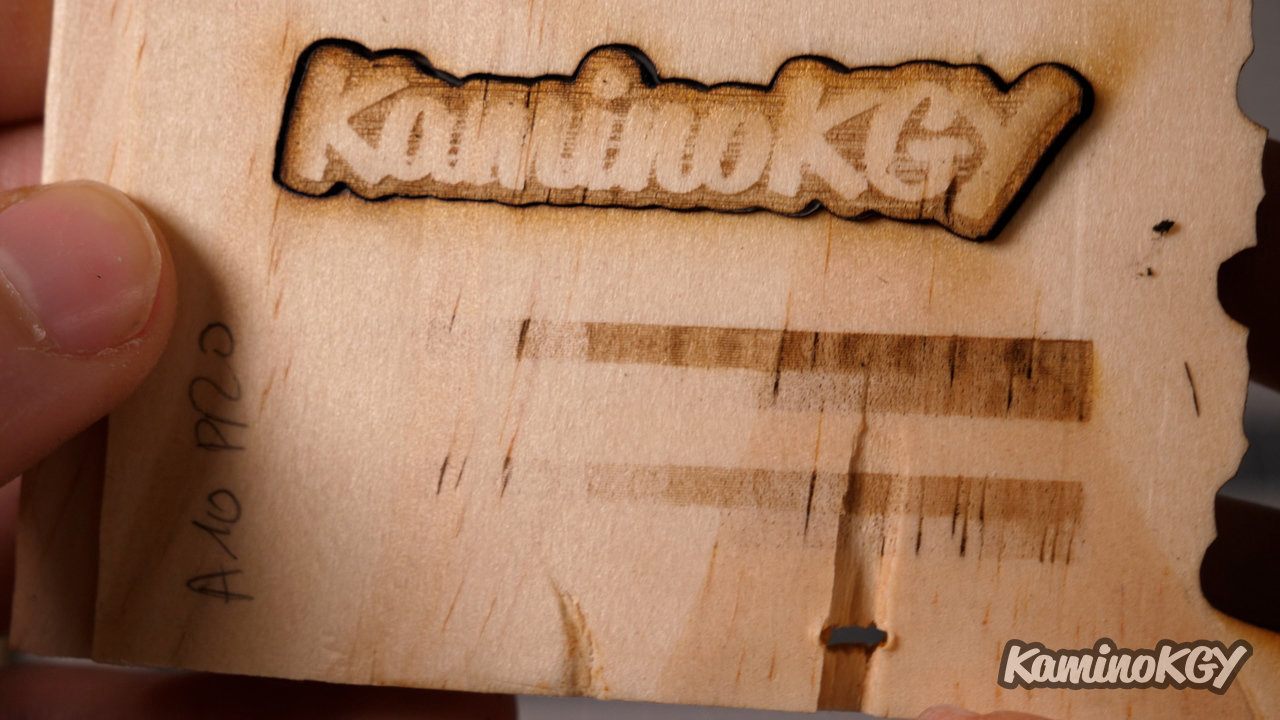
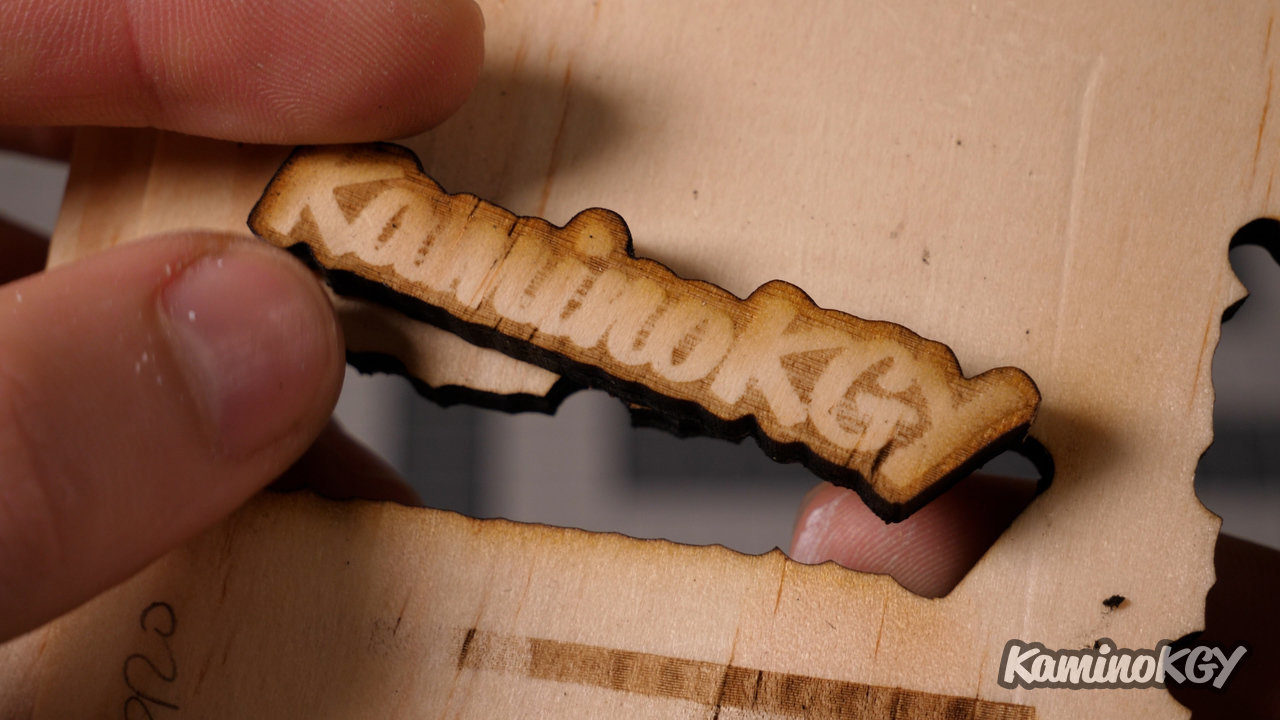
Then I moved on to a small 7.6mm thick wood board where I started with 2 gradations, on the second one I tried to get darker shades by increasing the power, but I just managed to get a more hollowed out wood. For the KaminoKGY, you can feel that the engraving attacked the wood a bit to give it some relief. On the cutout, you can see some burns that spilled over the engraving. It would need an air assist to make it disappear. And concerning the cutting, it took only 2 passes at 200 mm/min to get through, but as you can see 1 pass at a slightly lower speed would be enough. You can tell by the amount of smoke coming from the unintentional etching of my protective board underneath. Thanks to my air extractor for not smoking where I work and avoiding toxic fumes.
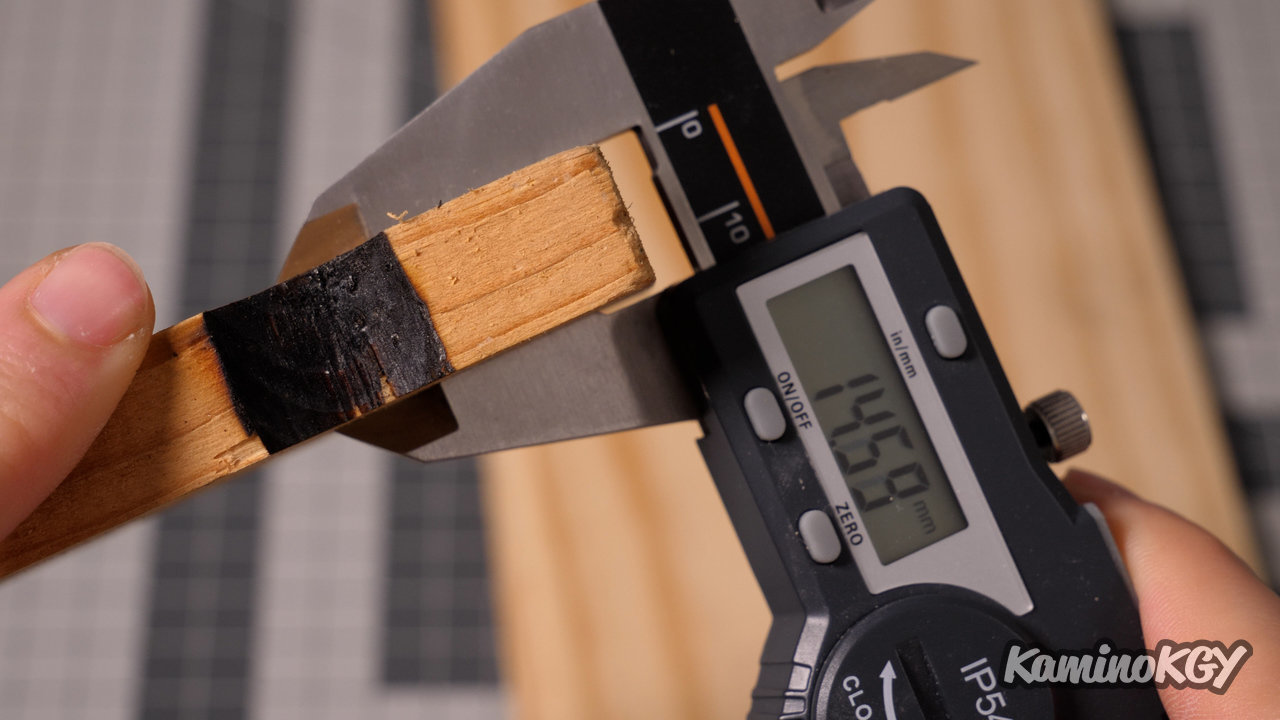
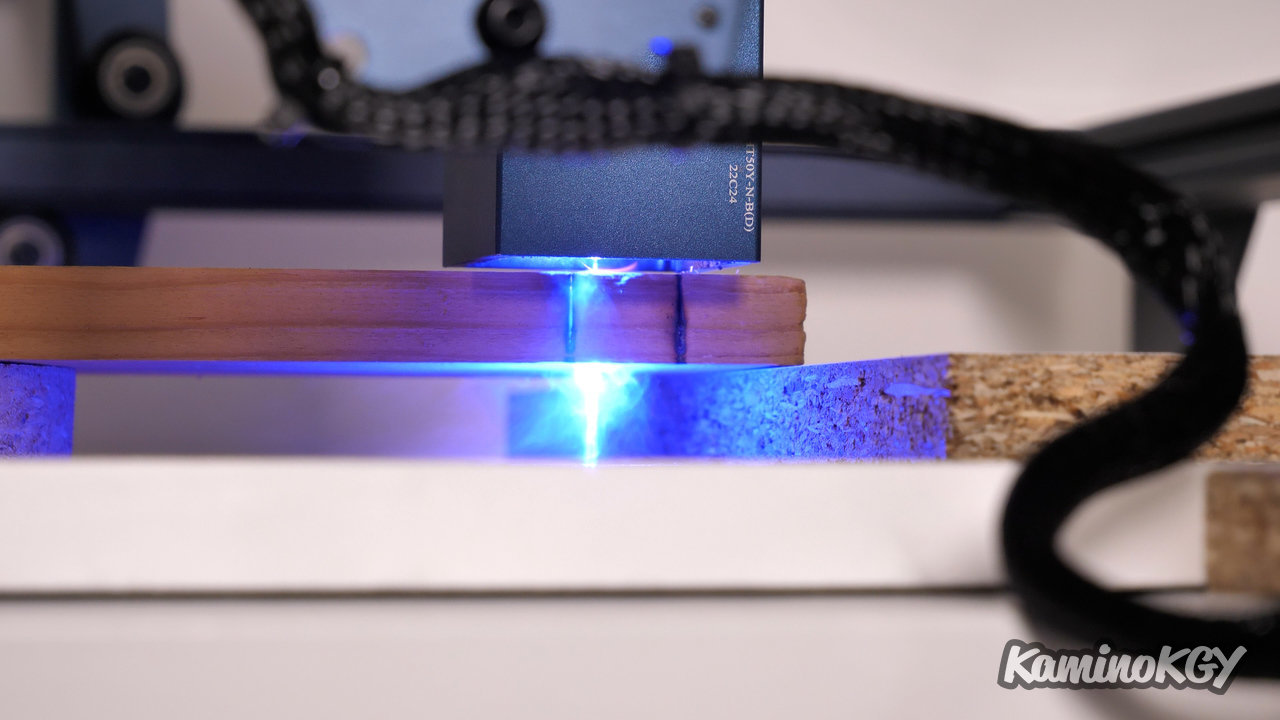
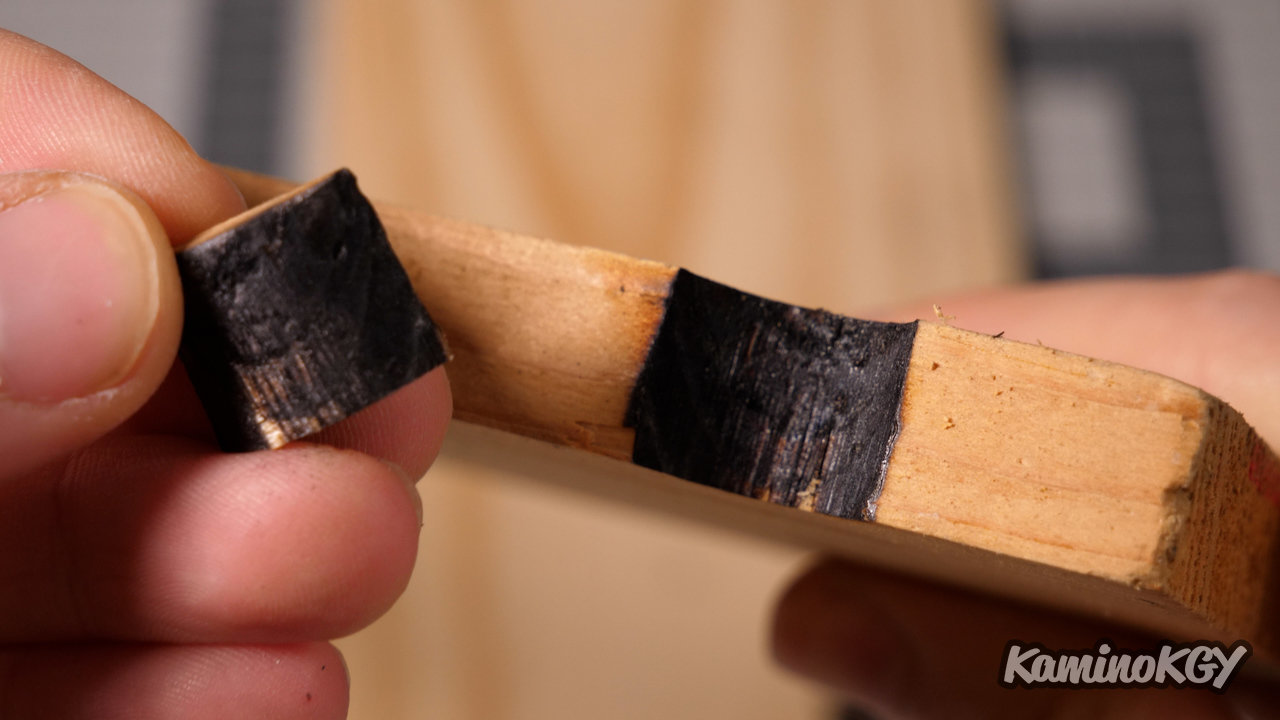
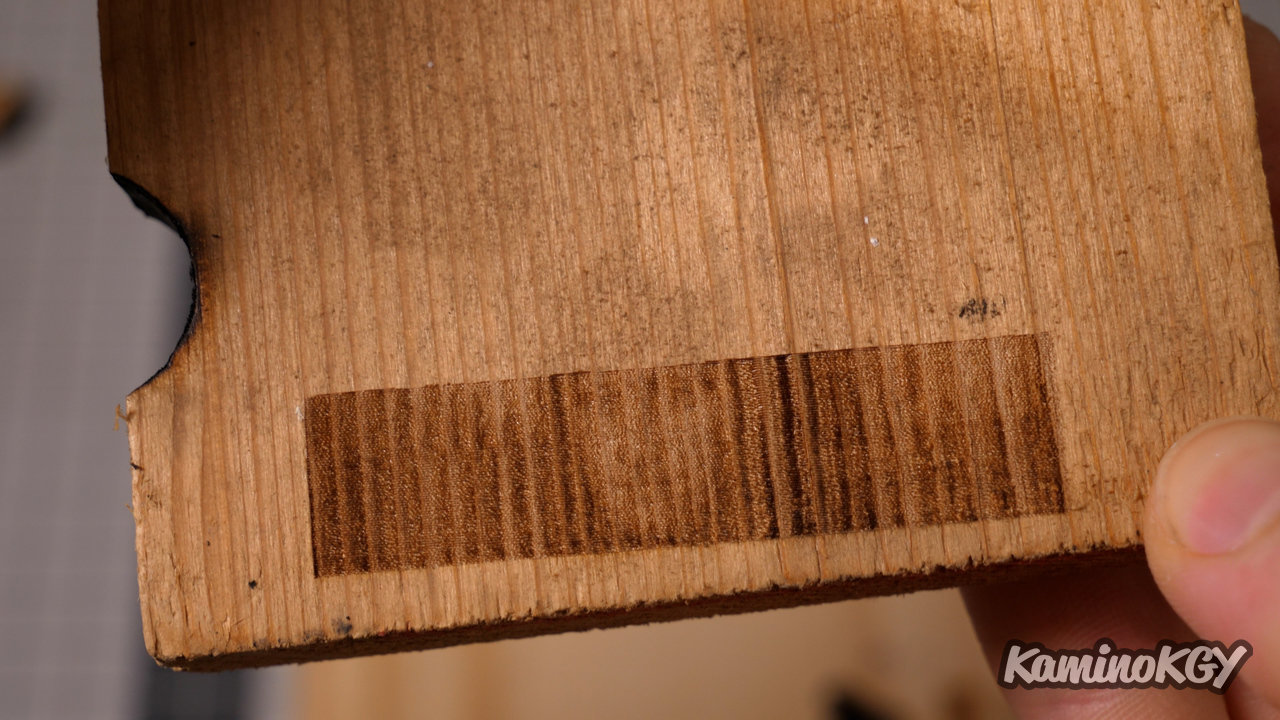
I then tested cutting a 14.6mm thick board. It made it through in 4 passes in several places, at 5 passes we cut almost everything, the last one was just to free up the front. Note that with an air assist again, we could probably reduce the number of passes because it removes the particles stuck in the hole, which reduce the power of the laser when it tries to go through. And just to test, I made a little Mona Lisa where you can see the texture of the wood which is very far from being smooth here. But you can make out the face and the background isn't all black, so that's good.
To summarize
Overall, I'm really happy with this machine in terms of functionality and ergonomics. The engravings are interesting for a 10W laser. The only downside is that you cannot a priori directly connect an air assist module to blow air on the engraving or improve the cut.
Note that it would probably be possible to cut thick wooden boards in a single pass, with the laser at maximum power and reduced speed. But personally I prefer to avoid to reduce the risk of it catching fire. But that's just my personal opinion.
If you want more details in the engravings, maybe wait until you see the next video I'm going to release on the A5, an almost identical machine, but equipped with a 5W laser module.
Bye bye!